






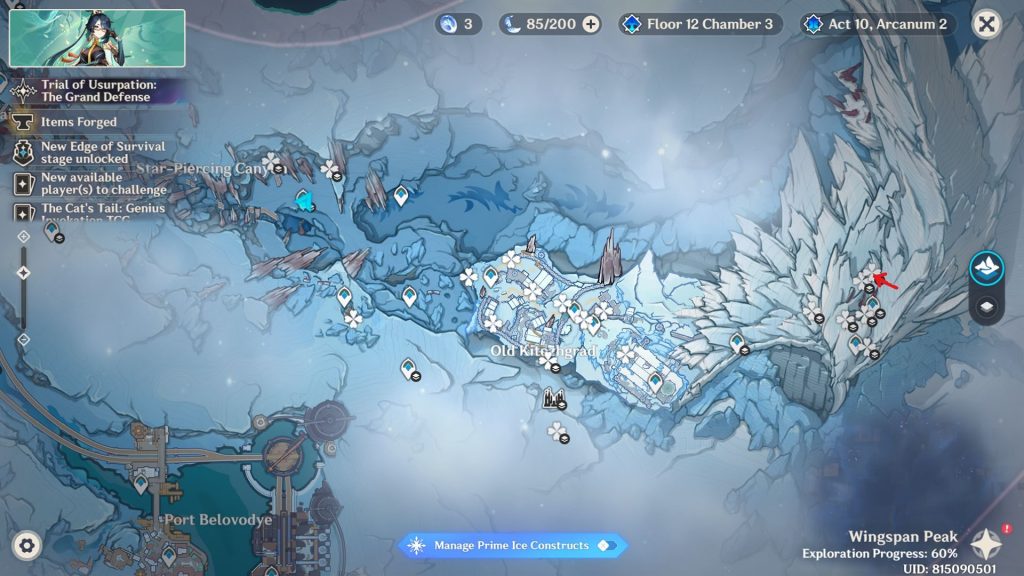
Genshin Impact version 7.2 brings 90 new Cryoculus to Novokitezhgrad and Wingspan Peak. We previously had 140 Cryoculus upon Snezhnaya’s release and no additional content in version 7.1.
With the total count now being 230, players can upgrade the Statue of the Seven in Snezhnaya up to level 9. So, while you won’t be able to max the Statue just yet, these new Cryoculus should still reward you with valuable resources like Primogems, Shrine of Depth keys, and Constellations for Cryo Traveler.
I have prepared this guide to show you the locations of all 90 Cryoculus added in Genshin Impact version 7.2. Follow along and try not to teleport away while following the route, as I will be giving directions relative to the previous position. There will still be an in-game screenshot and map mark shown to ensure you stay on the right track. With that out of the way, let’s dive in.
Prerequisite Quests
- Complete the main World Quest An Ancient Song of Flowing Crystal and Stone Chests. It is a long one, but worth the extra lore.
- Unlock Danica and Mitya Meeting Points, and complete Mitya’s second quest, Dark Clouds in a Wine Bottle.
Novokitezhgrad
Let’s first complete the Novokitezhgrad area. It covers the Byaroza Station, The Central Hub (including Downtown Novokitezhgrad), Port Belovodye, and Crystal-Tree Grotto. Some areas overlap, such as the Kresnik Kritall Mines, which are accessible via Downtown Novokitezhgrad, but the area comes under Wingspan Peak.
- More Insider Gaming: How to Build Mitya In Genshin Impact—Best Teams, Rotations, Stats & Artifacts
So expect a few Cryoculus to count towards the other’s exploration percentage.
- Cryoculus 1
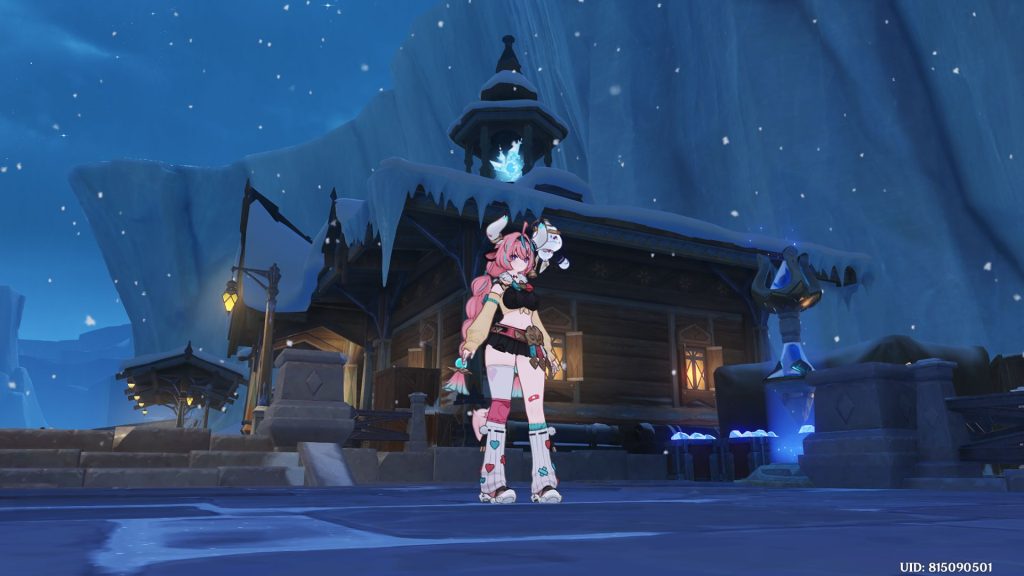
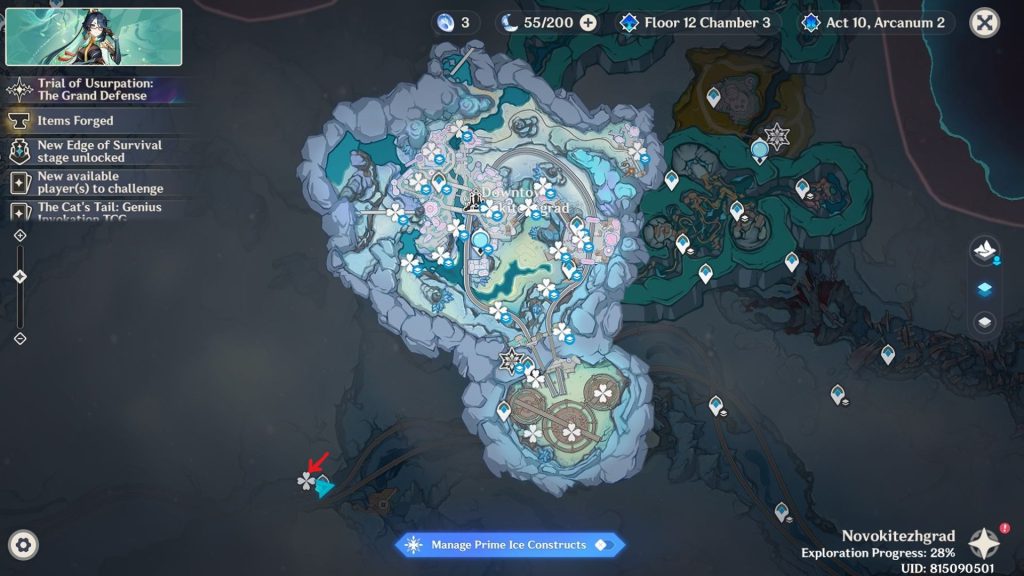
- Start at Byaroza Station waypoint. The Cryoculus will be behind you on the chimney.
- Cryoculus 2
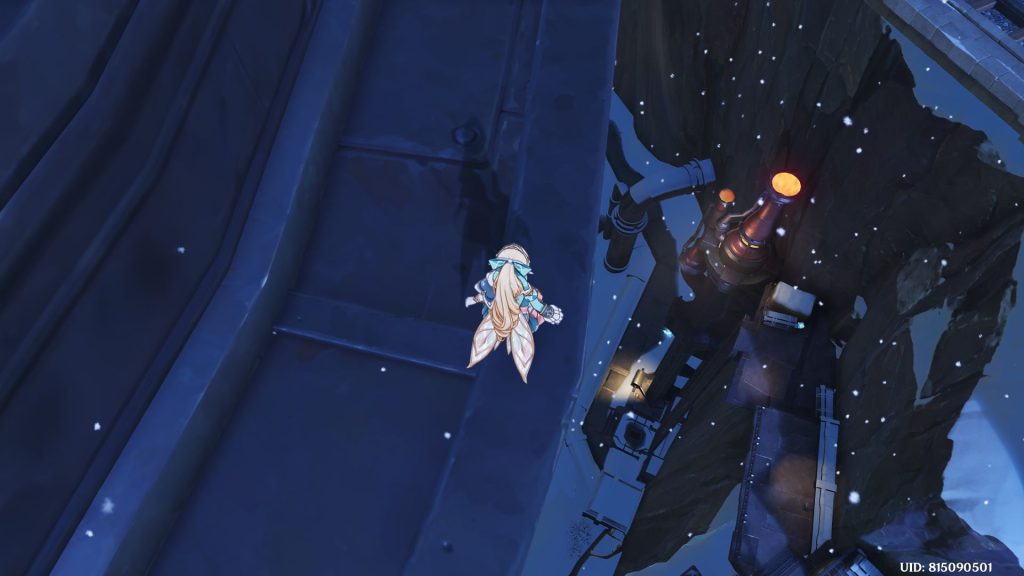
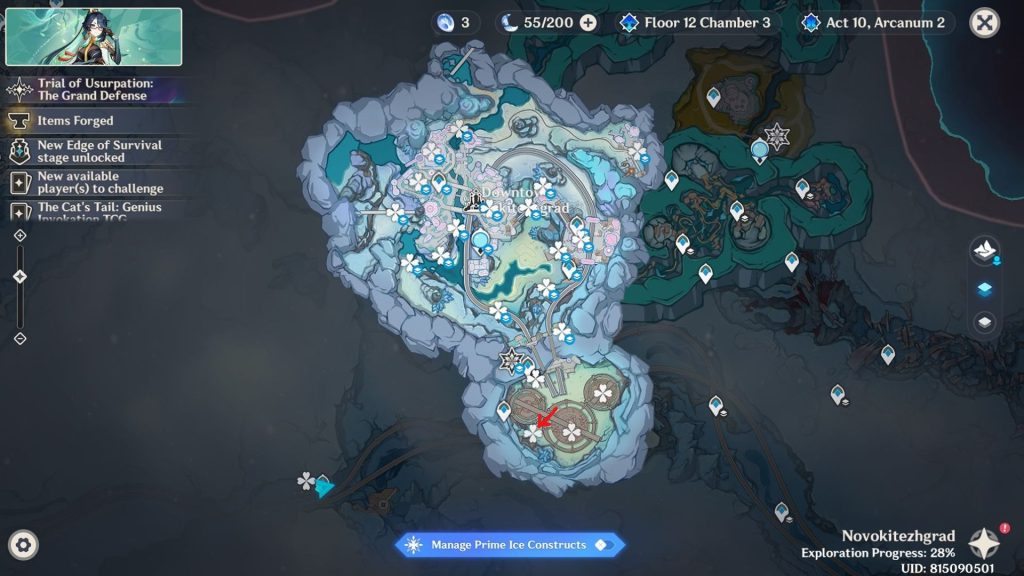
- Teleport to The Central Hub and head southeast. The Cryoculus will be below the platform, right under the giant furnace mechanism.
- Cryoculus 3
- Teleport back to the waypoint and head east. The Cryoculus will be next to the railway platform below.
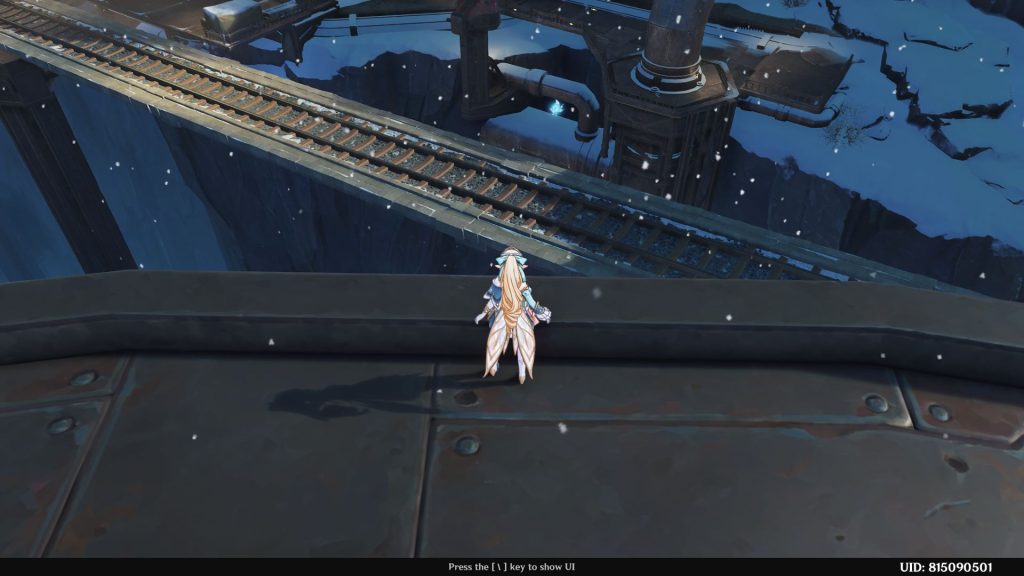
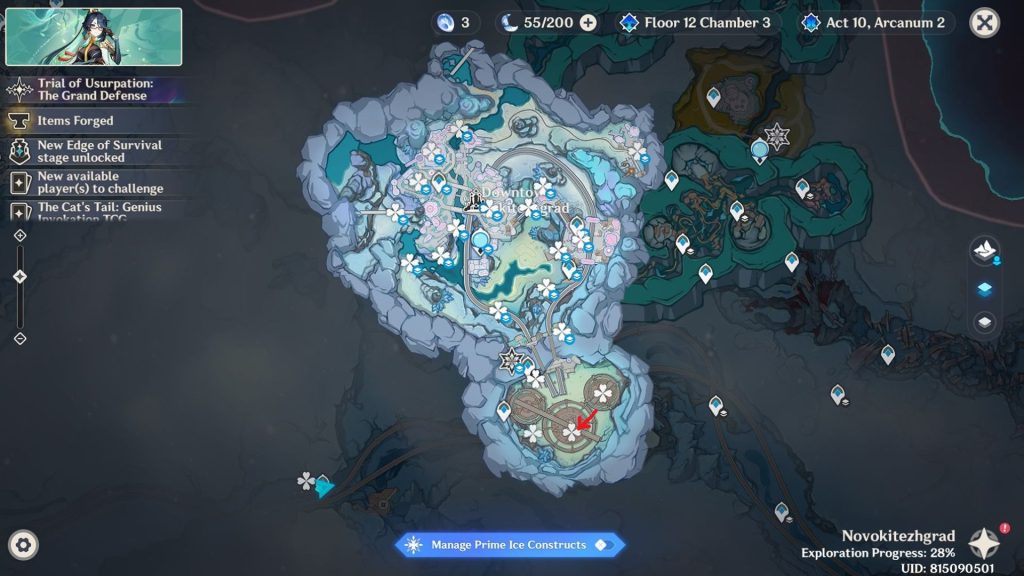
- Cryoculus 4
- Teleport back again and head east, slightly up north. The Cryoculus will be on top of the furnace.
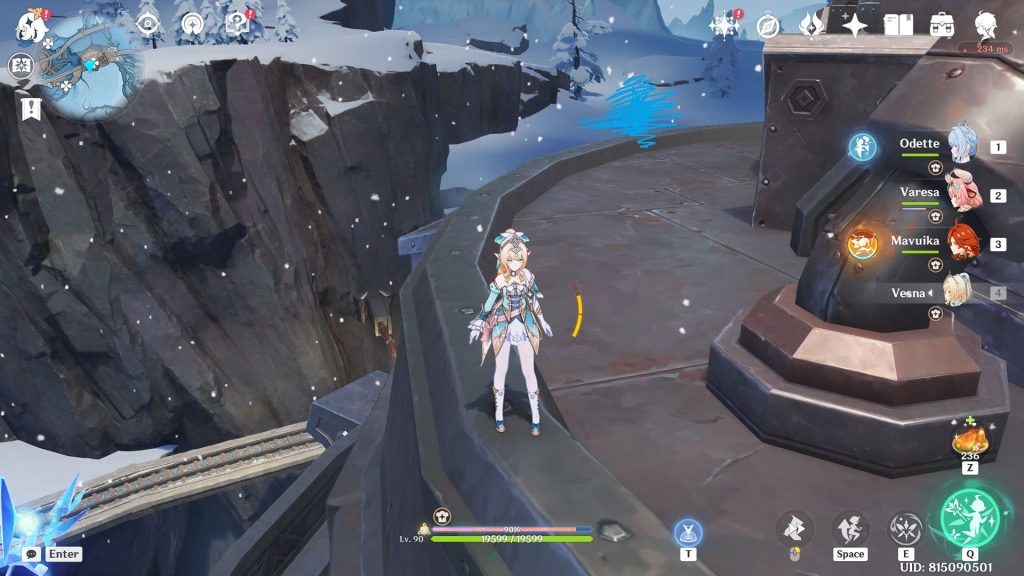
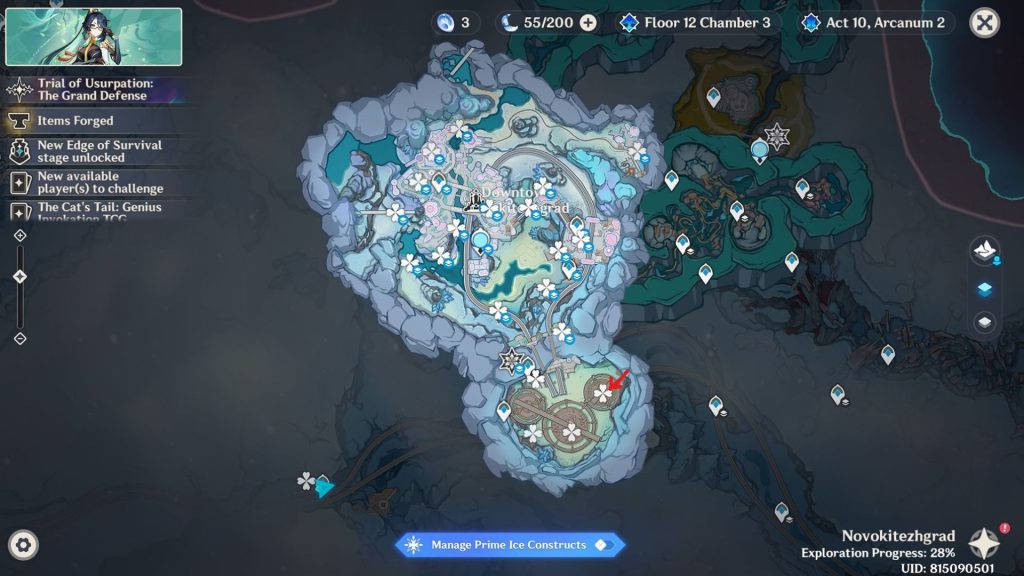
- Cryoculus 5
- Glide down towards the west. The Cryoculus will be visible above the machine.
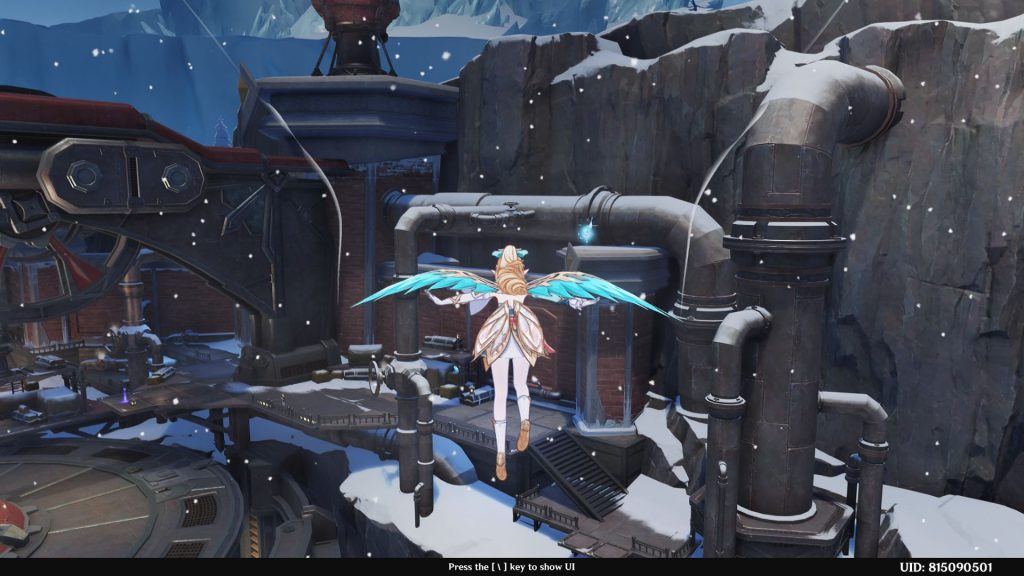
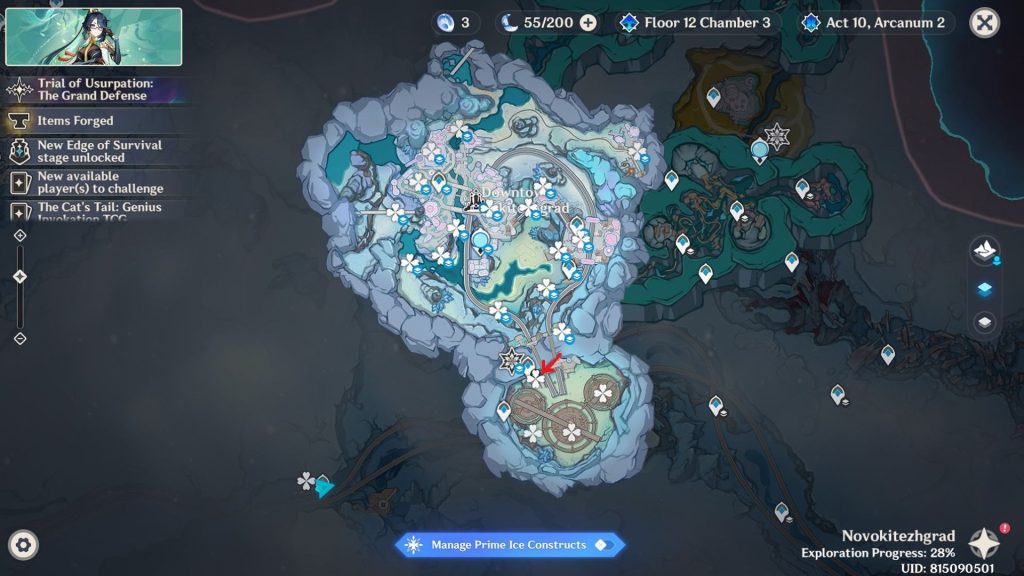
- Cryoculus 6
- Teleport to the waypoint next to Danica’s Meeting Point. Walk northeast; the Cryoculus will be in the gazebo.
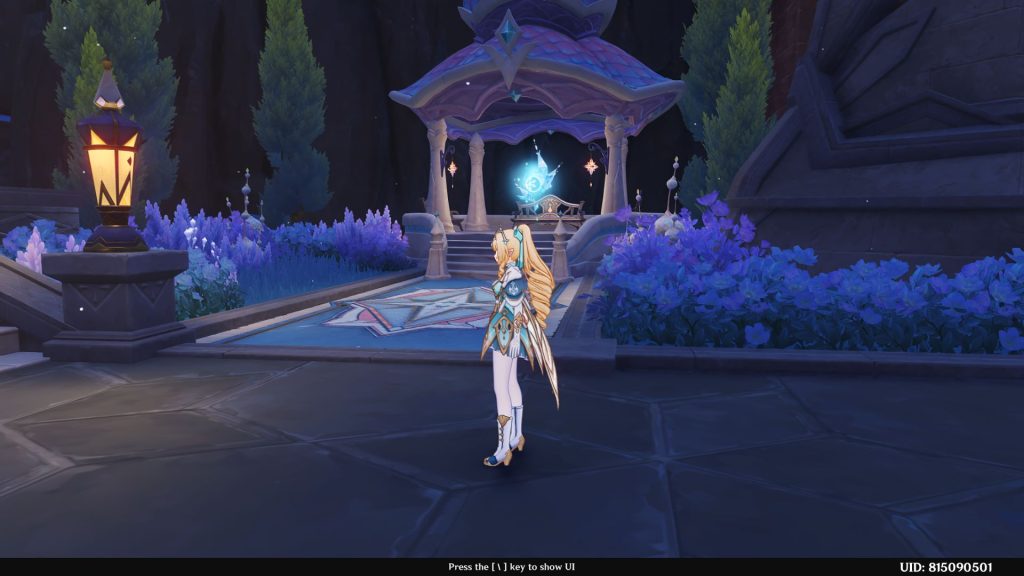
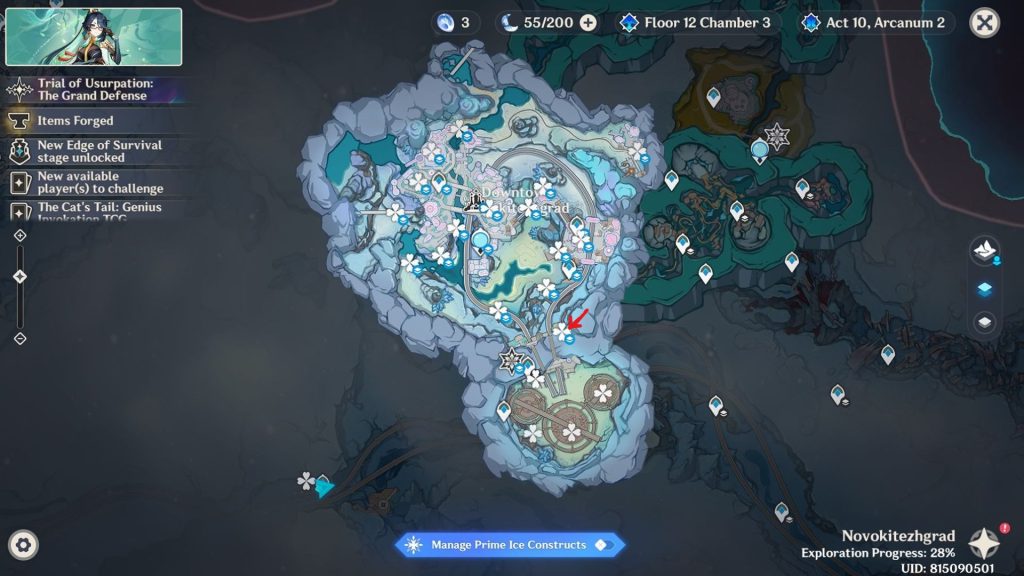
- Cryoculus 7
- Run along the left railway track. The Cryoculus will be inside one of the supporting pillars.
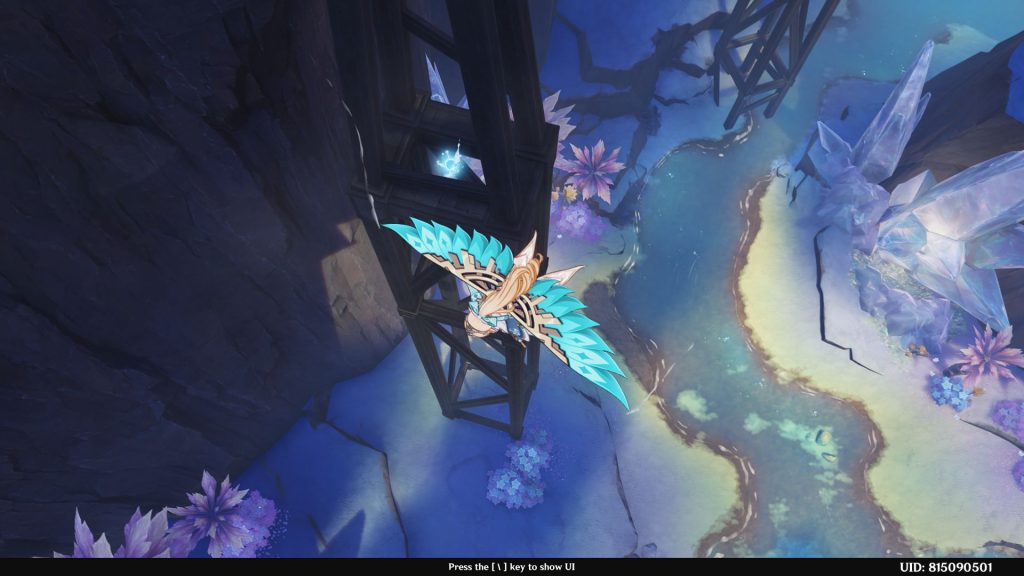
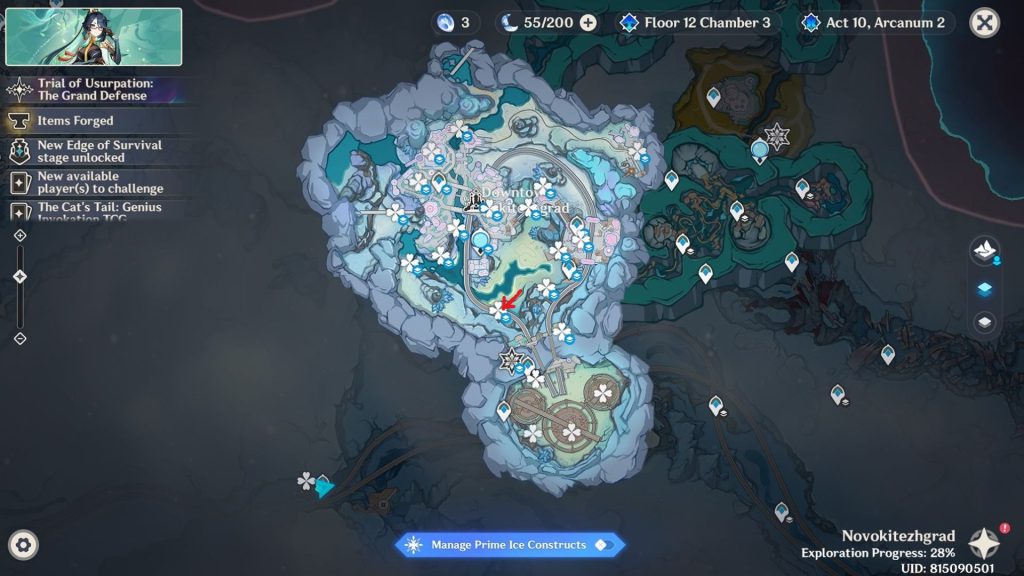
- Cryoculus 8
- You can either glide from the railway track or use the nearby teleport waypoint to take the Cryoculus under the crane hook.
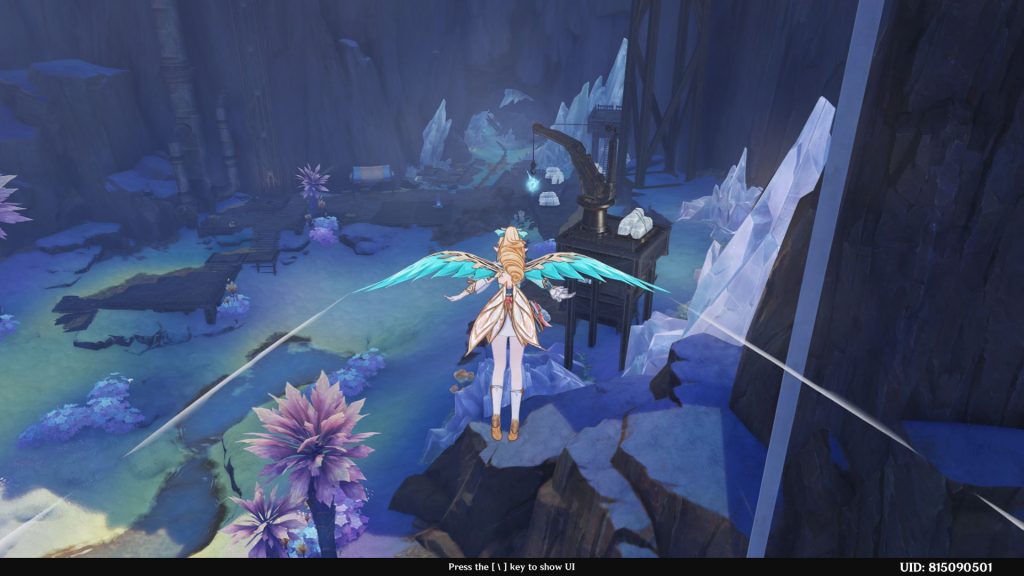
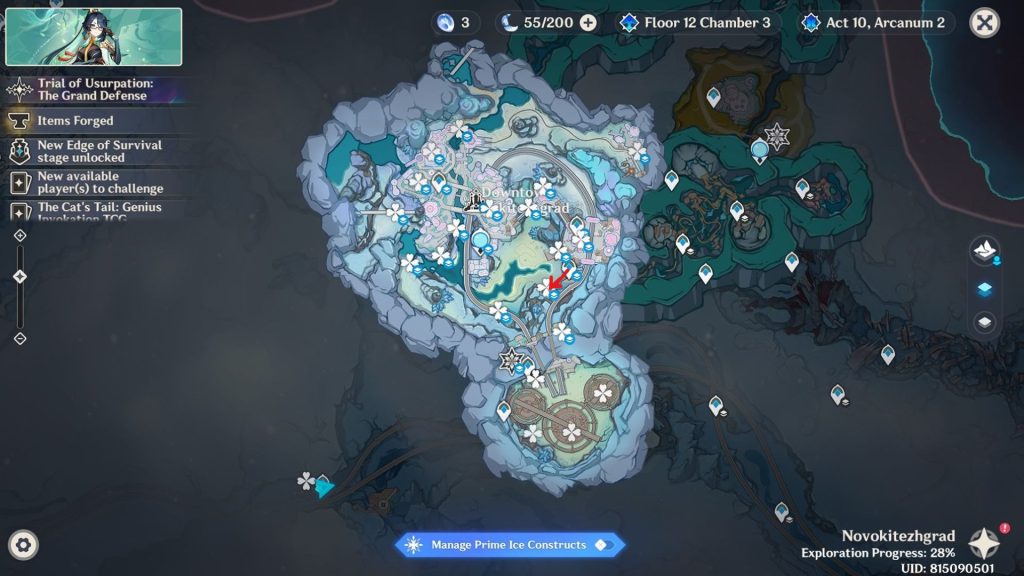
- Cryoculus 9
- Use the nearby waypoint and look south. You can use the Vortexes to gain height and reach the Cryoculus on top of the chimney.
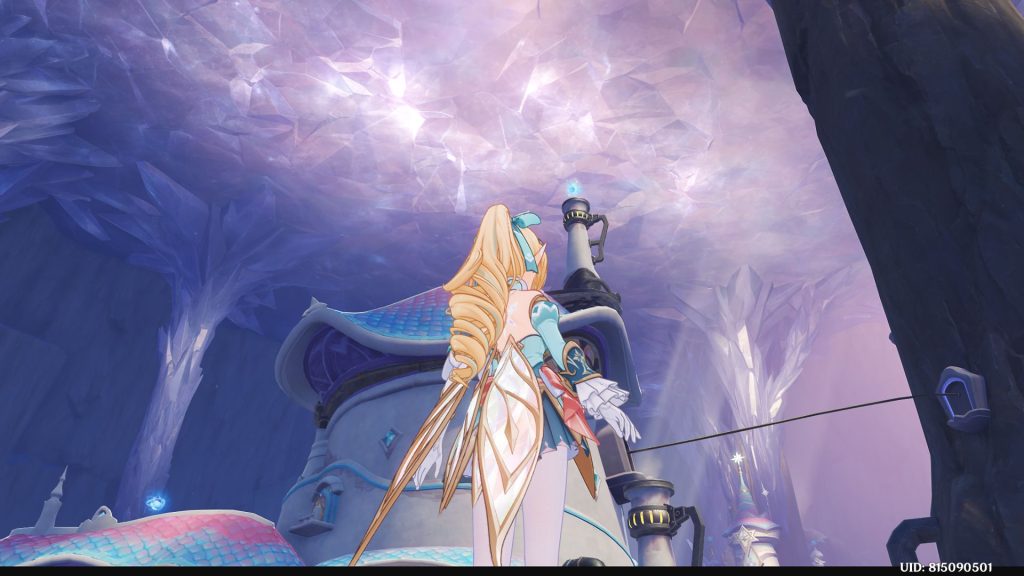
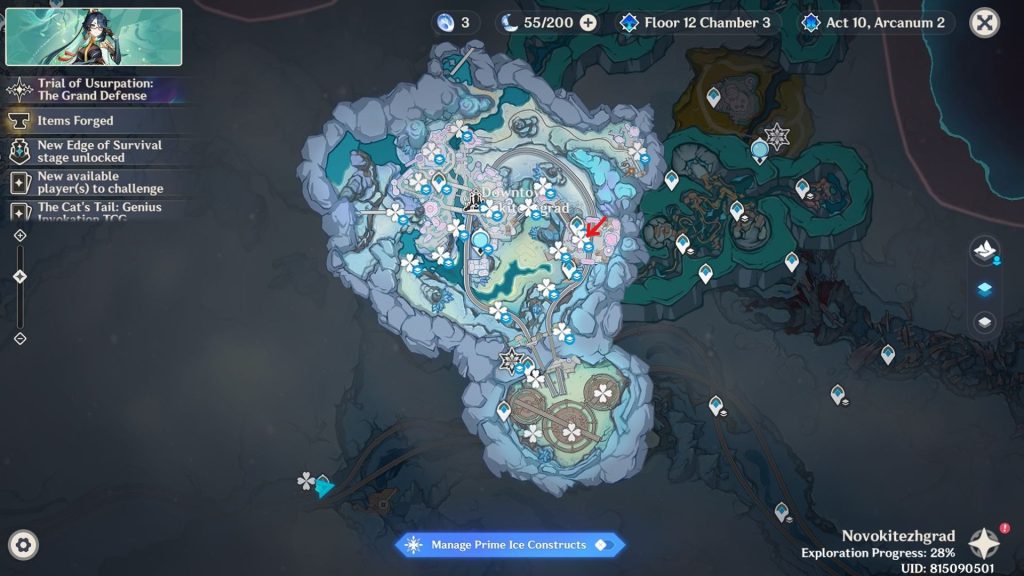
- Cryoculus 10
- Glide towards southwest. The Cryoculus will be along the pipe that goes down.
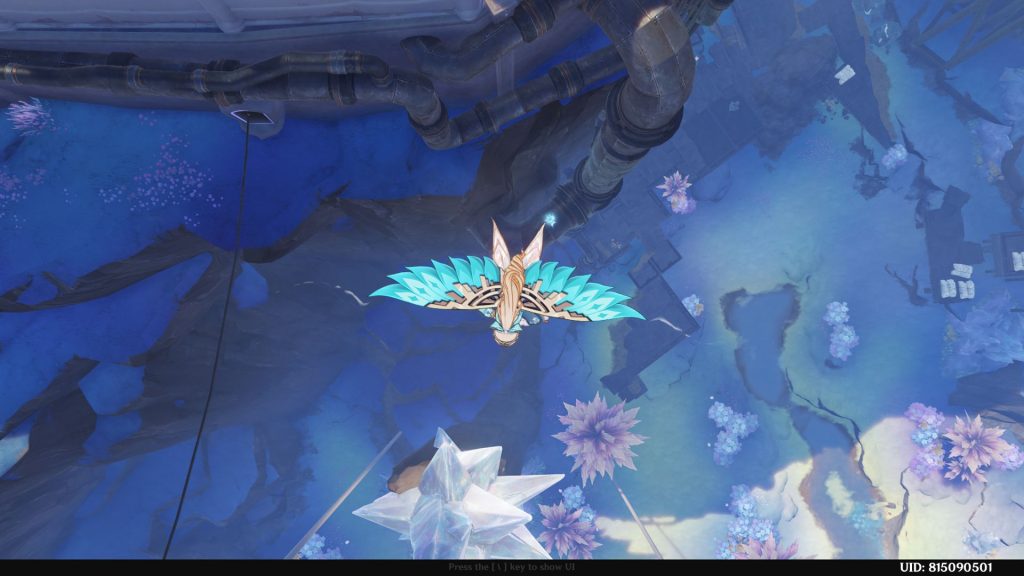
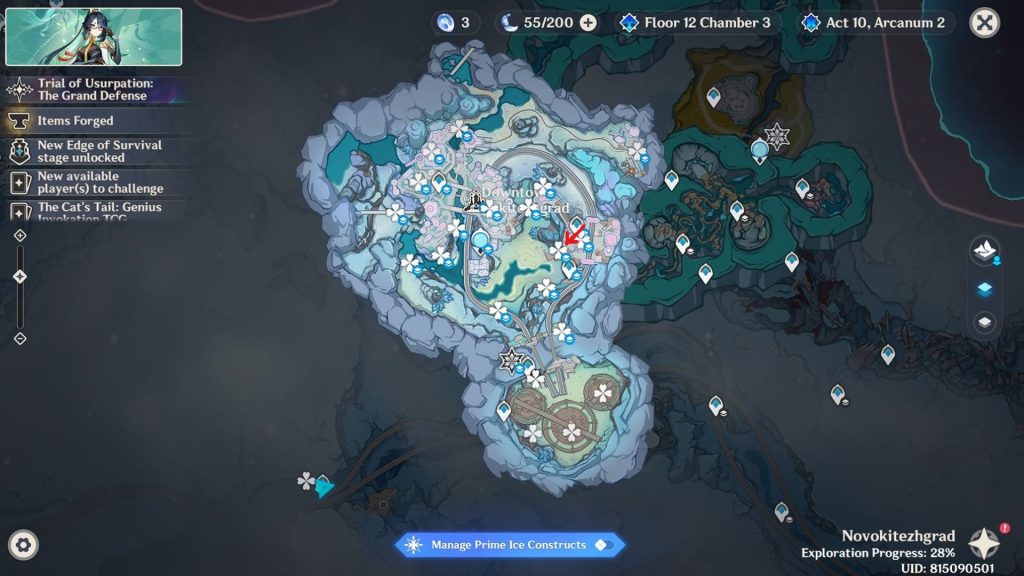
- Cryoculus 11
- Teleport back and look to the north, slightly west. The Cryoculus will be on the giant ice spike. There are Vortexes near to help you reach it.
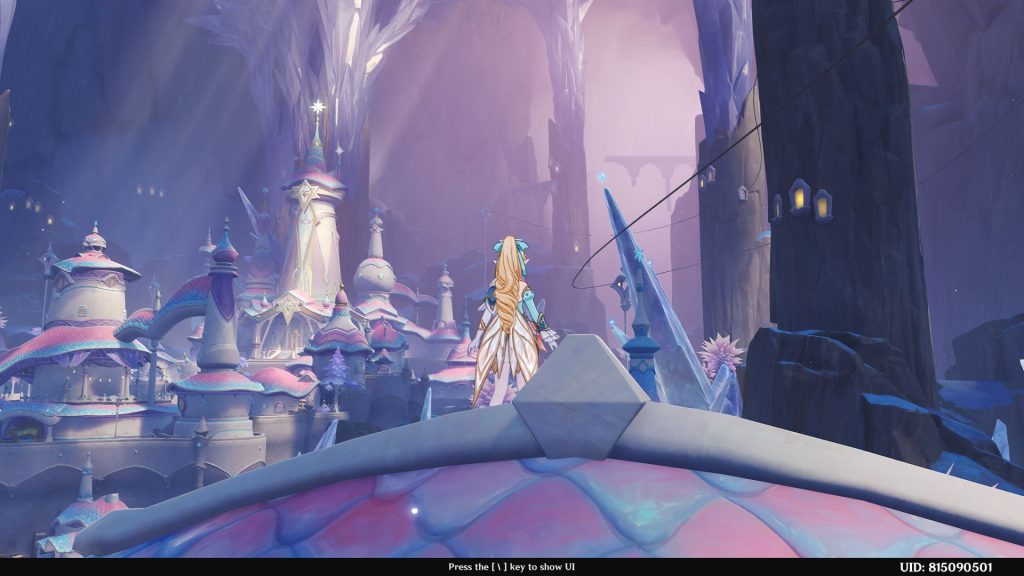
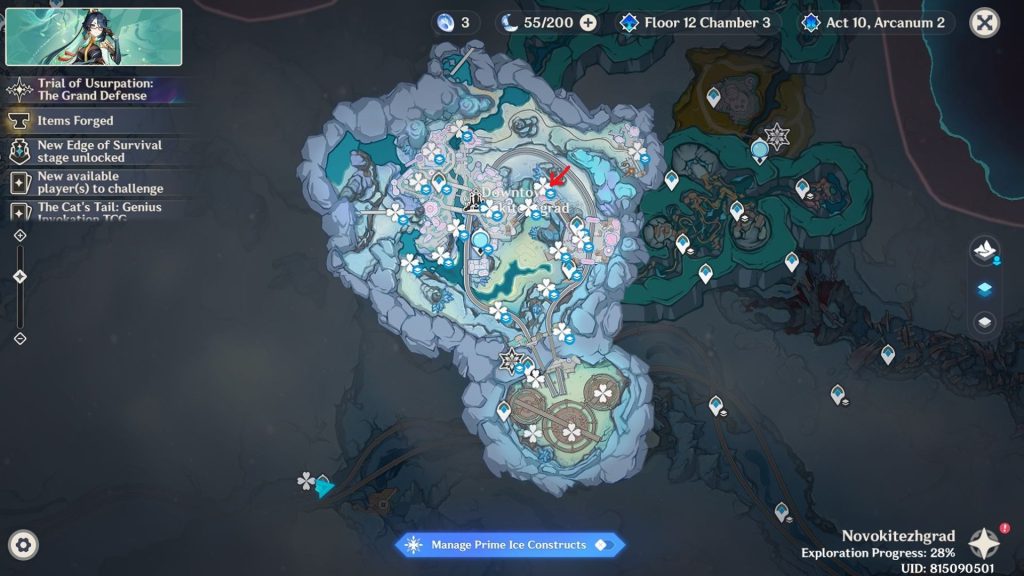
- Cryoculus 12
- Glide southwest. The Cryoculus is in the middle of the broken pillar.
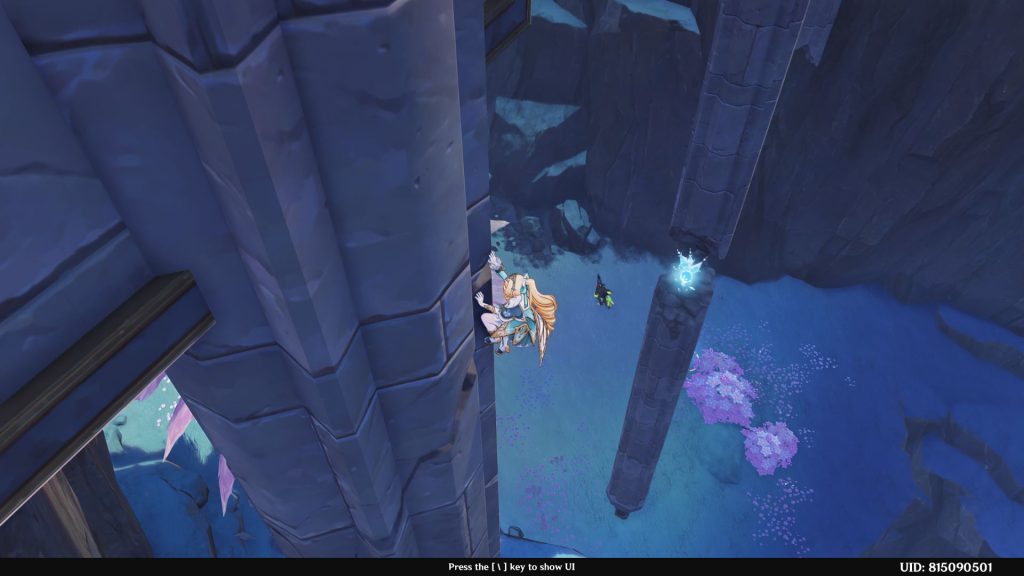
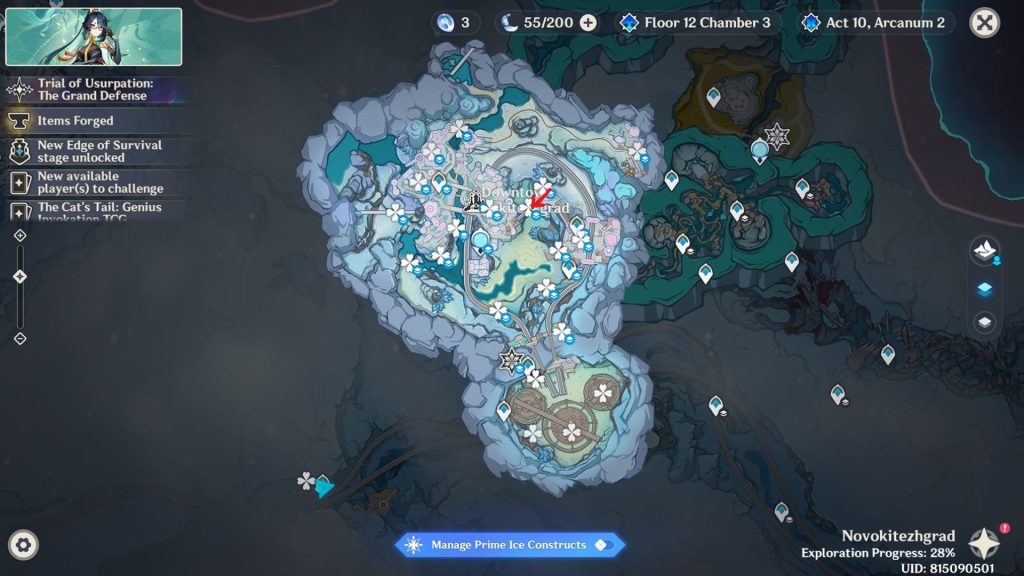
- Cryoculus 13
- Teleport to the center of the city and look behind. The Cryoculus is on the balcony of the restaurant.
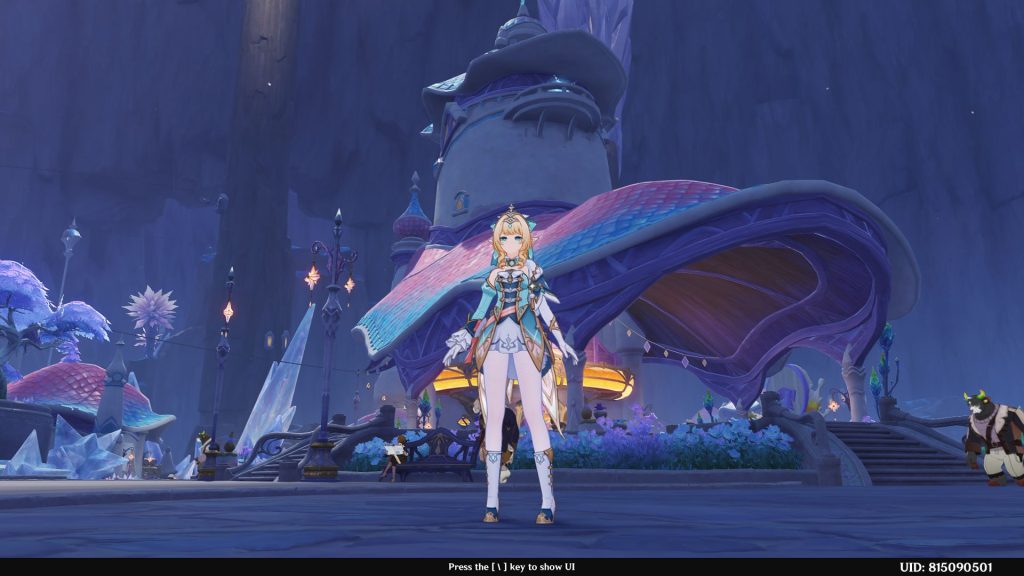
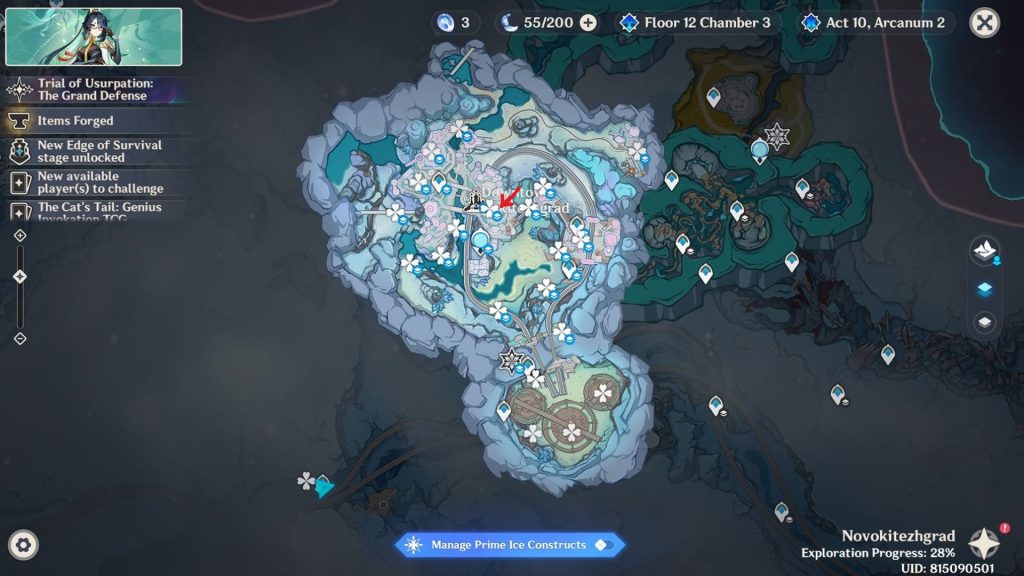
- Cryoculus 14
- Teleport to the left waypoint and head southwest. The Cryoculus is below the broken bridge. You can climb the mountain fairly easily and reach the top of the bridge.
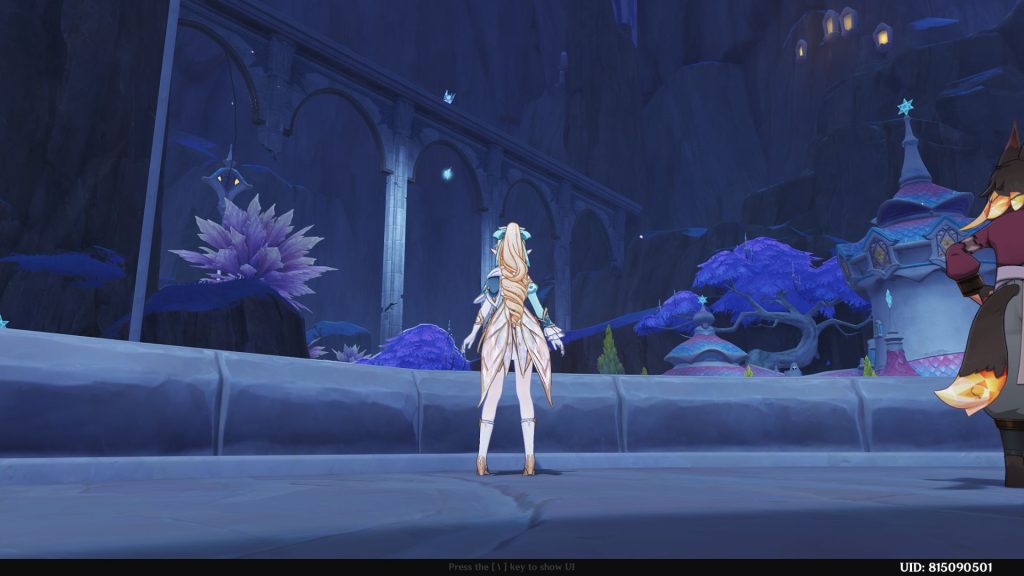
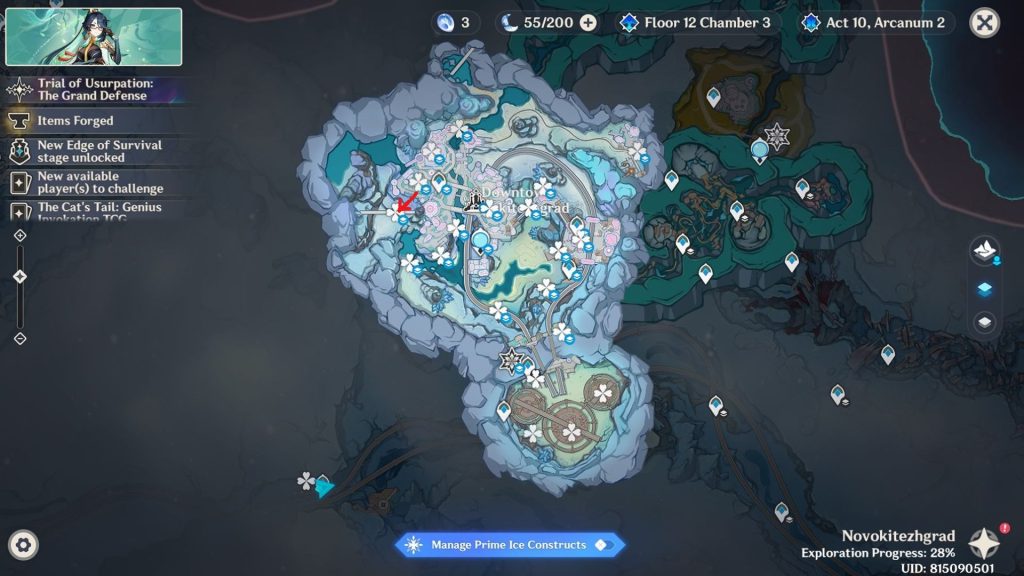
- Cryoculus 15
- Teleport back to the waypoint. The Cryoculus will be behind you on top of the fountain.
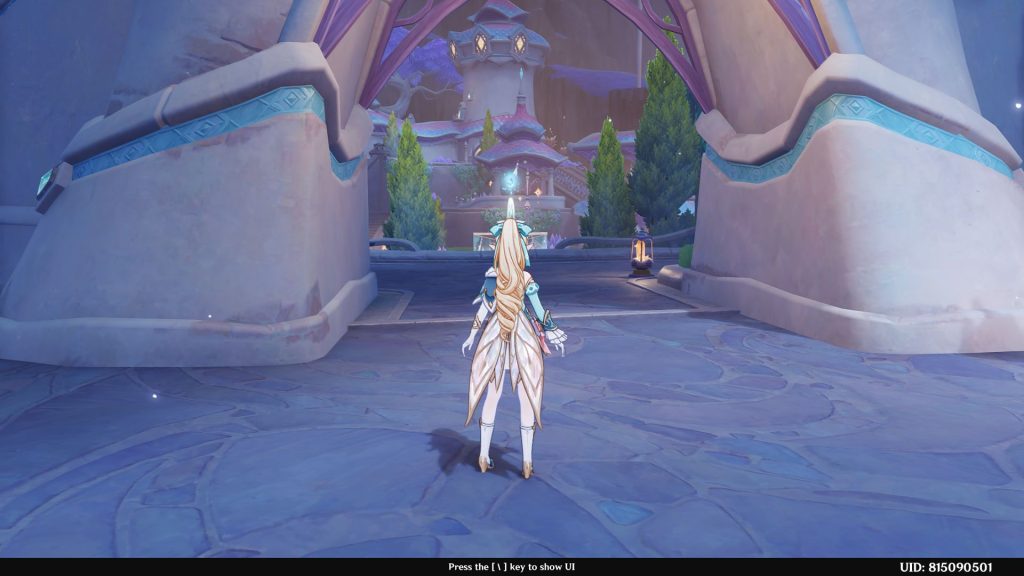
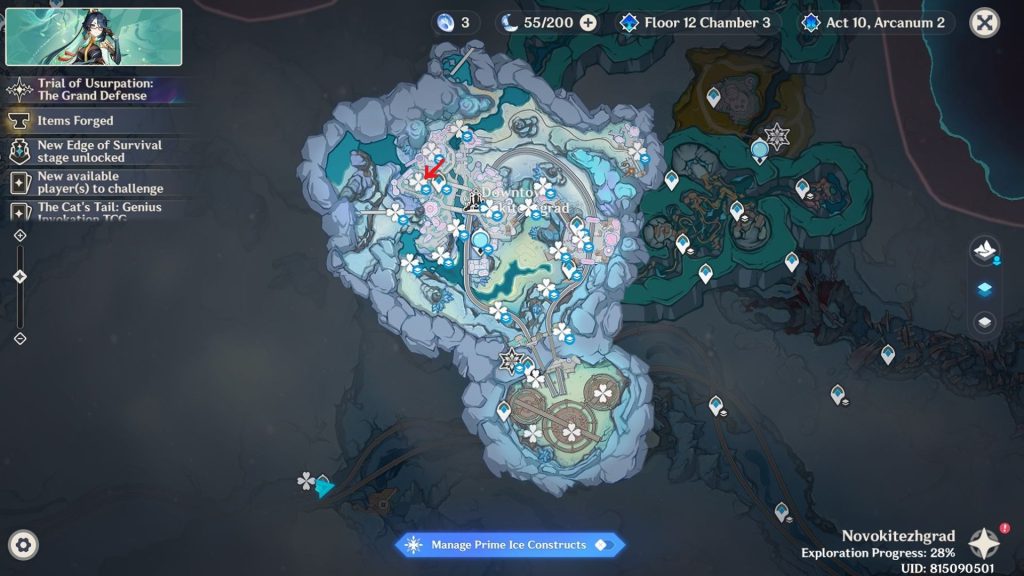
- Cryoculus 16
- Head south along the riverbank. The Cryoculus is right there on the waterfall.
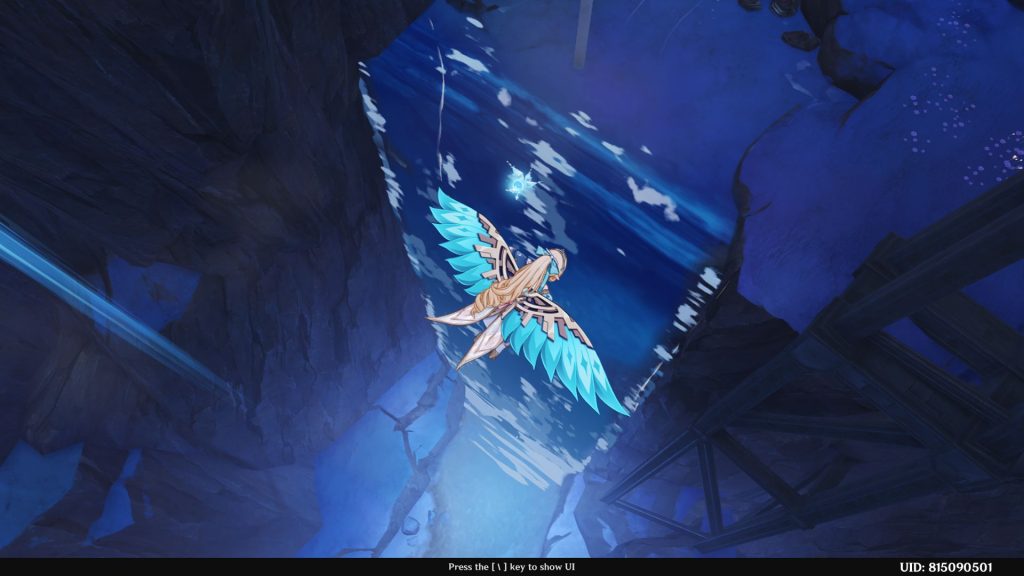
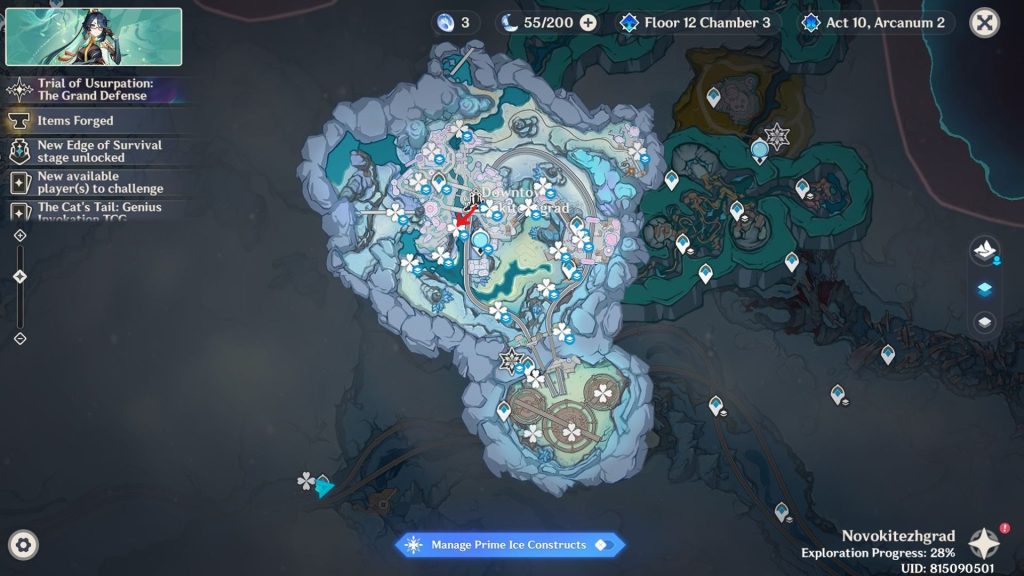
- Cryoculus 17
- Teleport to the Statue of the Seven and head west, slightly to the south. The Cryoculus is inside the gazebo.
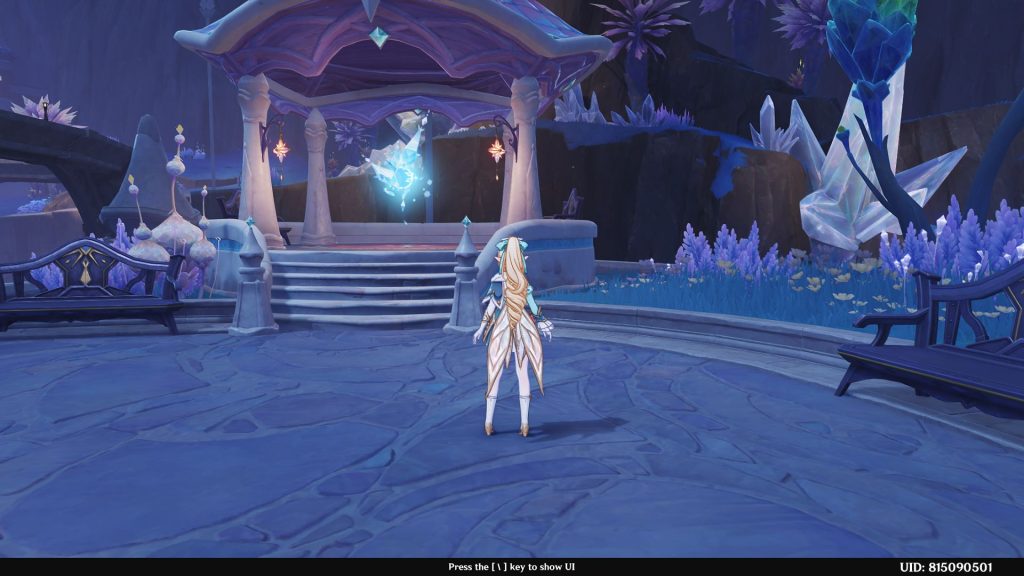
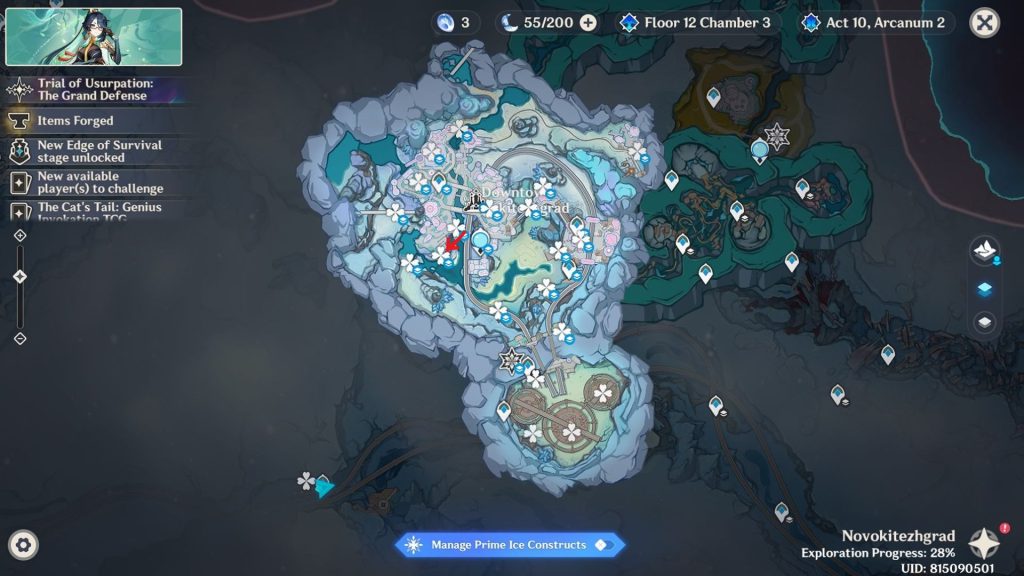
- Cryoculus 18
- Right past the gazebo, you can see the next Cryoculus near the waterfall. You can walk around to get it or use exploration characters to get it.
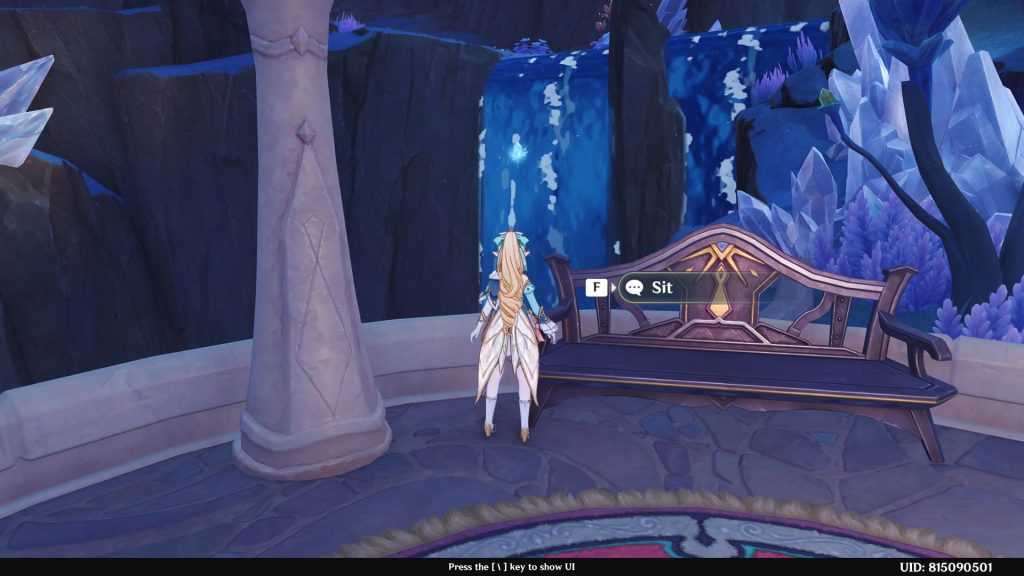
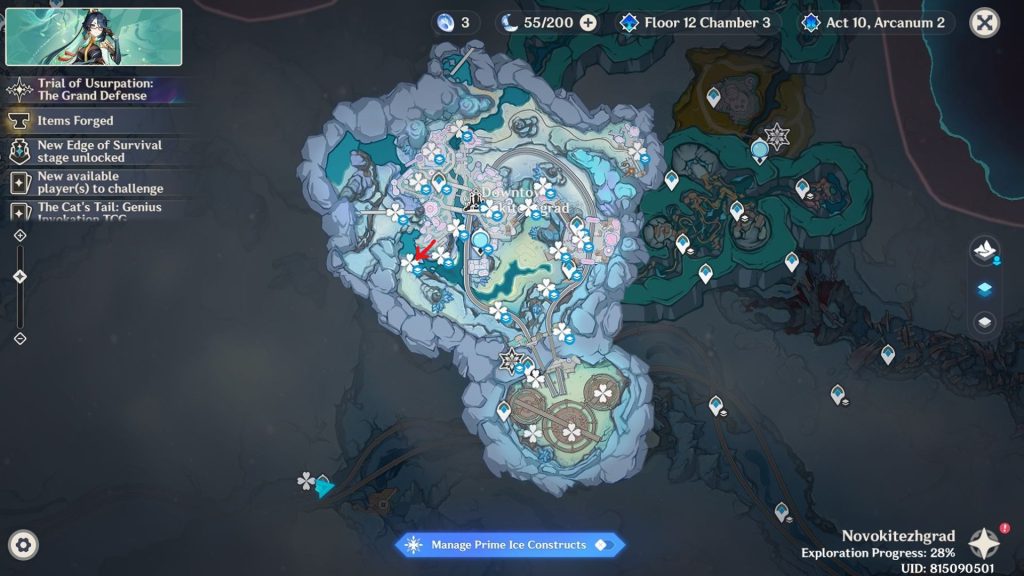
- Cryoculus 19
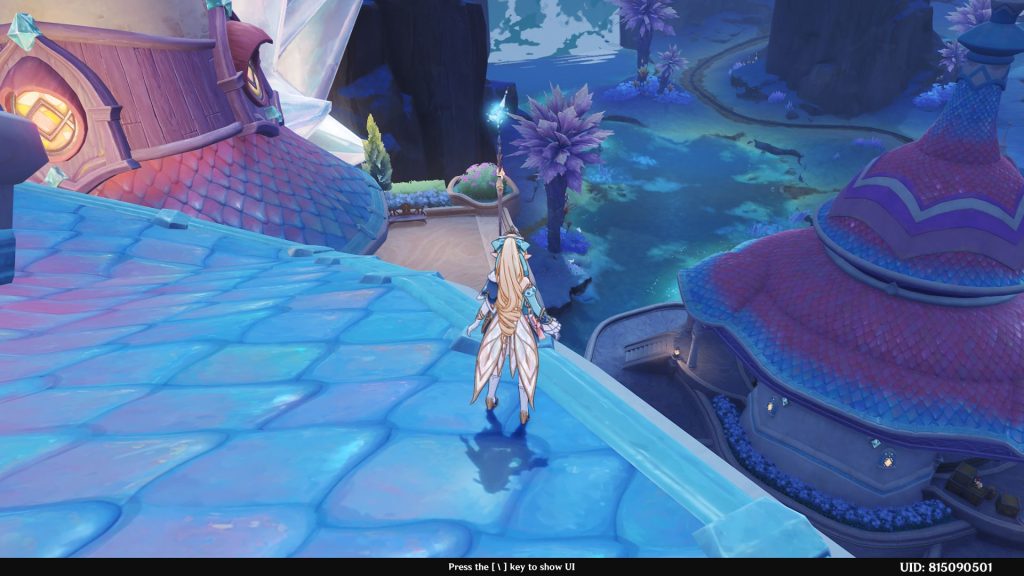
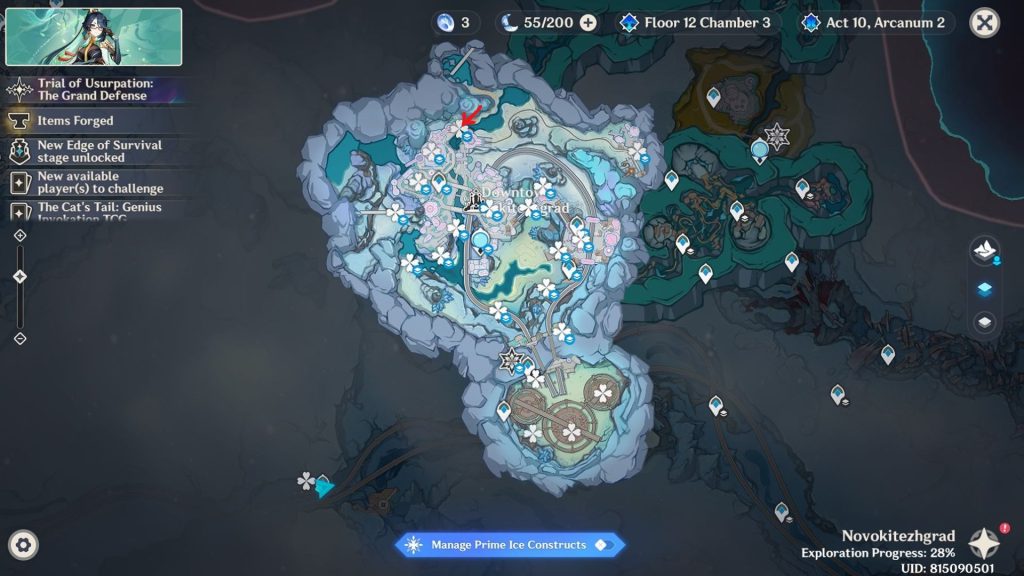
- Teleport to the left waypoint and head north. The Cryoculus will be on the final pillar of the wall.
- Cryoculus 20
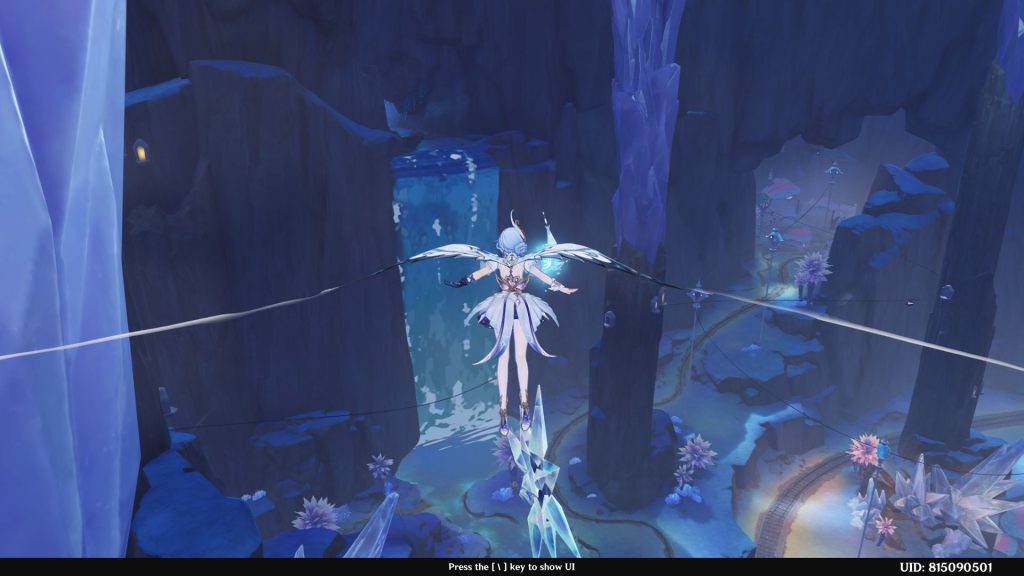
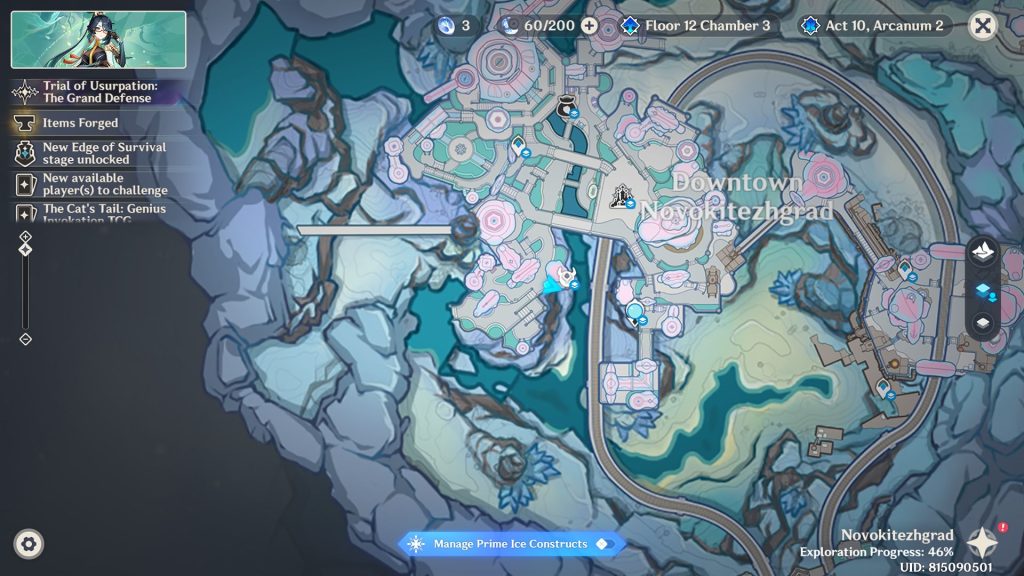
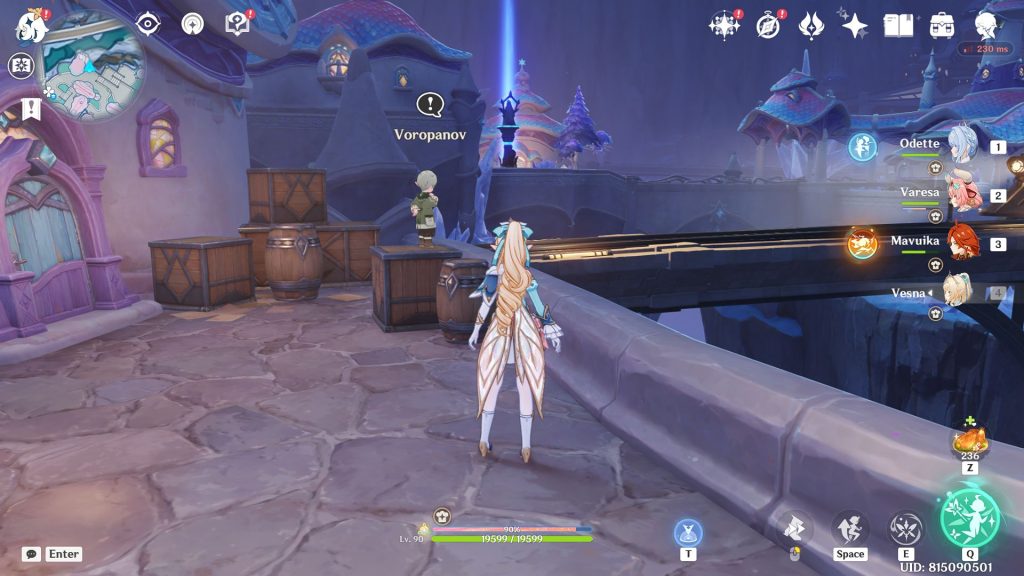
- The next Cryoculus is on top of the tallest building to the left, but it’s difficult to get there even with characters like Mavuika. Instead, use the left waypoint and head southeast; there is an NPC named Voropanov. Interact and trigger the challenge that will open up a path all the way to the top.
- Cryoculus 21
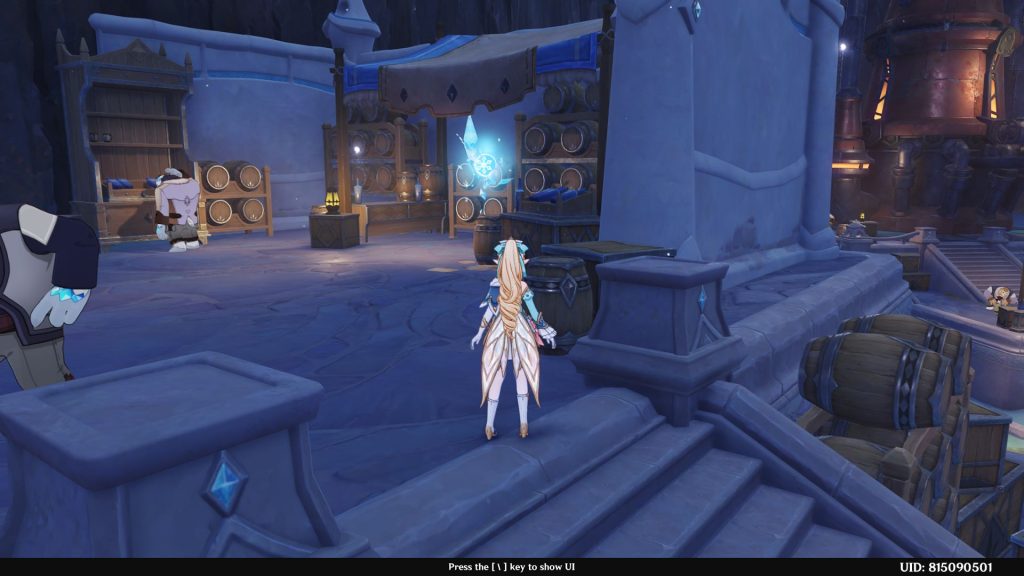
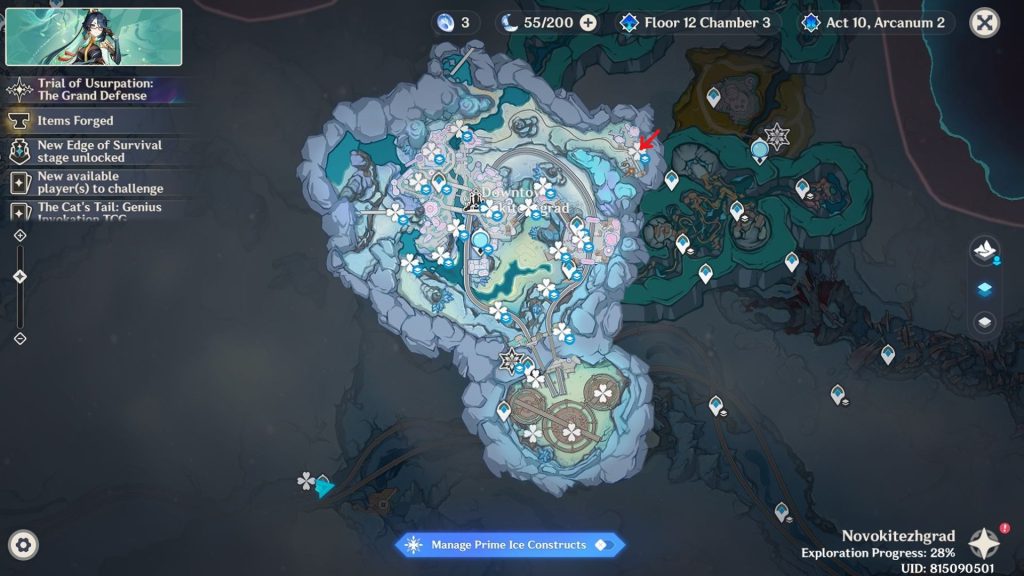
- Go all the way to the right side of the city. The Cryoculus is inside the market-like building.
- Cryoculus 22
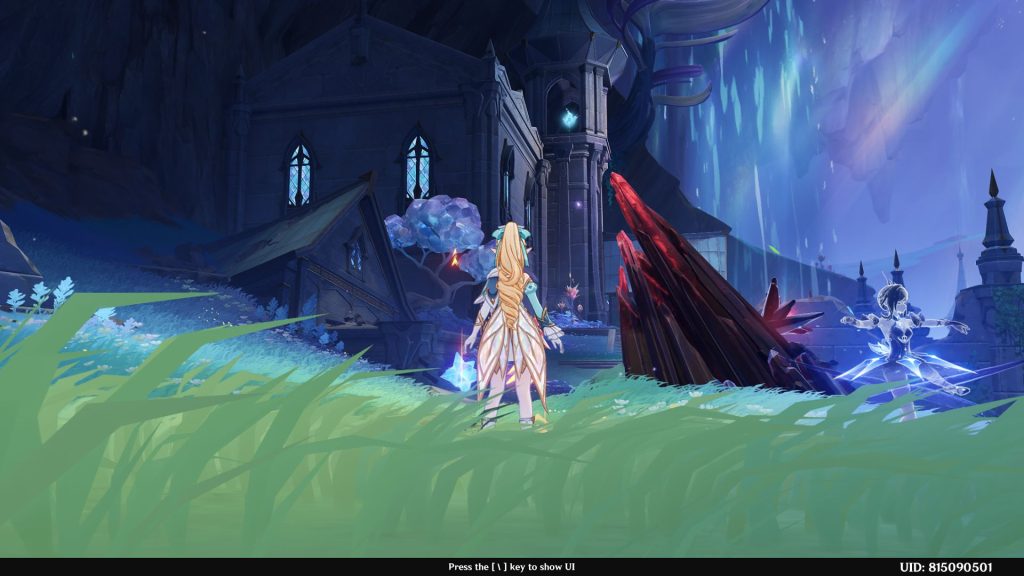
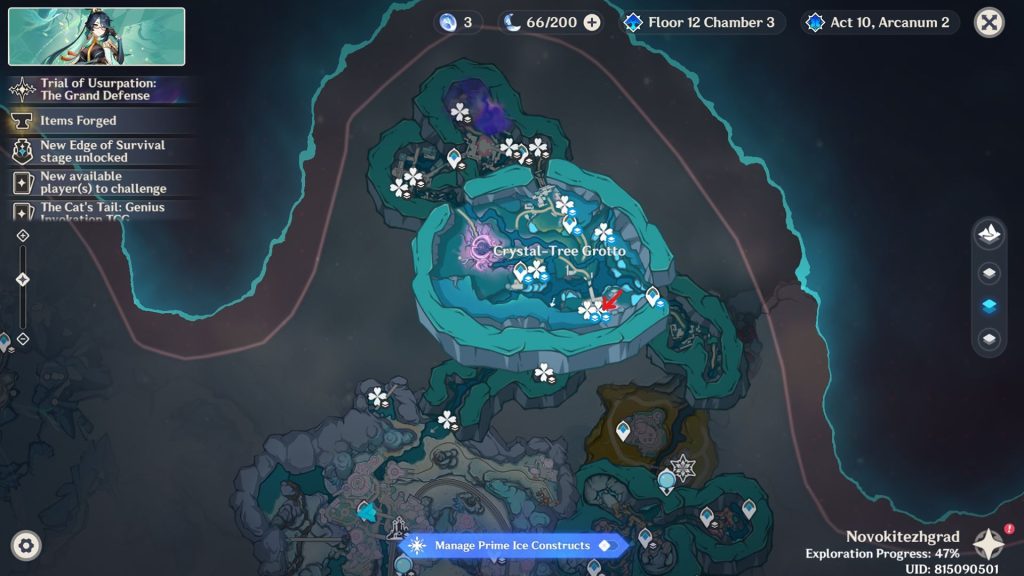
- Teleport to the entrance waypoint of Crystal-Tree Grotto, go along the west side, and you will see the Cryoculus on the tower.
- Cryoculus 23
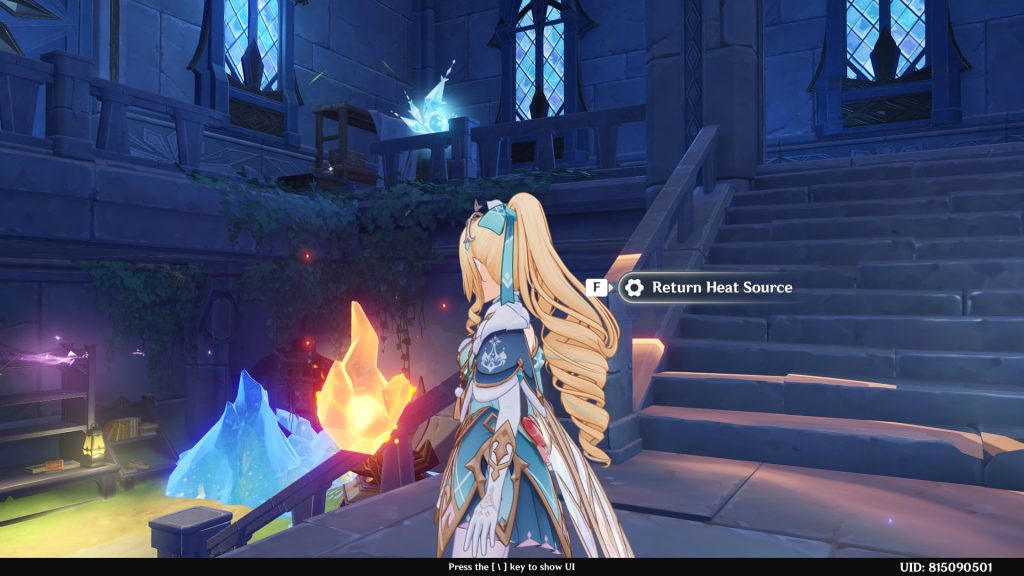
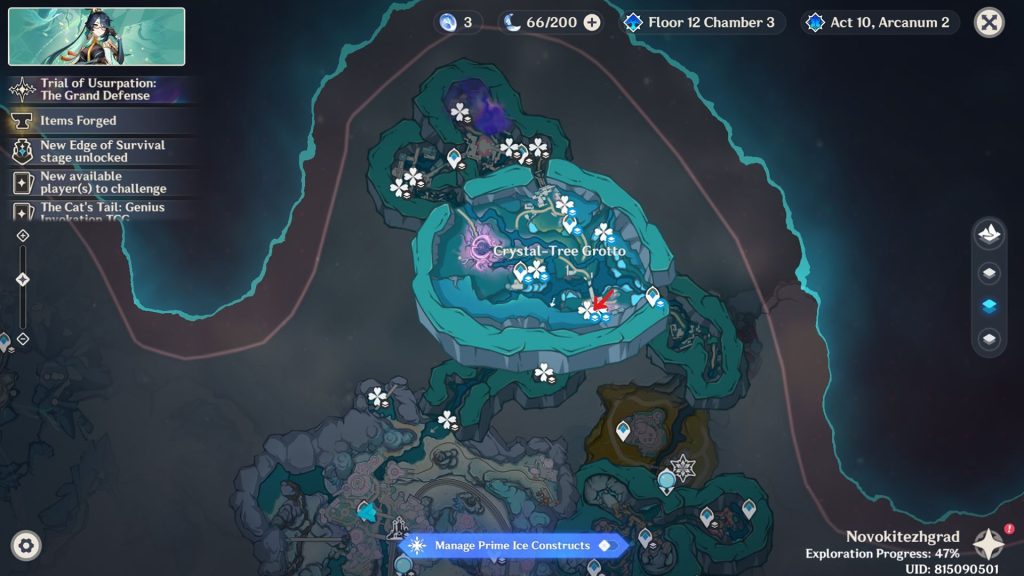
- There is a puzzle nearby where you have to illuminate the light on the Blightkristall. Break the one further away to get blueprints that will help you guide the direction to the Blightkristall blocking the opening to the building. Go inside, and you will see the Cryoculus.
- Cryoculus 24
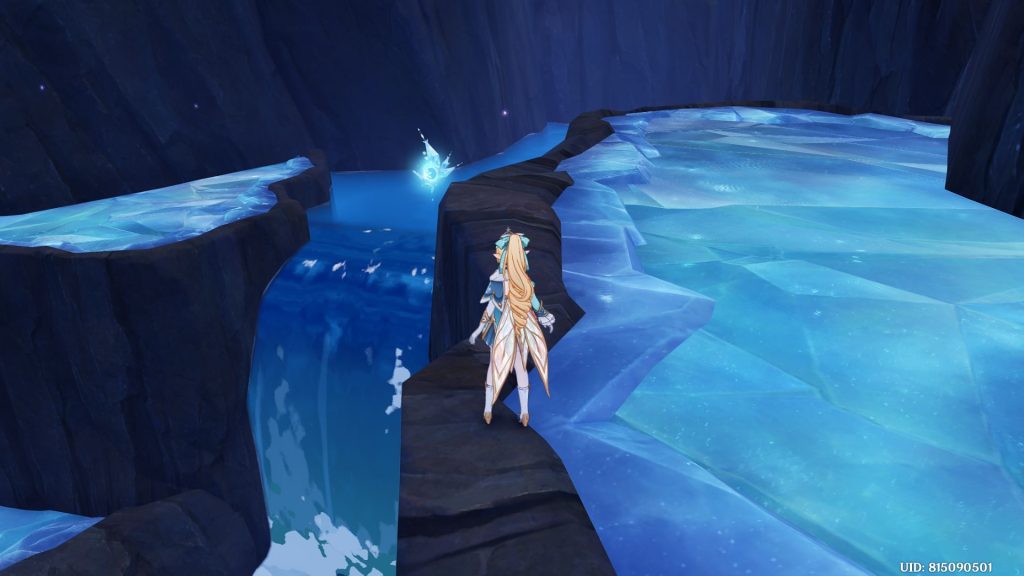
- Use the waypoint a bit to the north and head east. The Cryoculus will be on the waterfall.
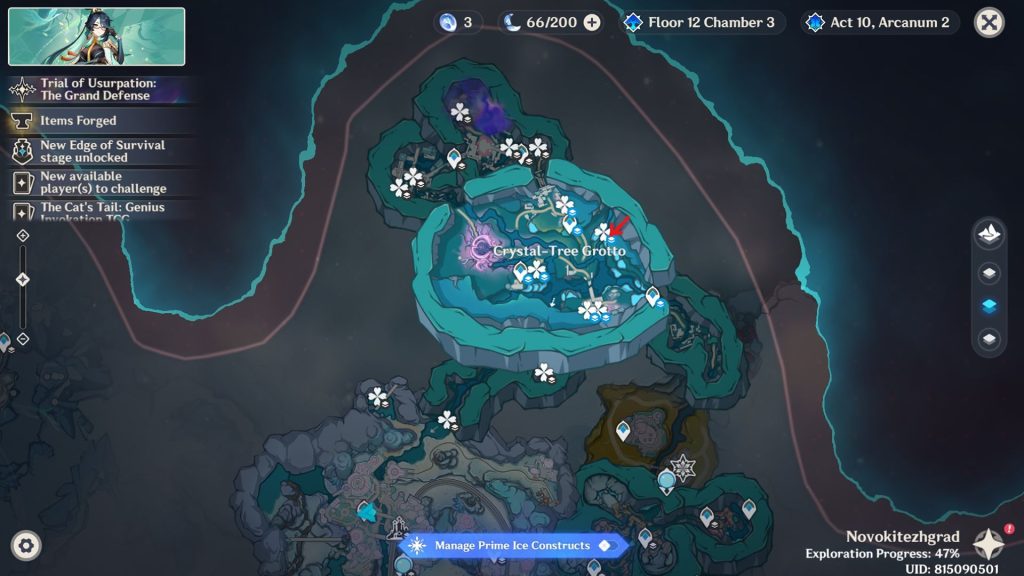
- Cryoculus 25
- Teleport back and head north. The Cryoculus is on top of the broken house.
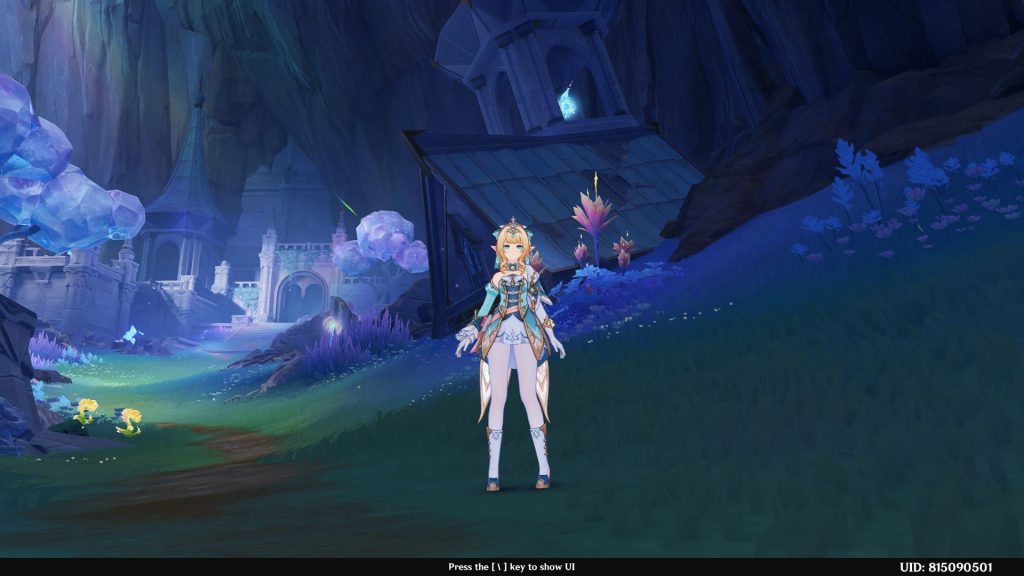
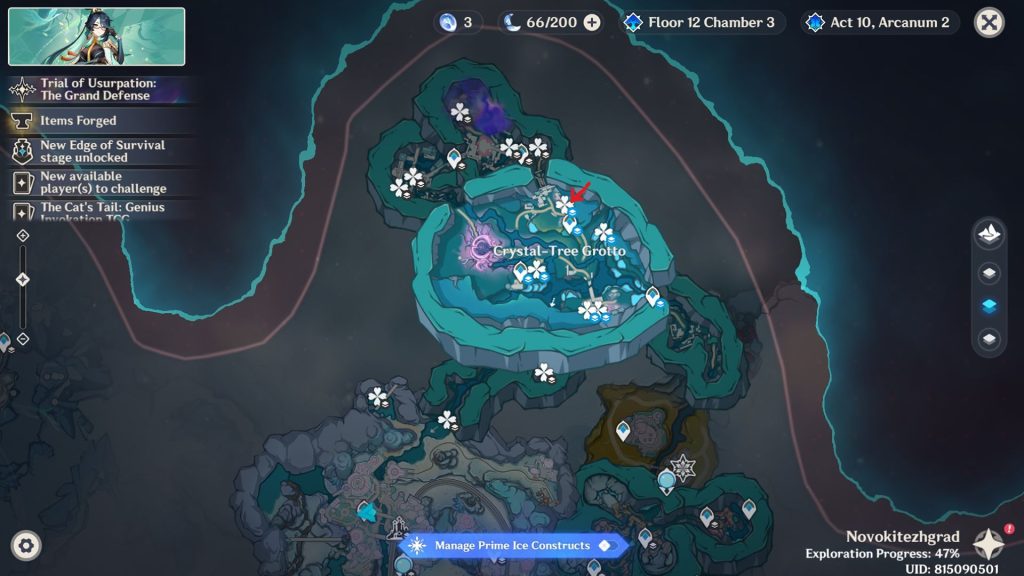
- Cryoculus 26
- Teleport to the left waypoint, and the Cryoculus will be a bit towards the east.
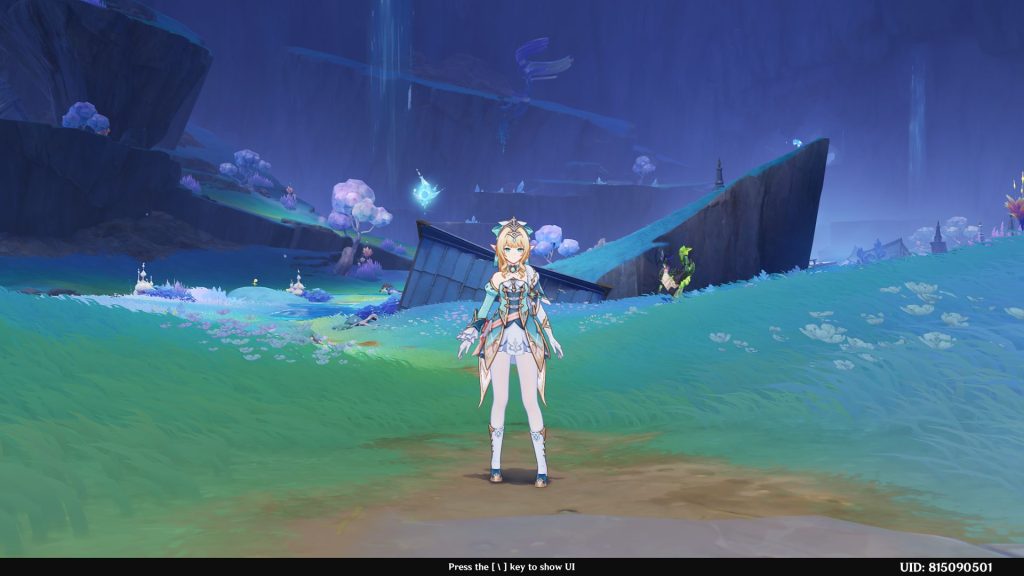
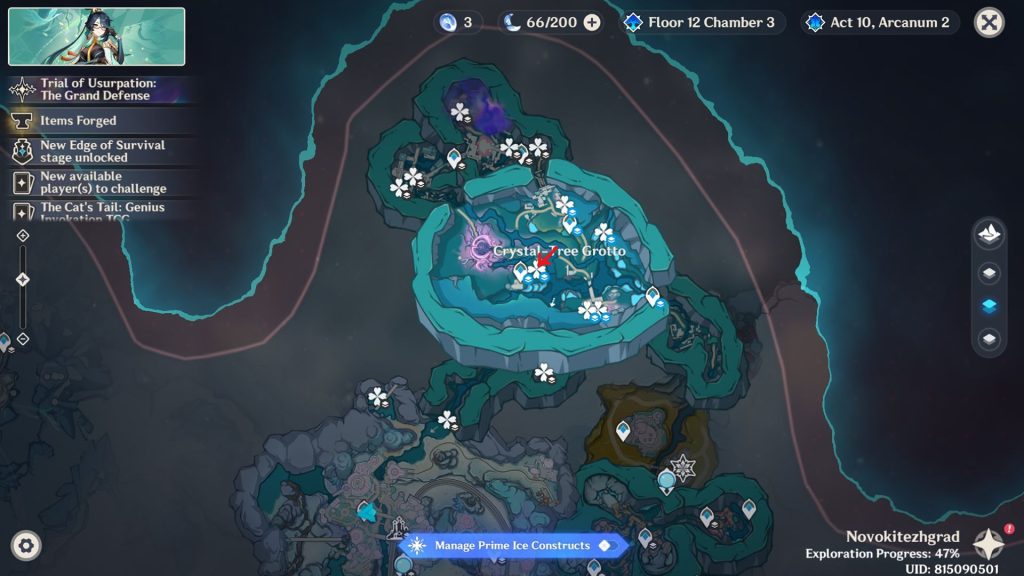
- Cryoculus 27
- Go down the path opened during World Quest that takes you down the waterfall. The Cryoculus will be along the path.
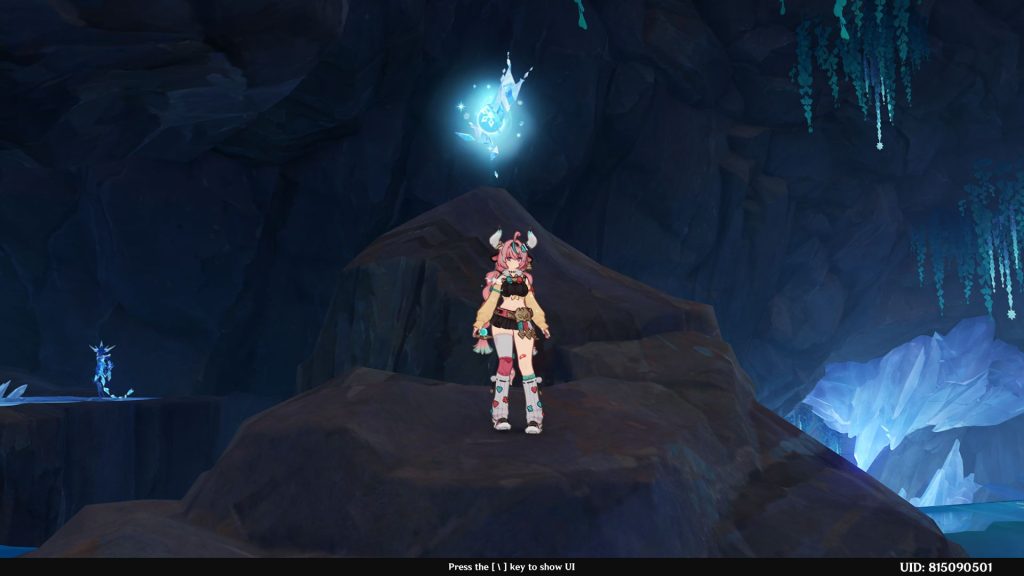
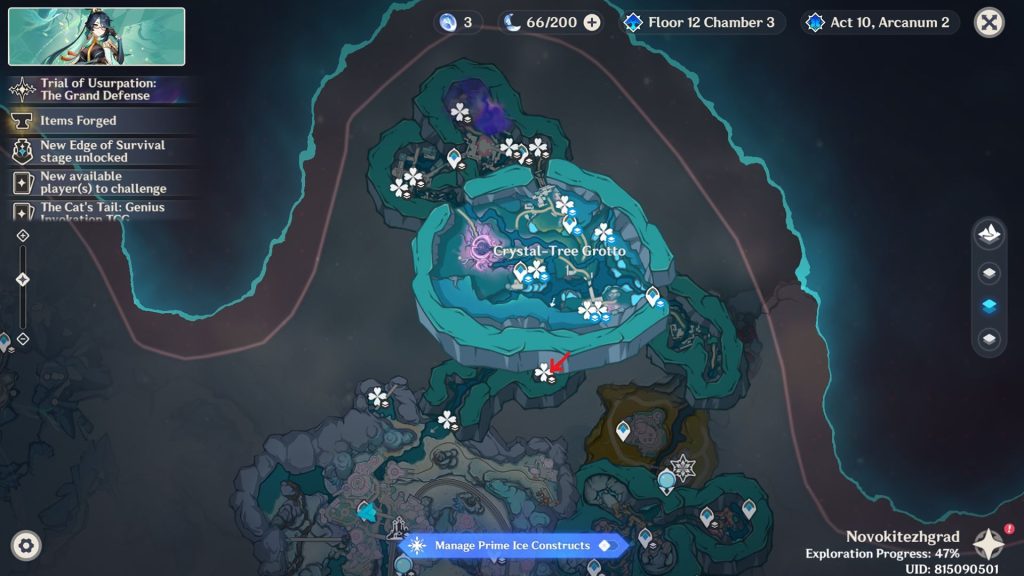
- Cryoculus 28
- Head deeper into the cave, and the Cryoculus is on top of the waterfall that goes inside the city.
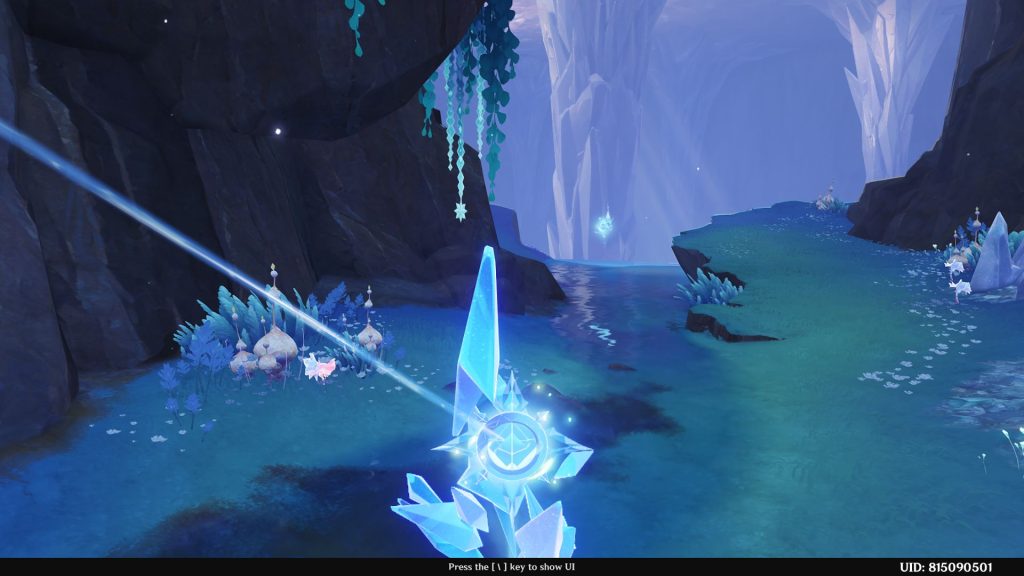
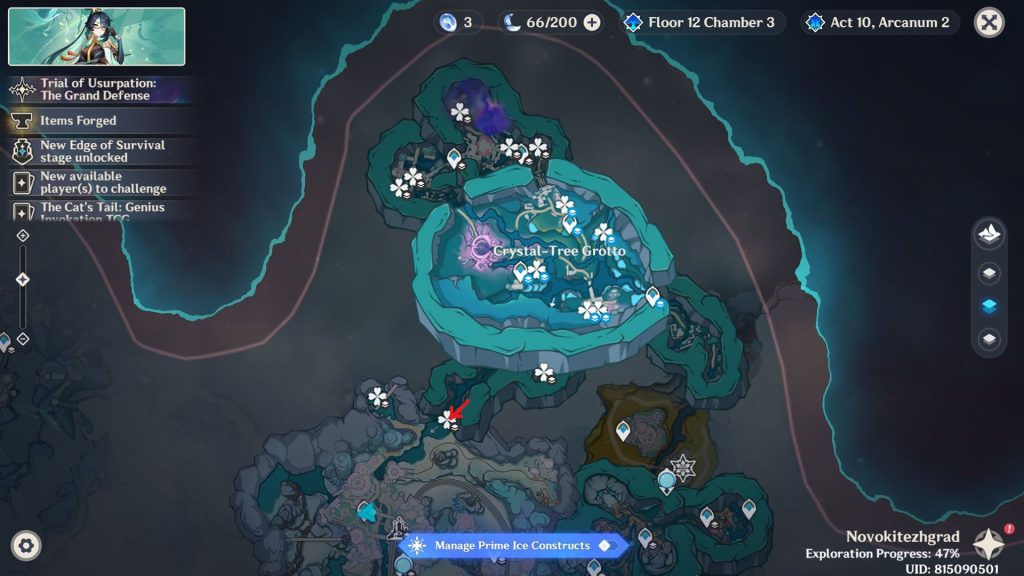
- Cryoculus 29
- Glide down and head west towards the location of the Local Legend. You can defeat the Rowdy Beast Host or just ignore it and go towards the Cryoculus at the end.
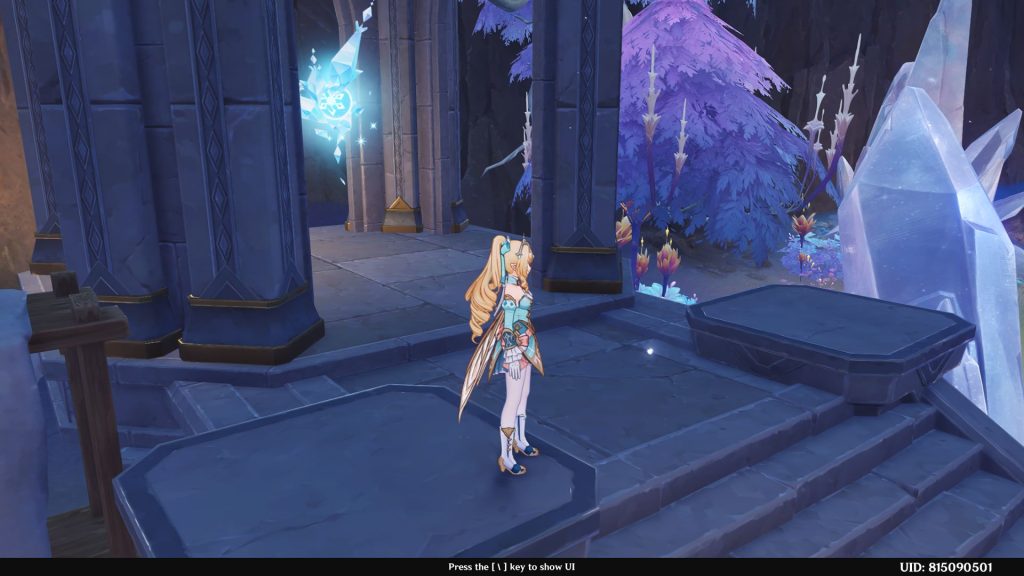
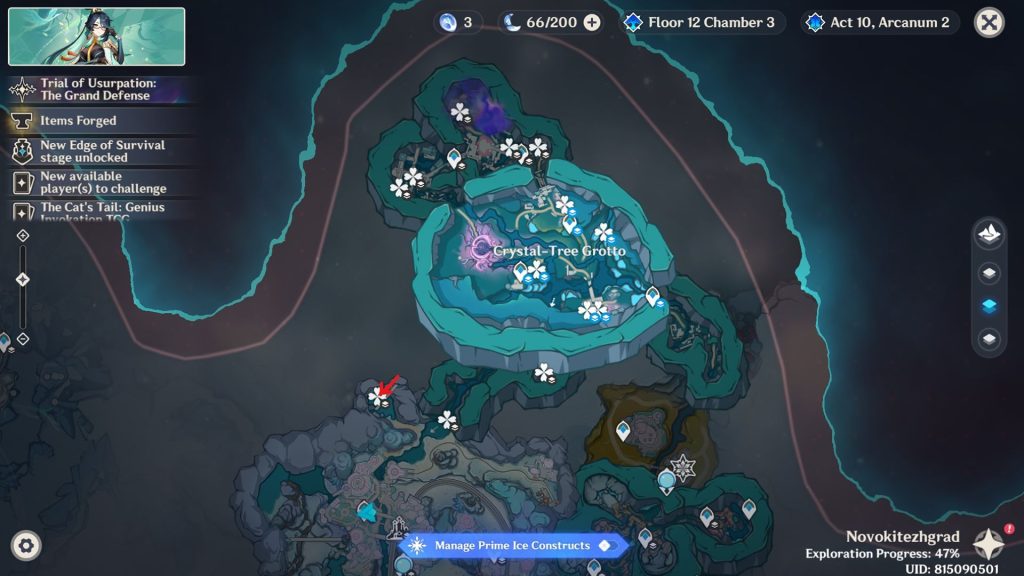
- Cryoculus 30
- Teleport to the north waypoint that takes you to a level below. The Cryoculus will be to the east.
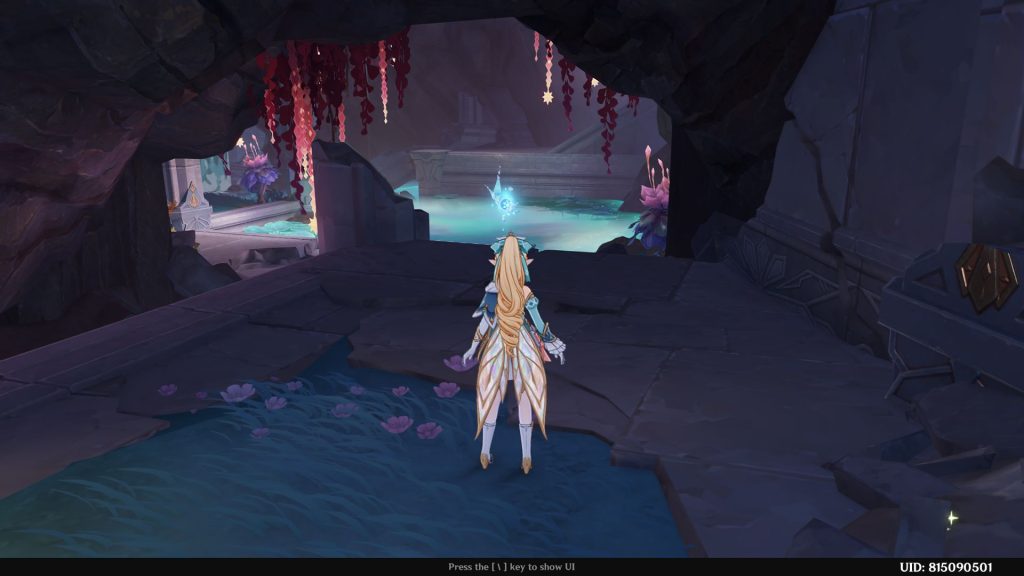
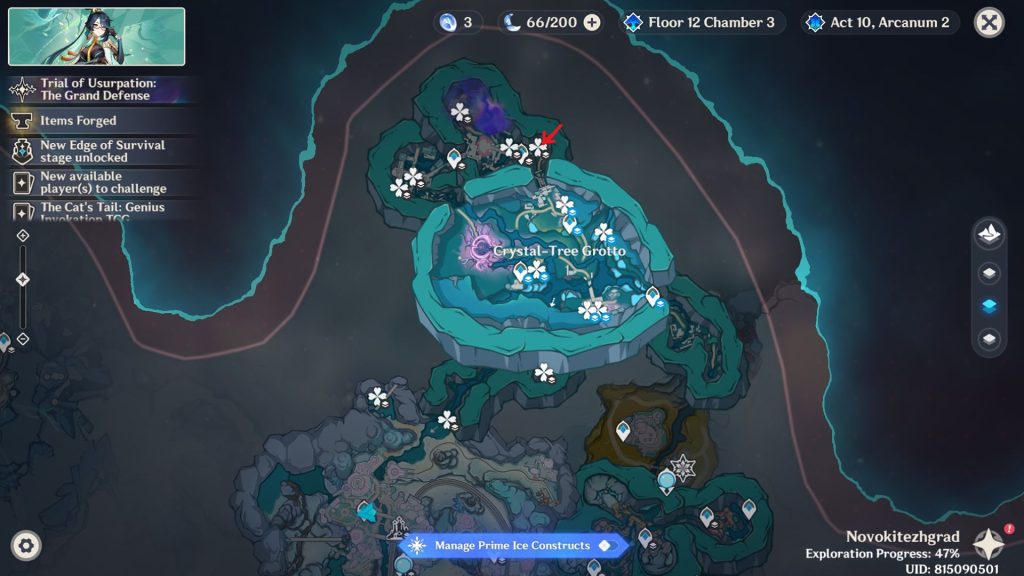
- Cryoculus 31
- Head west, and the Cryoculus will be right below the broken path.
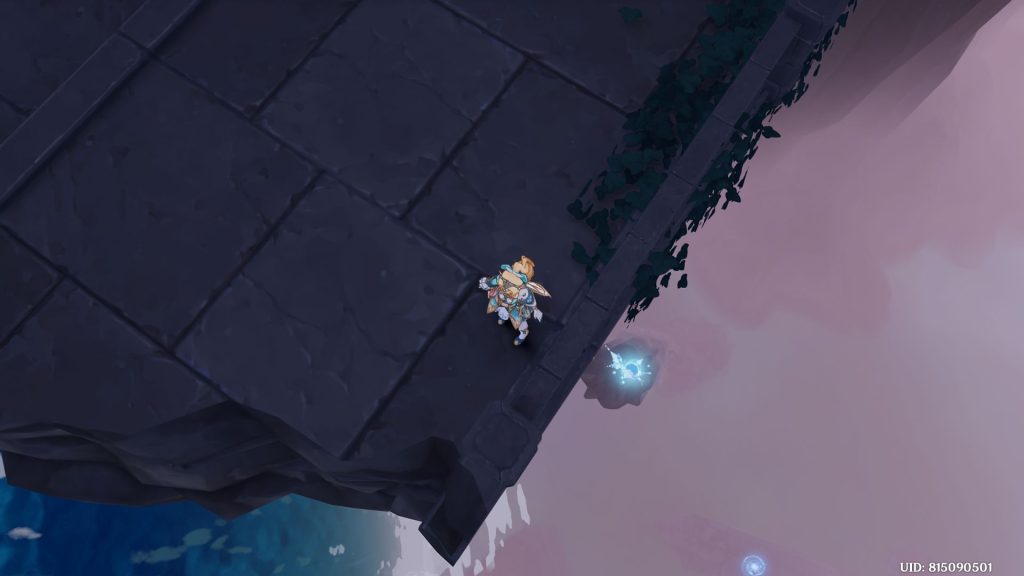
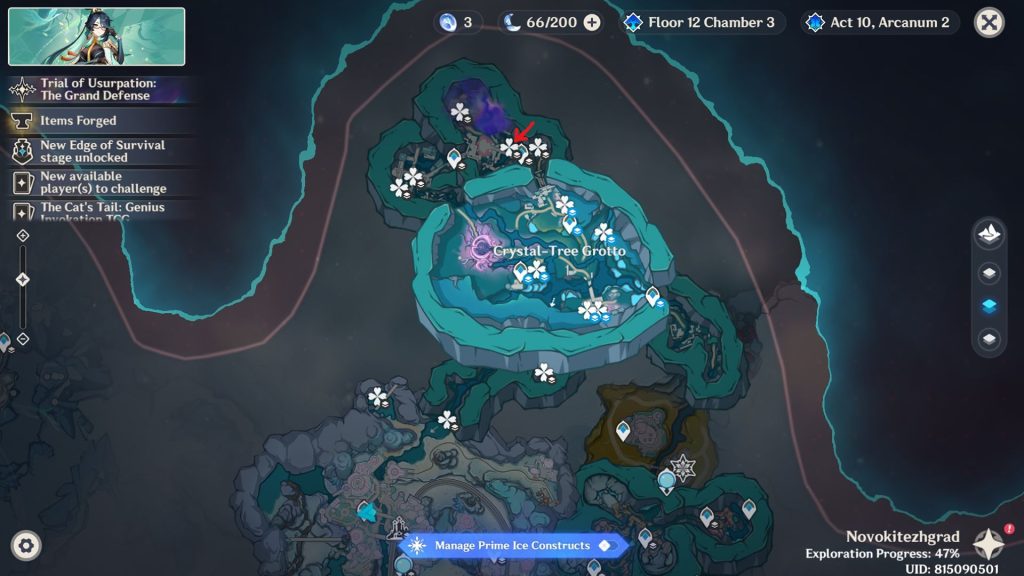
- Cryoculus 32
- Teleport back to the waypoint and head towards the Shadow Realm. Keep progressing, and right when you are about to exit, look right, and the Cryoculus will be inside the room.
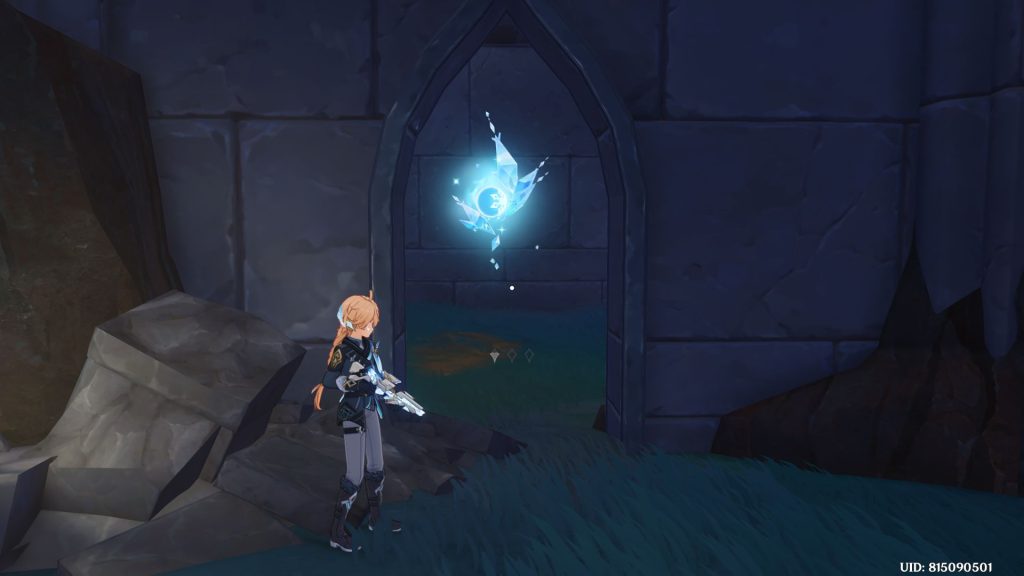
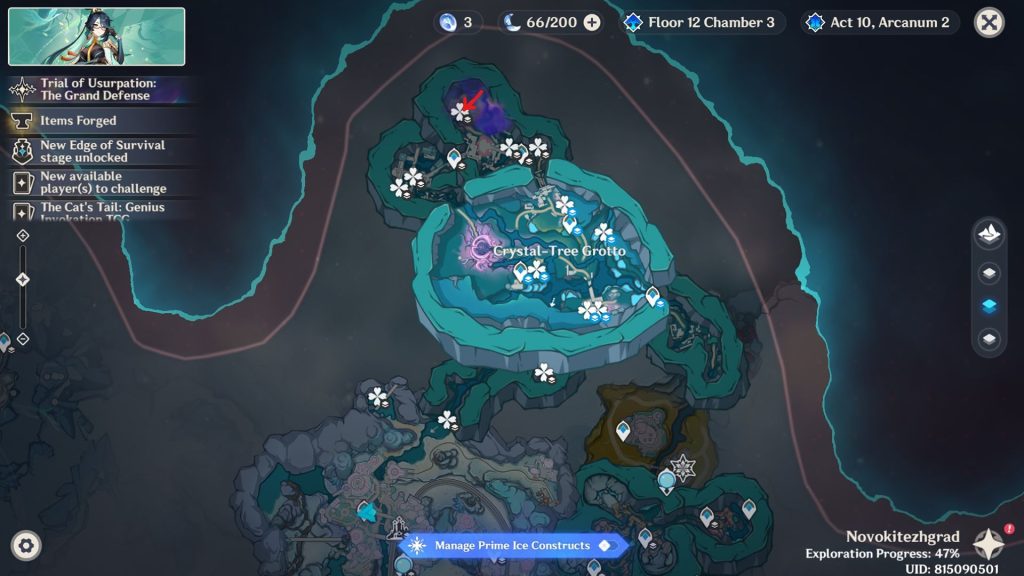
- Cryoculus 33
- Teleport to the top-left waypoint and head west. The Cryoculus will be right next to the broken stone.
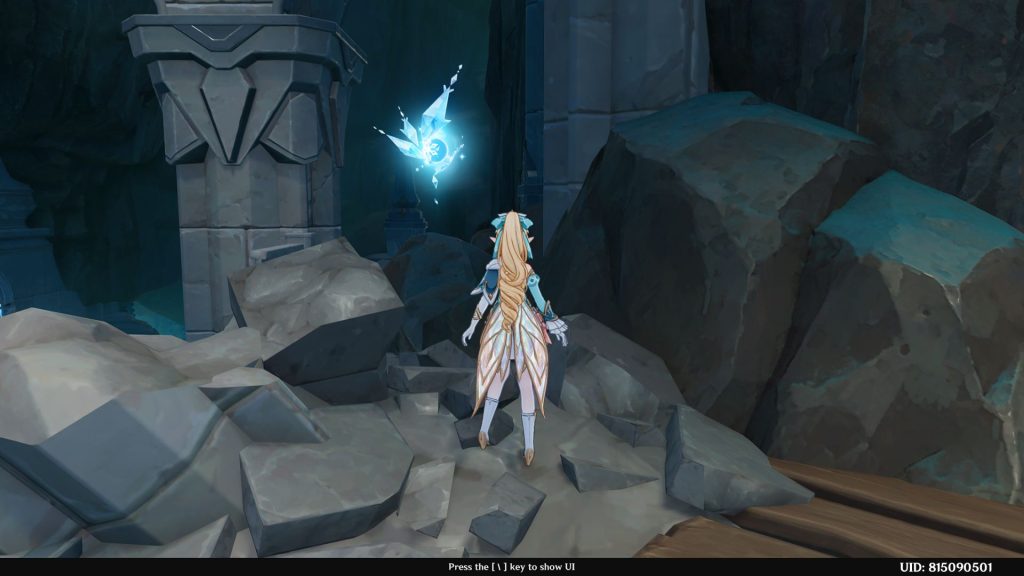
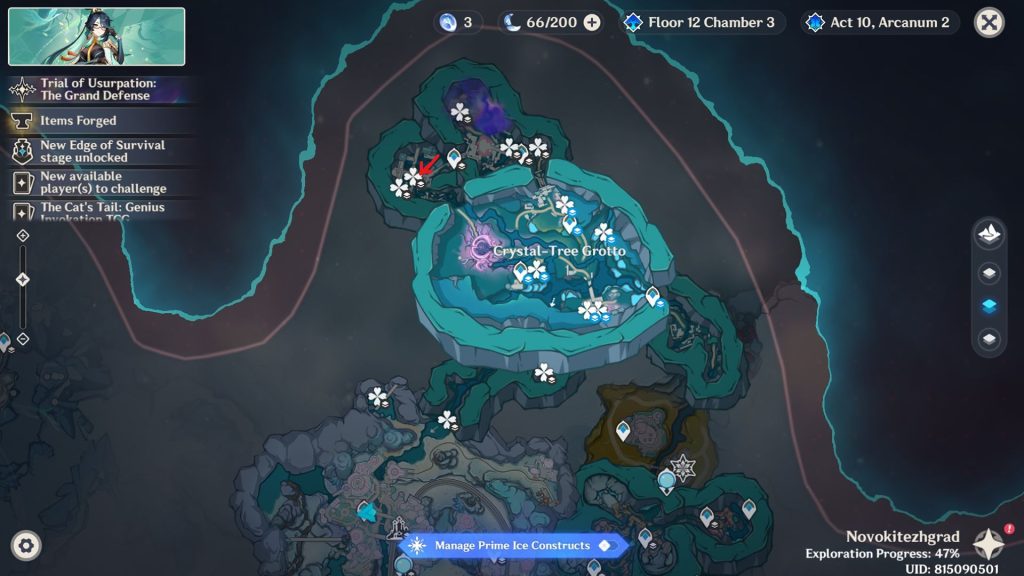
- Cryoculus 34
- Walk up some of the stairs, and the Cryoculus will light up on your map. Go and collect it.
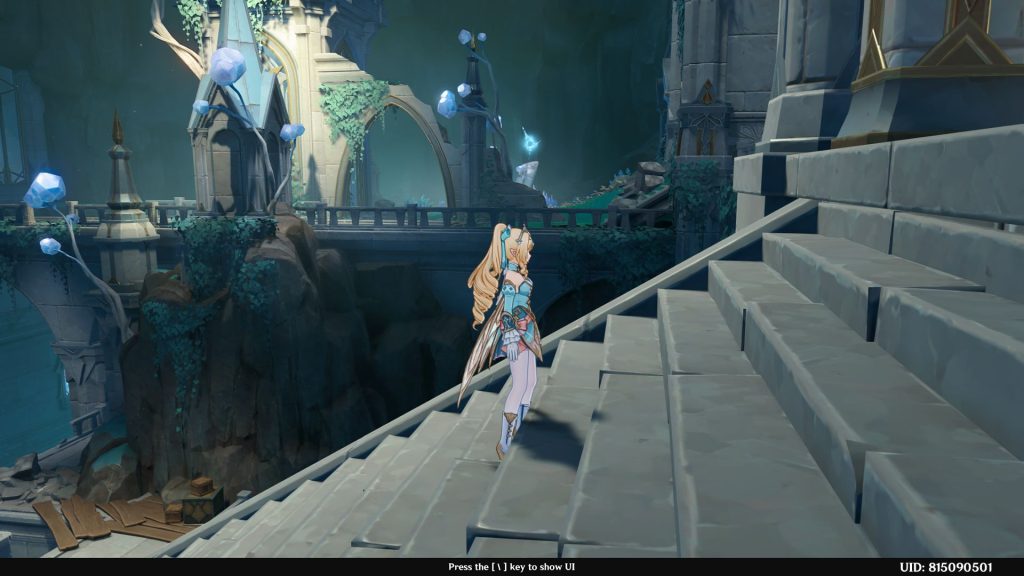
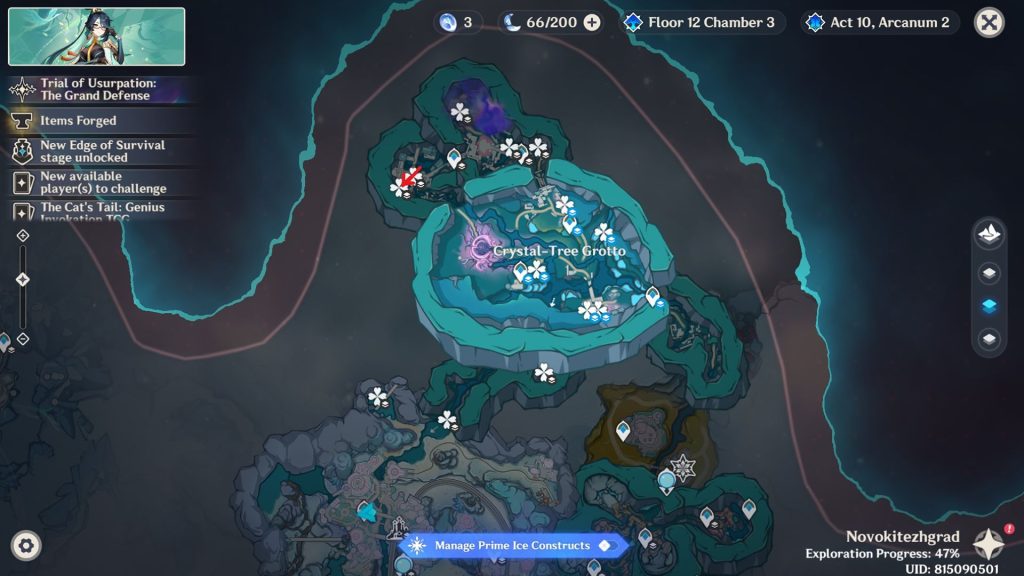
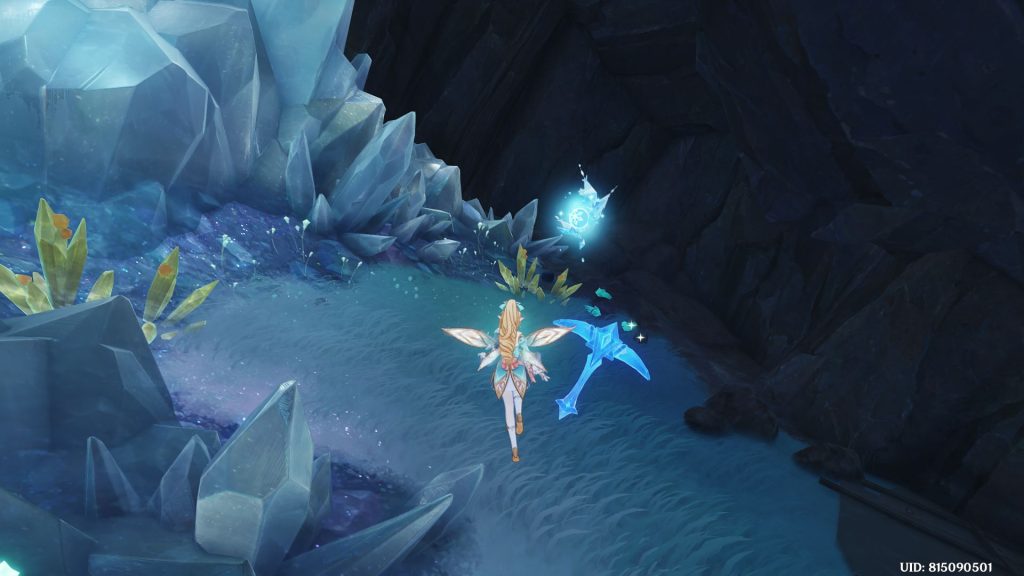
- Cryoculus 35
- Teleport to the waypoint right outside the entrance of the Kresnik Kristall Mines. Walk along the path and break the stones on your right using the pickaxe construct to get the Cryoculus.
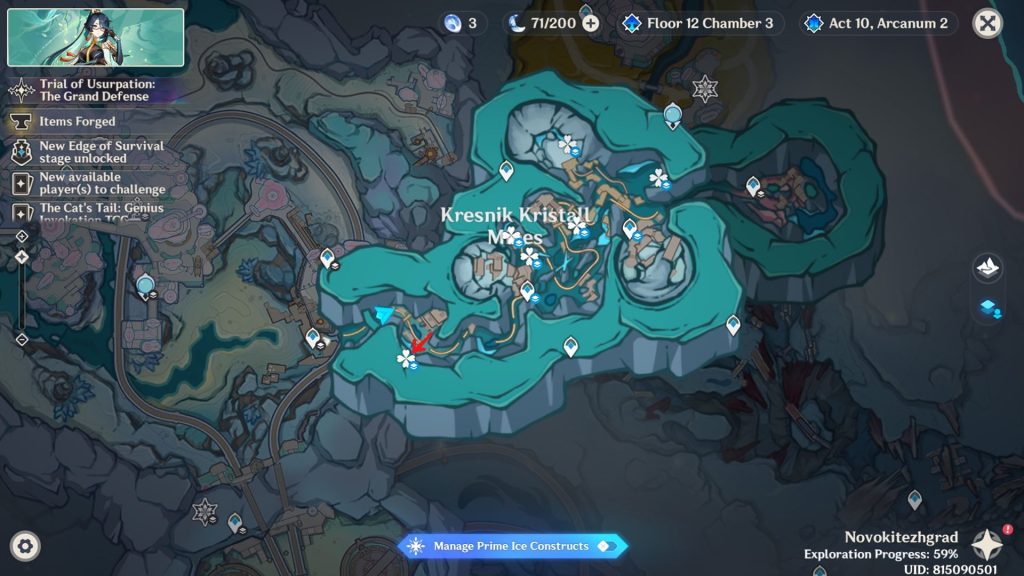
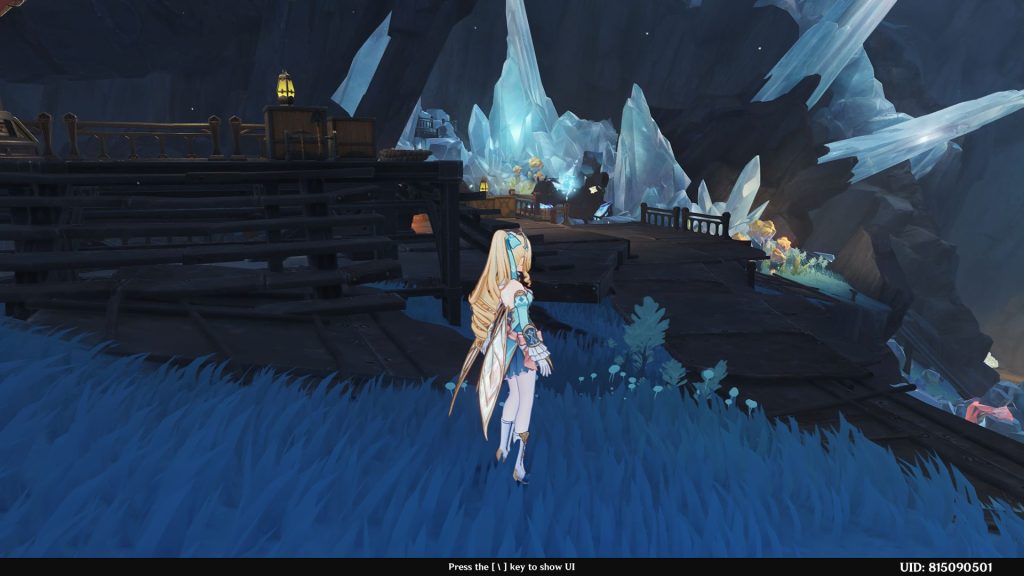
- Cryoculus 36
- Teleport to the next waypoint and head north. The Cryoculus will be there on the platform.
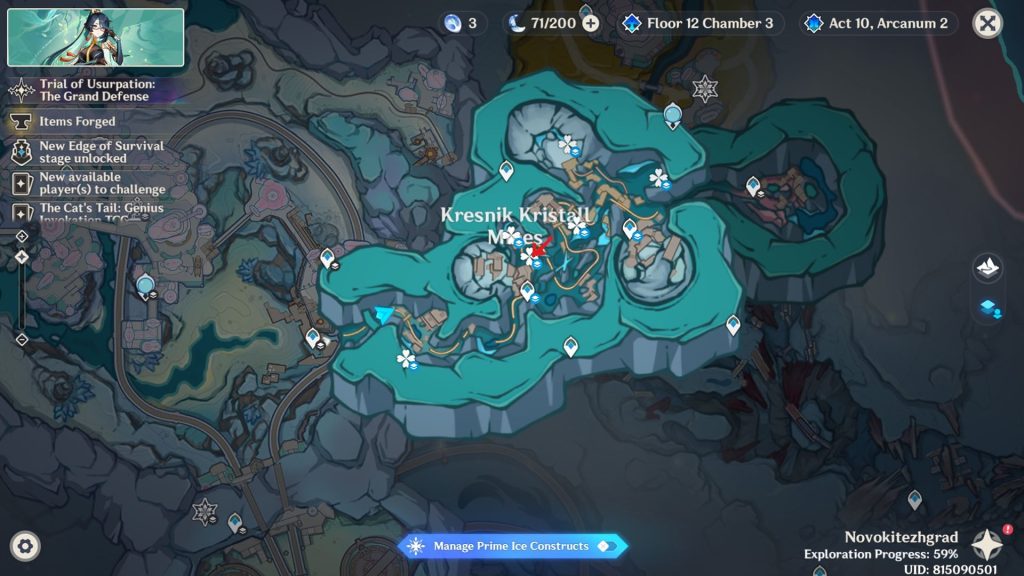
- Cryoculus 37
- Keep going northwest a bit, and the Cryoculus will be inside the crystals. Break them to collect it.
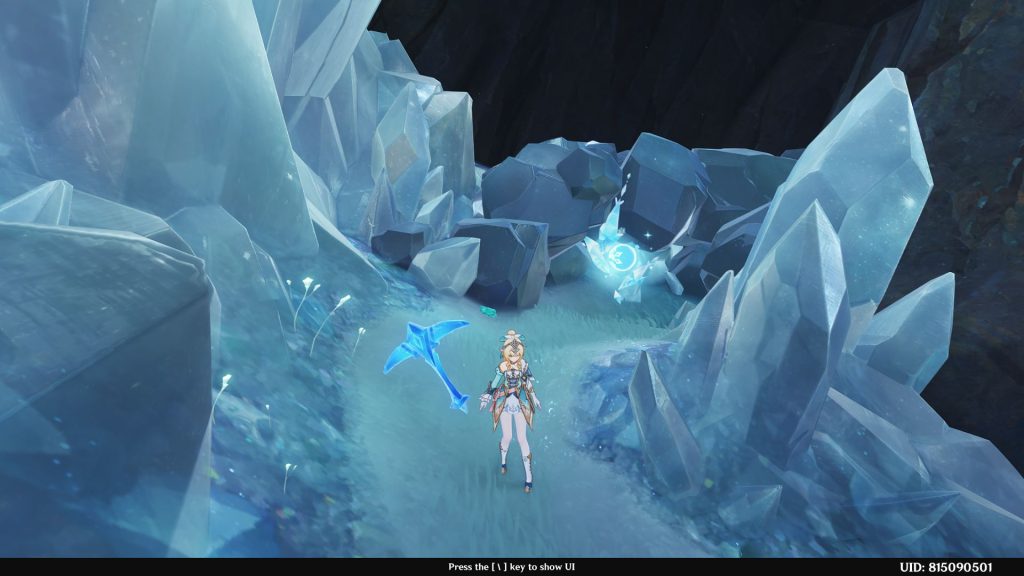
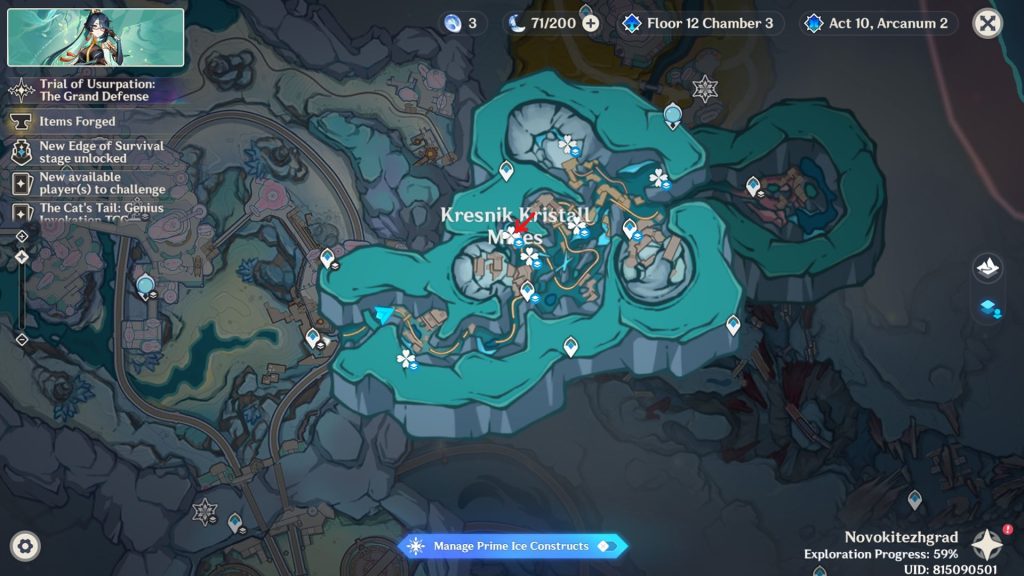
- Cryoculus 38
- Teleport to the right waypoint and head west. The Cryoculus is inside the crystals you can break.
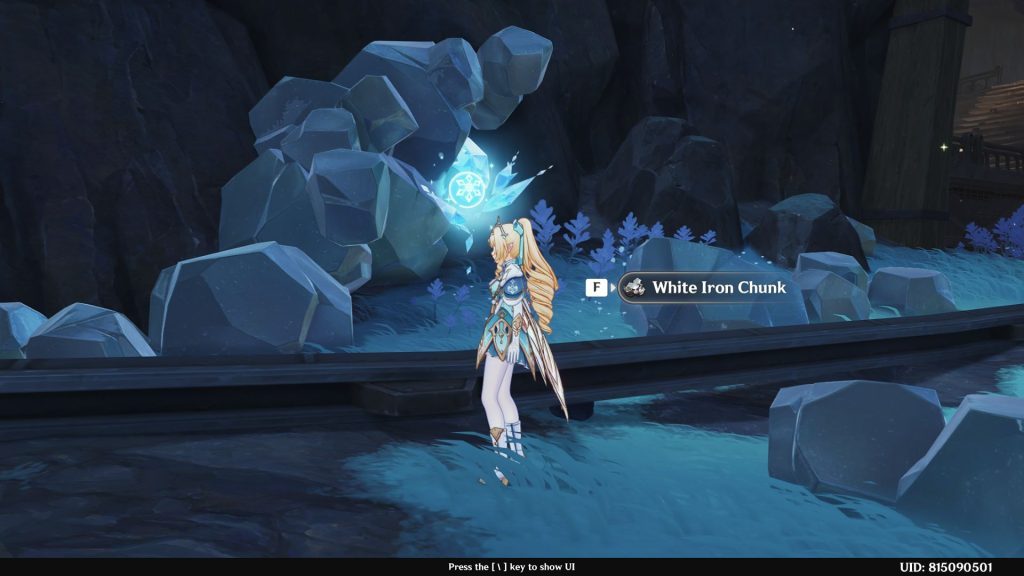
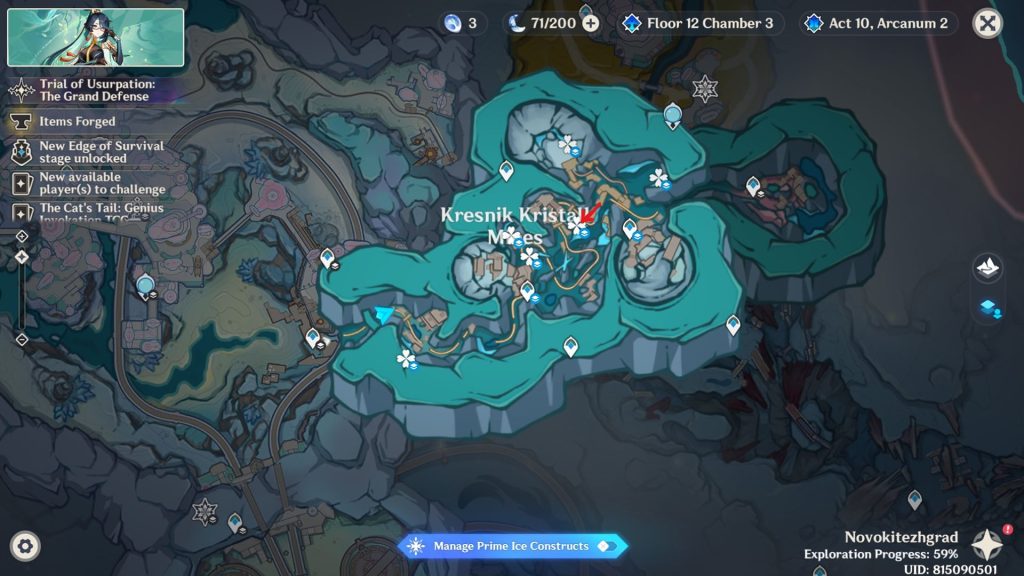
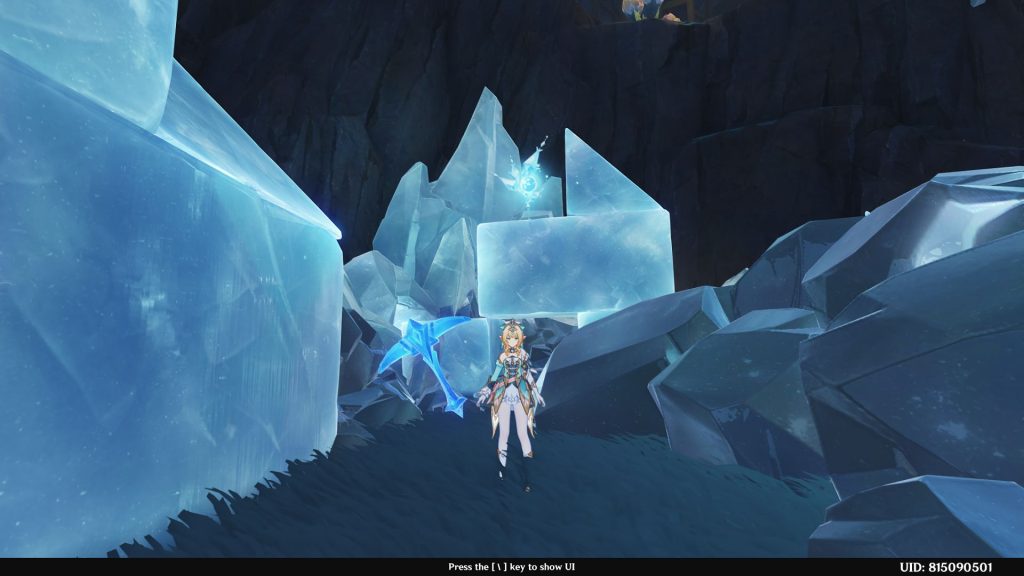
- Cryoculus 39
- Head to the north part of the mines. There will be a lot of crystals and blocks for a puzzle. The Cryoculus is above the blocks.
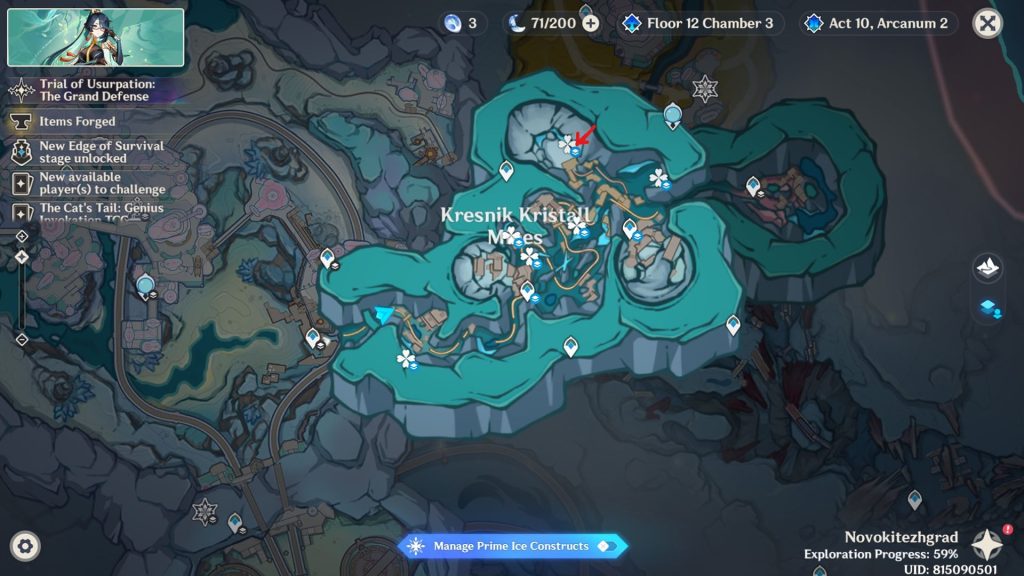
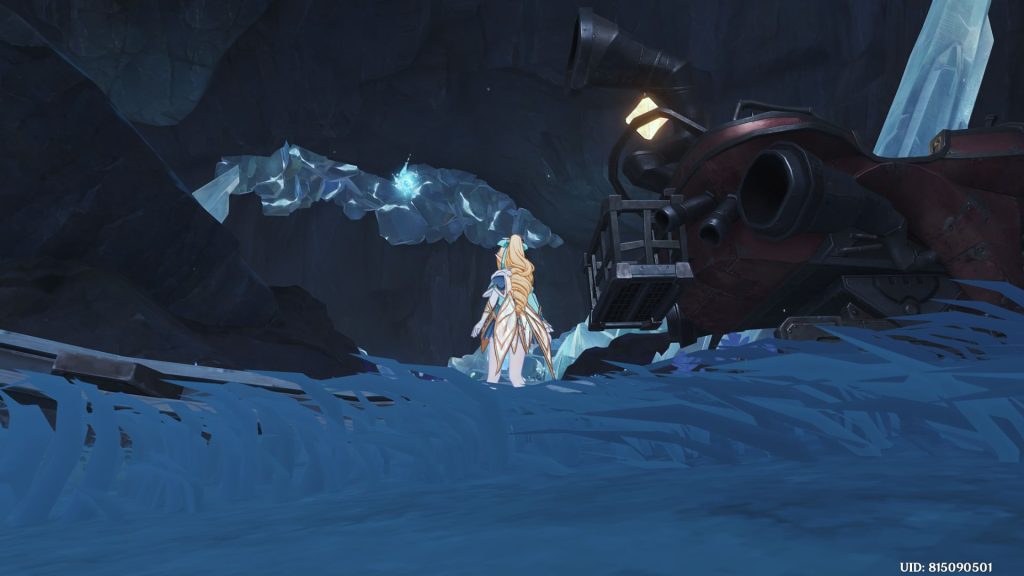
- Cryoculus 40
- Teleport back to the waypoint and head north, slightly to the east. The Cryoculus is right ahead.
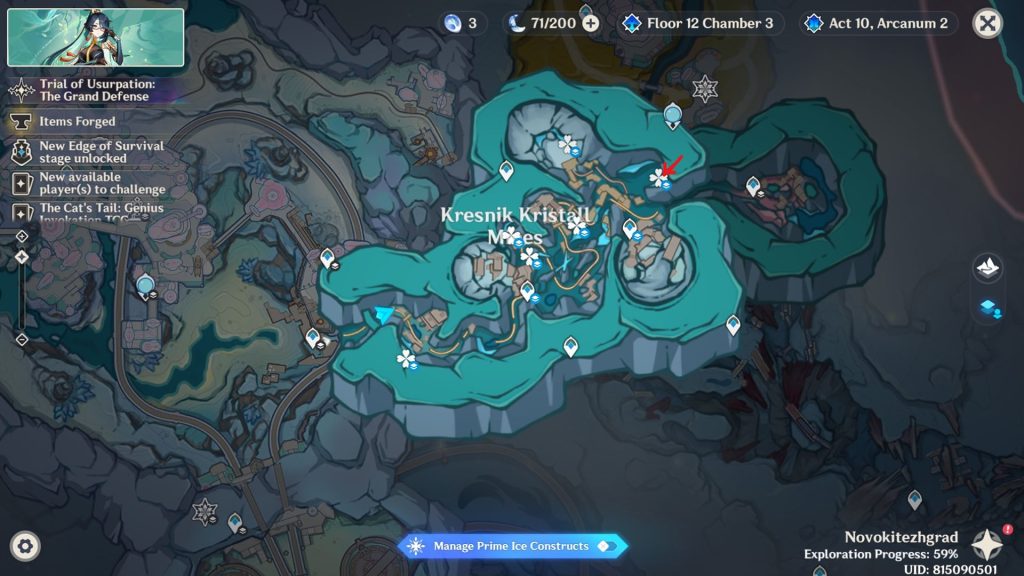
- Cryoculus 41
- Teleport to the first waypoint at Port Belovodye and look behind. The Cryoculus is inside the chimney.
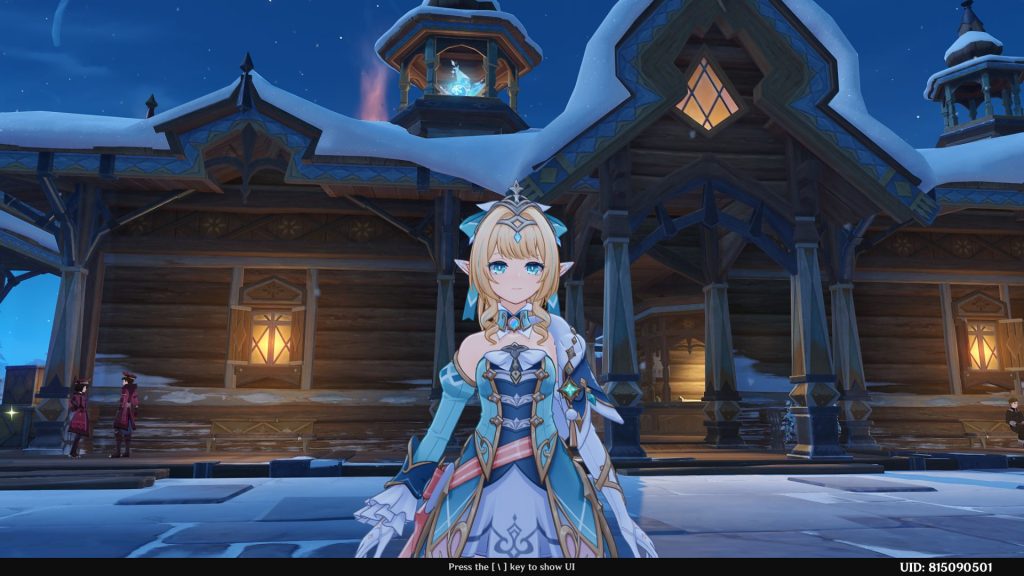
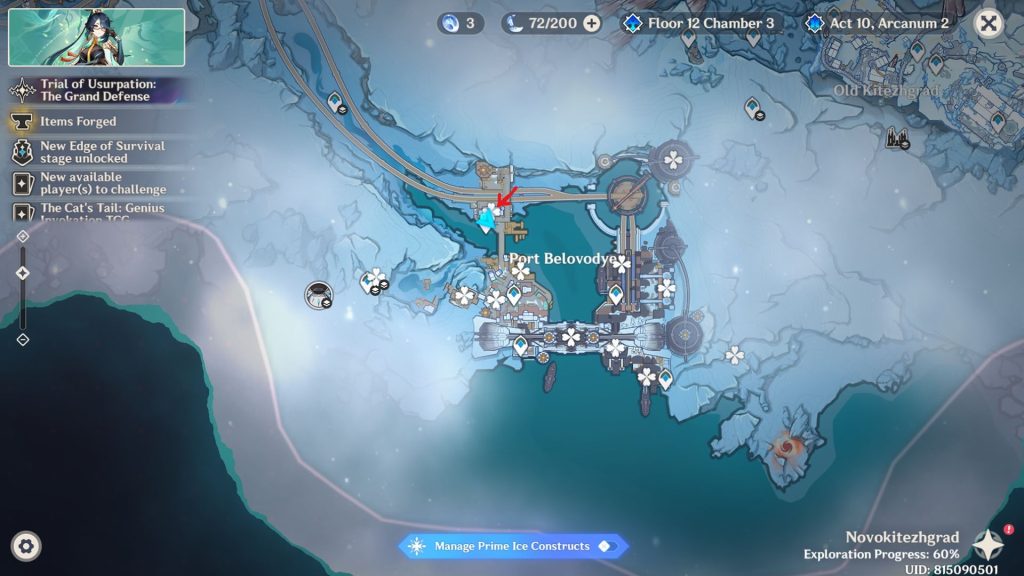
- Cryoculus 42
- Head south and you will see the next Cryoculus on the boat’s mast.
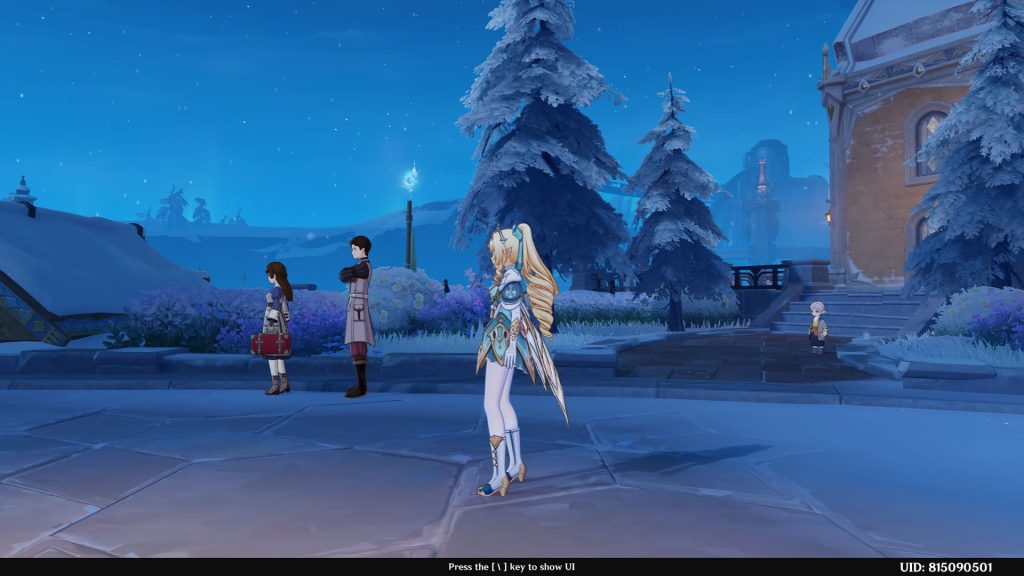
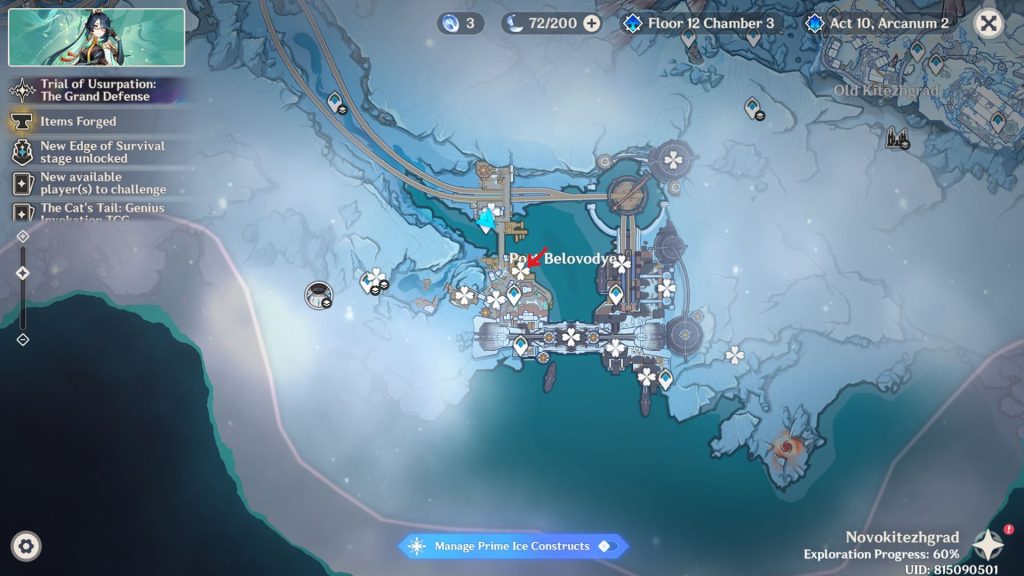
- Cryoculus 43
- Teleport to the nearby waypoint and head a bit south. You will see the Cryoculus behind the building, on the balcony of another house.
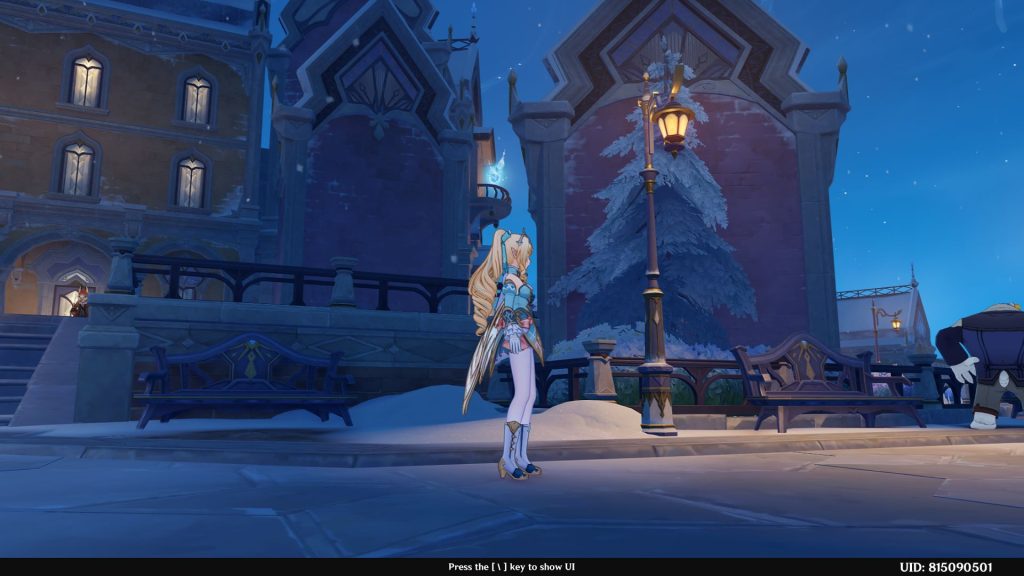
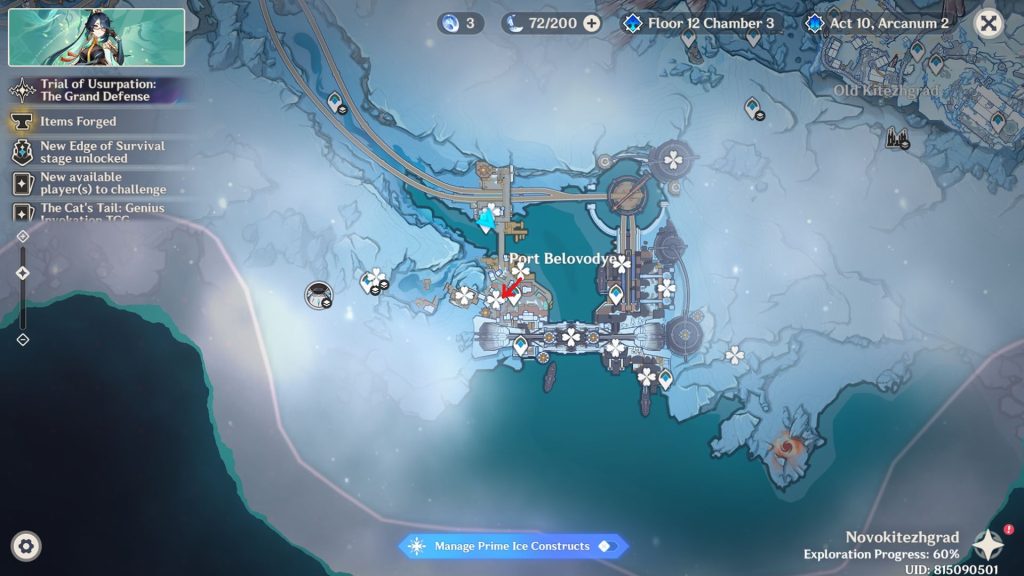
- Cryoculus 44
- Keep heading west. You will see the next Cryoculus on top of the structure.
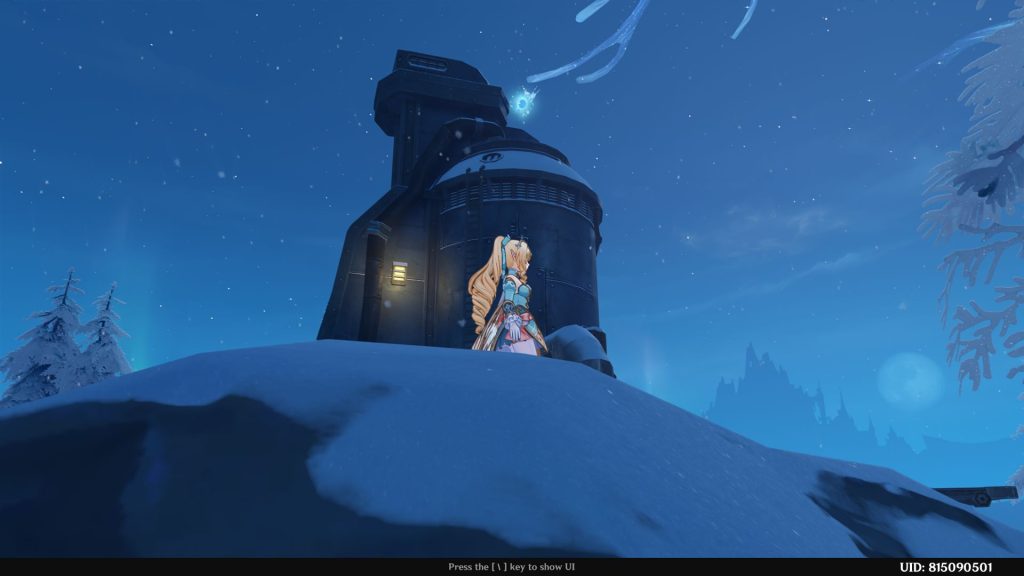
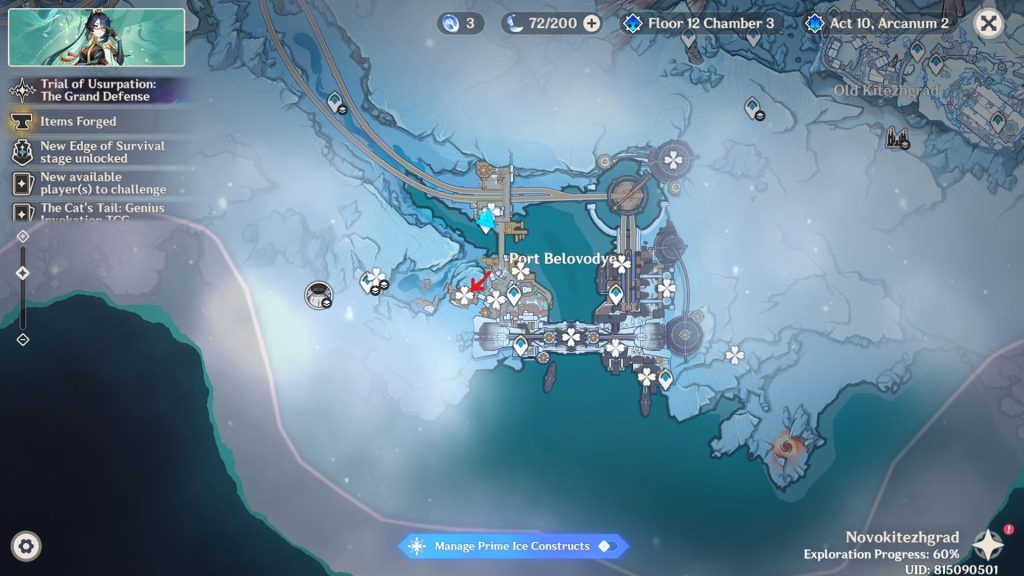
- Cryoculus 45
- Teleport to the underground waypoint leading into the Wavebinder boss. The Cryoculus will be behind you, on the above platform.
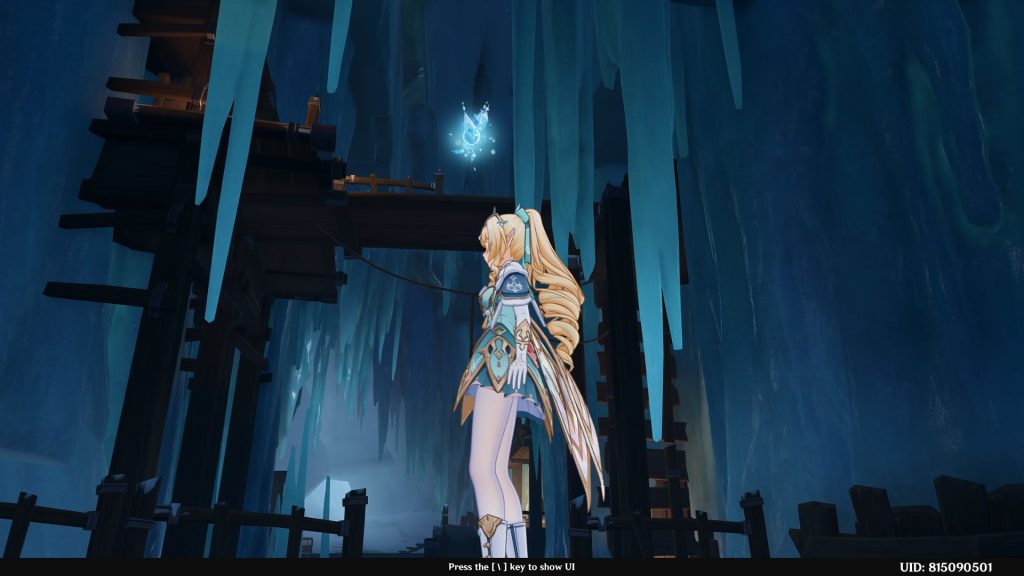
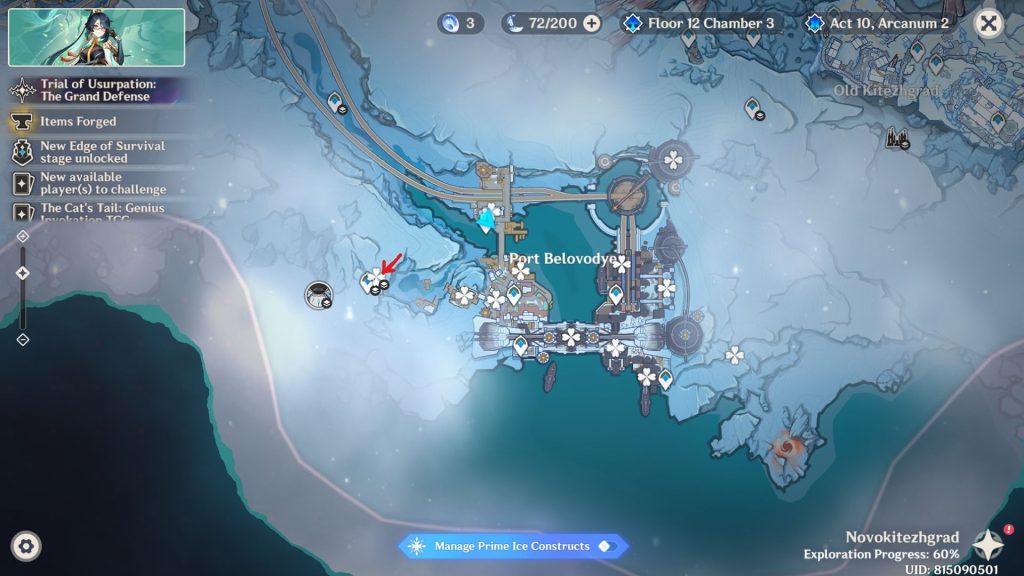
- Cryoculus 46
- Teleport to the bottom waypoint and keep walking on the bridge. The Cryoculus will be midair. You can reach it by fighting the enemies below, and activating the Starlight Prism. Make the bouncing construct and gain even higher height to get up.
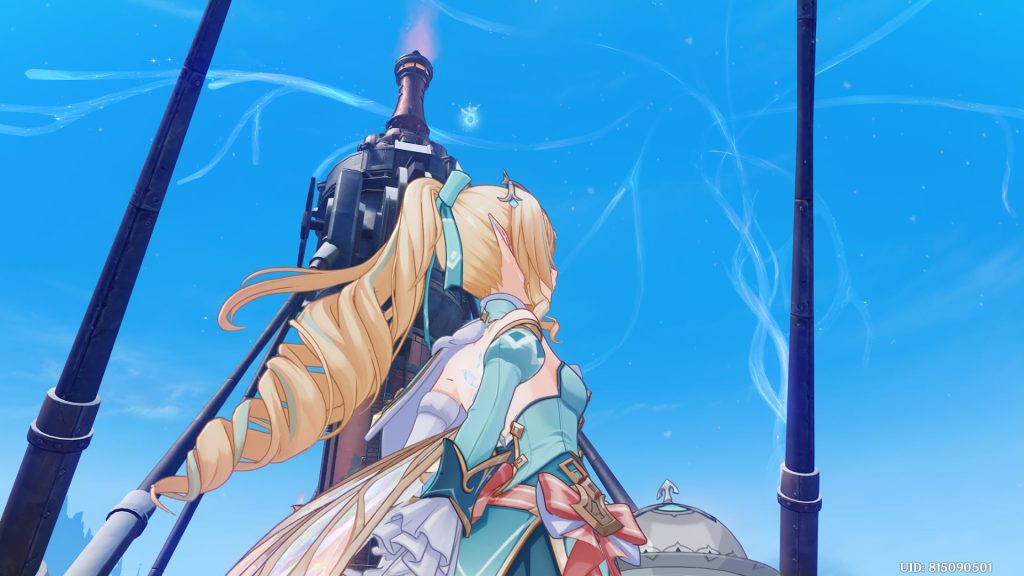
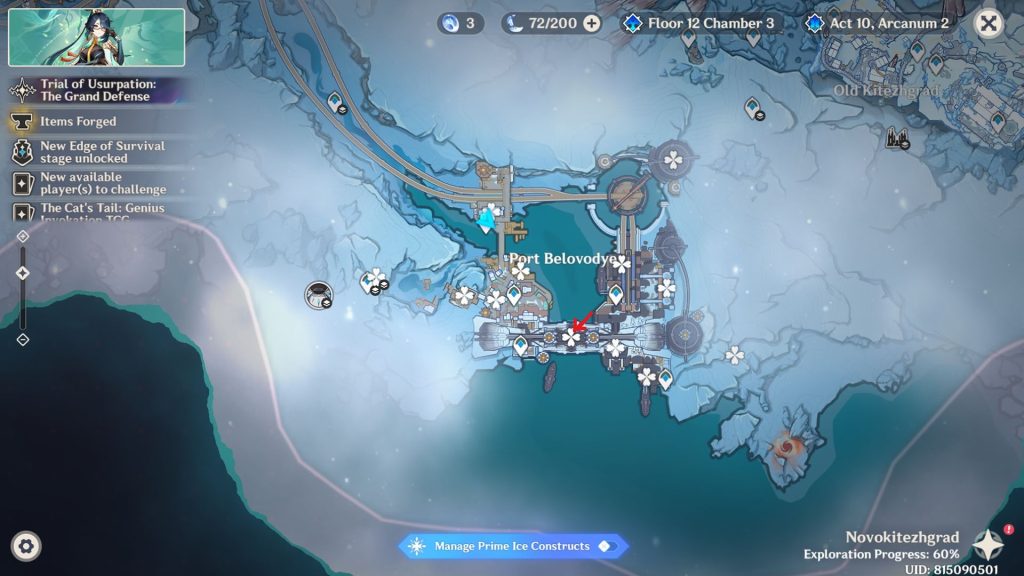
- Cryoculus 47
- Keep heading east, and the Cryoculus will be on the right side of the bridge.
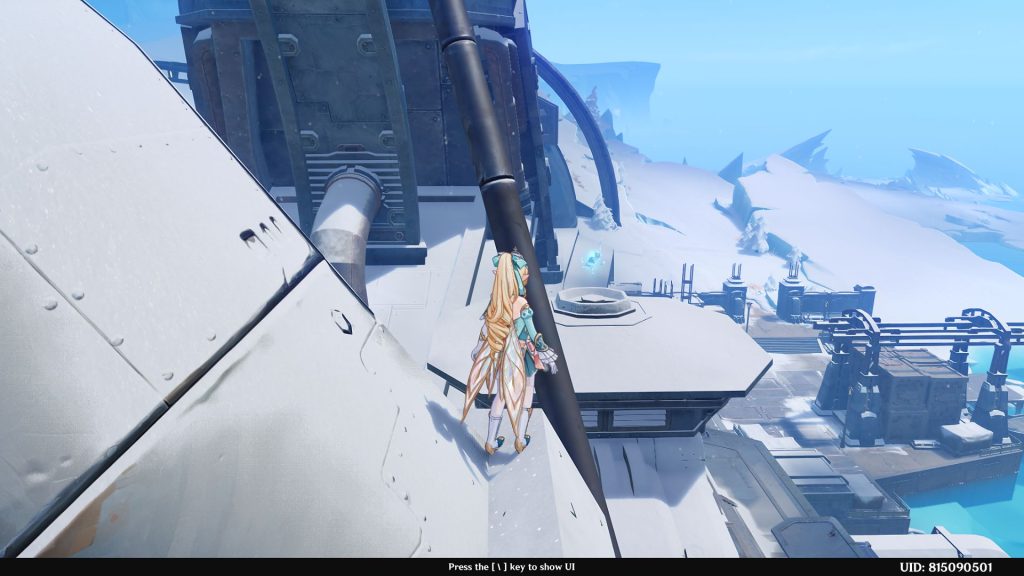
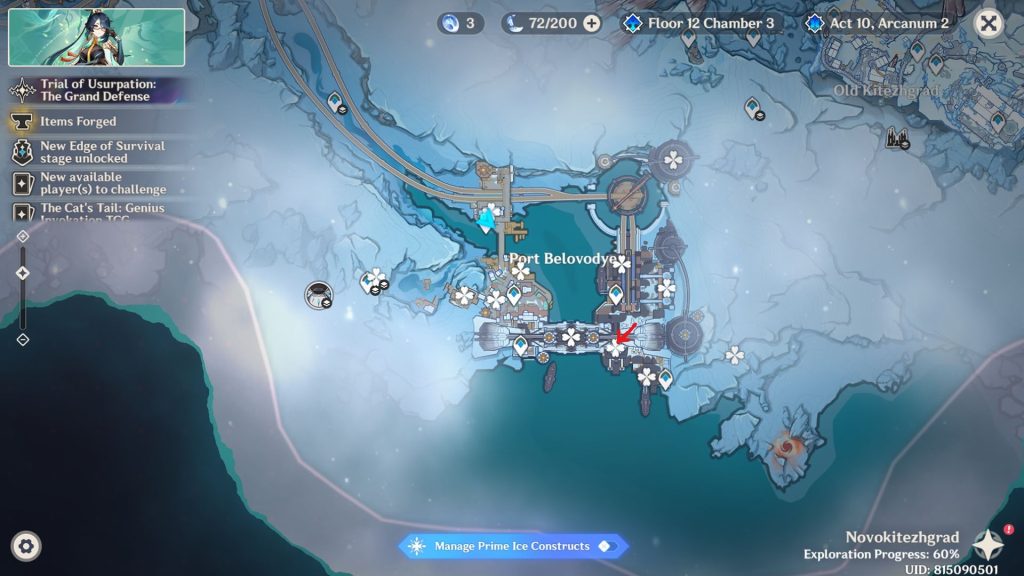
- Cryoculus 48
- Teleport to the bottom-left waypoint and head west. There will be some containers. You have to use a construct to break the path and go inside these to collect the Cryoculus.
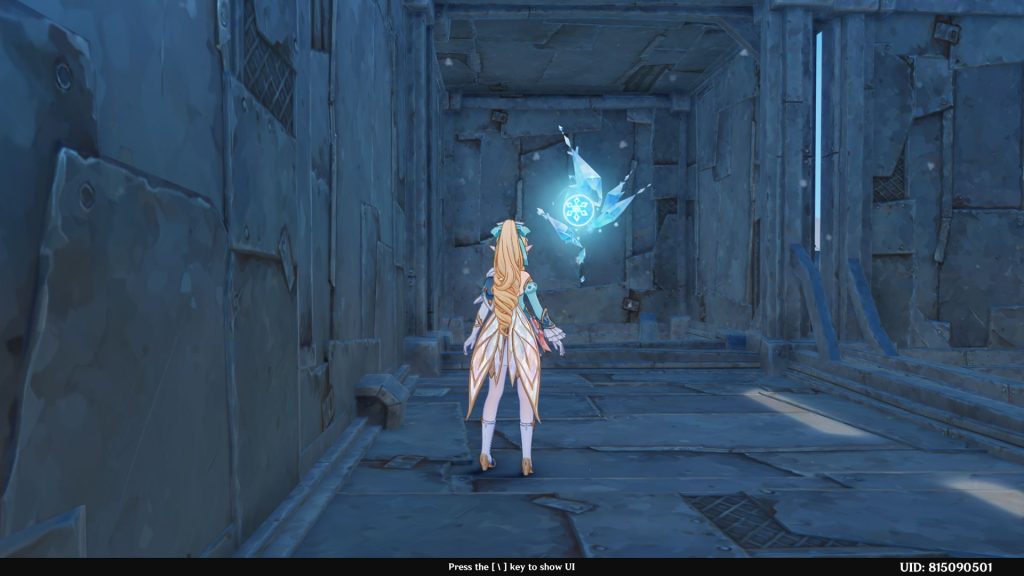
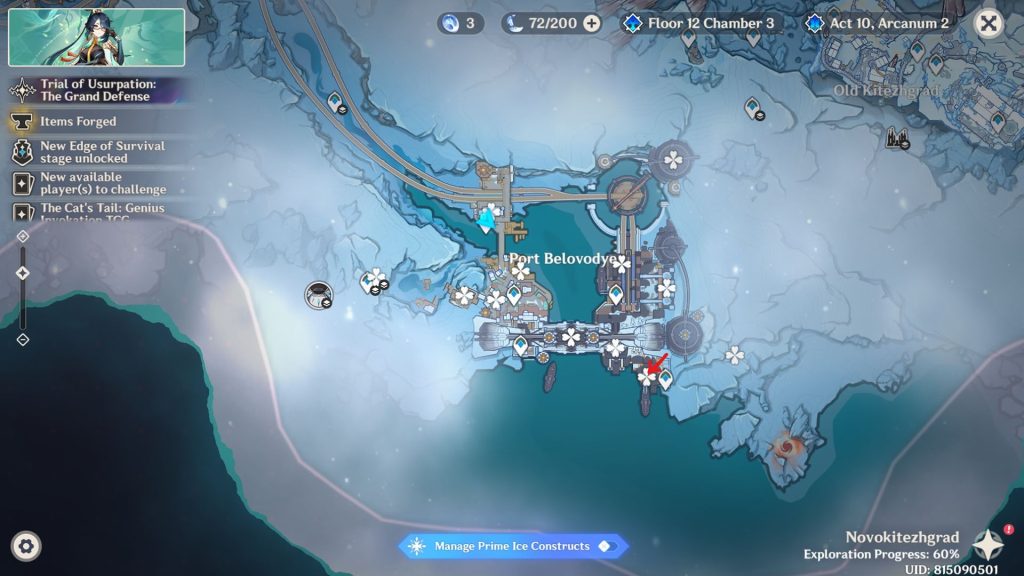
- Cryoculus 49
- Keep heading east, and you will see one of the newer enemies. The Cryoculus will be right next to it.
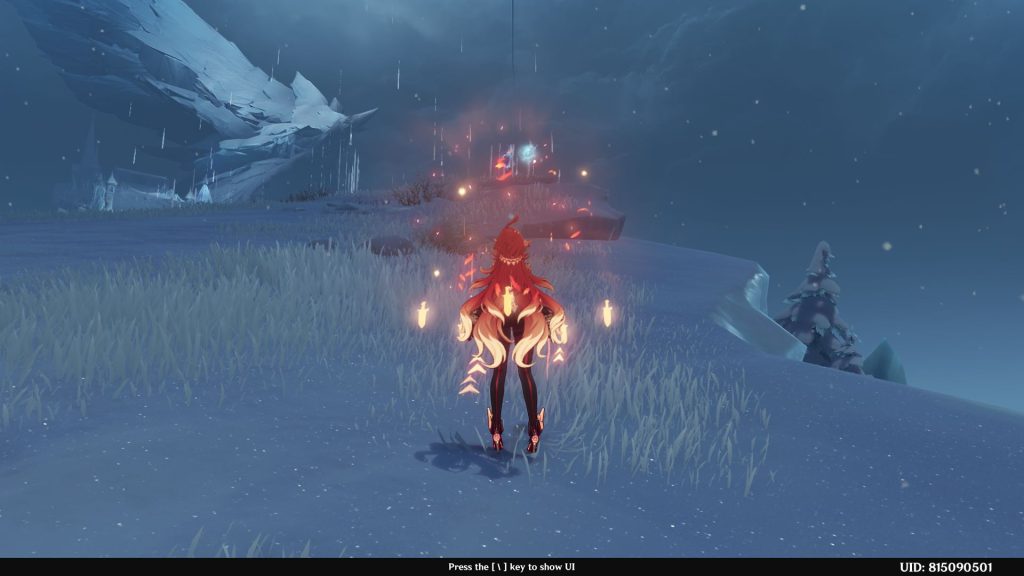
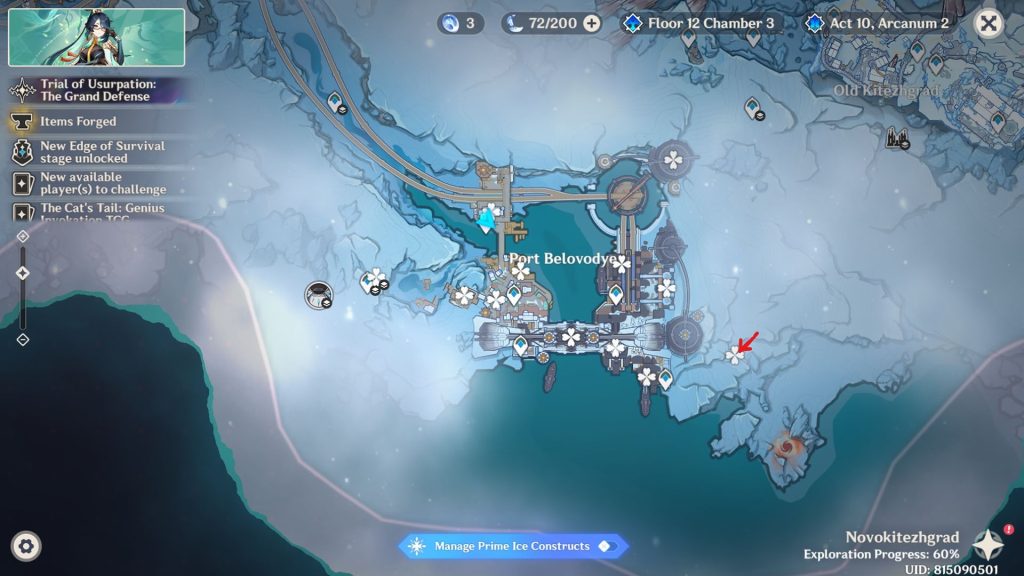
- Cryoculus 50
- Head northwest to the three furnaces. The Cryoculus will be on top of the middle one.
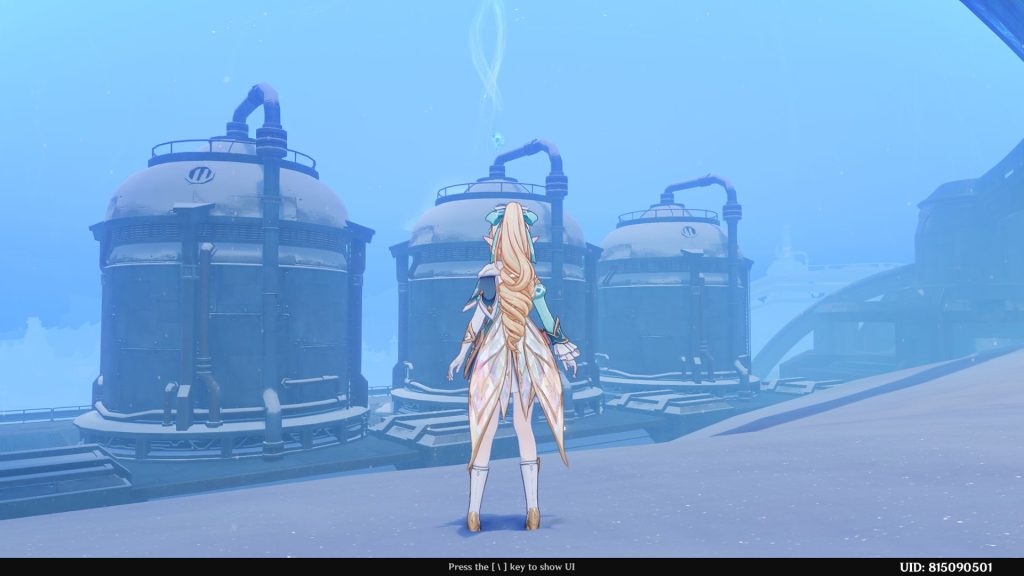
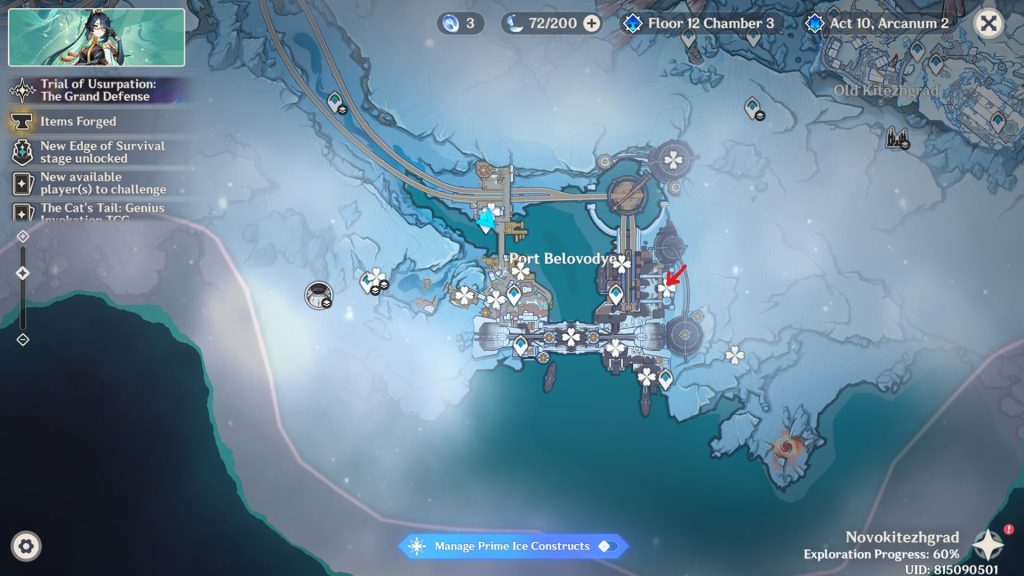
- Cryoculus 51
- Head further west. The Cryoculus is inside the tracks. There are openings on the edges that you can enter through.
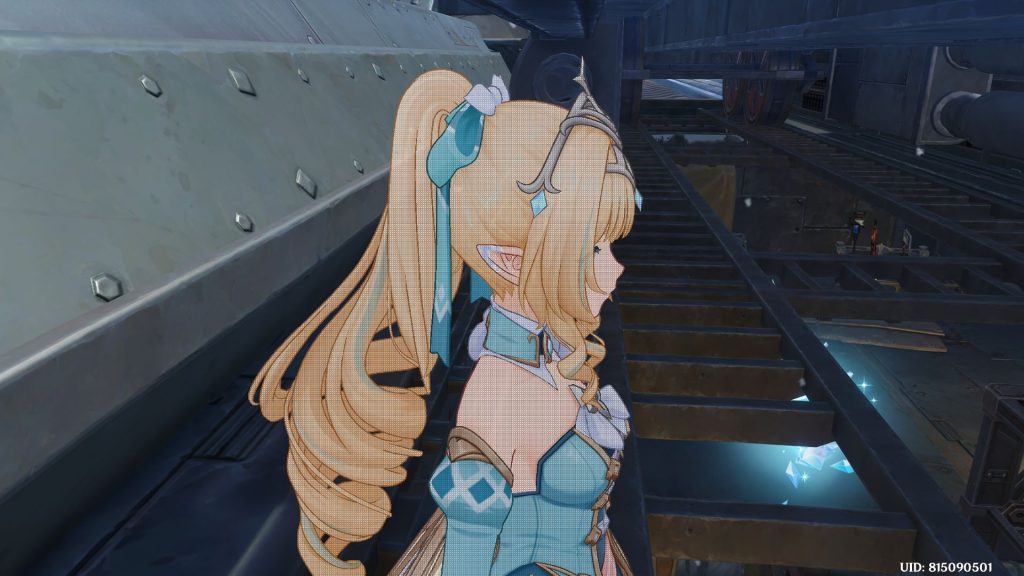
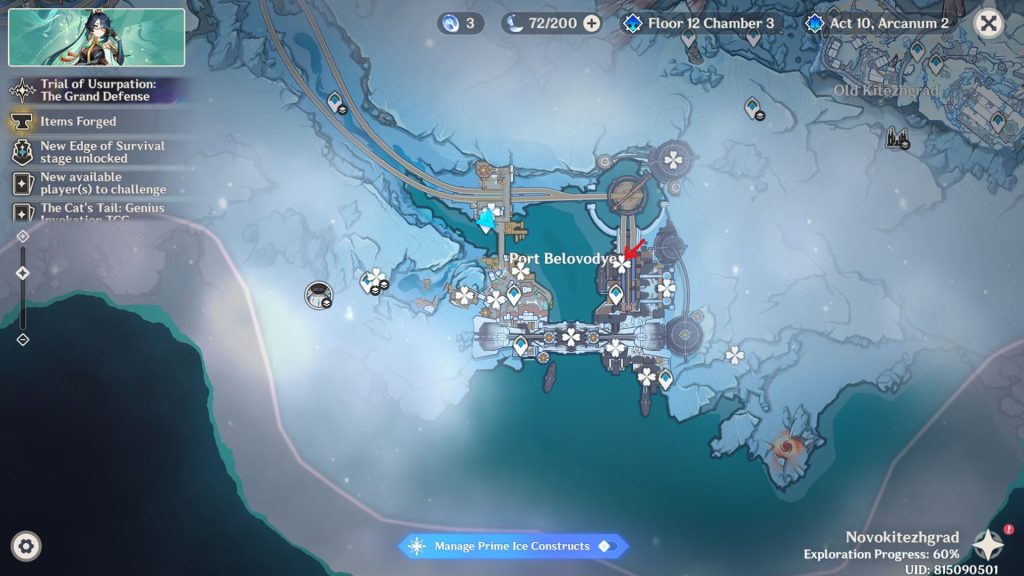
- Cryoculus 52
- Head to the furnace far to the northeast. There will be Vortexes that you can use to get up there for the Cryoculus.
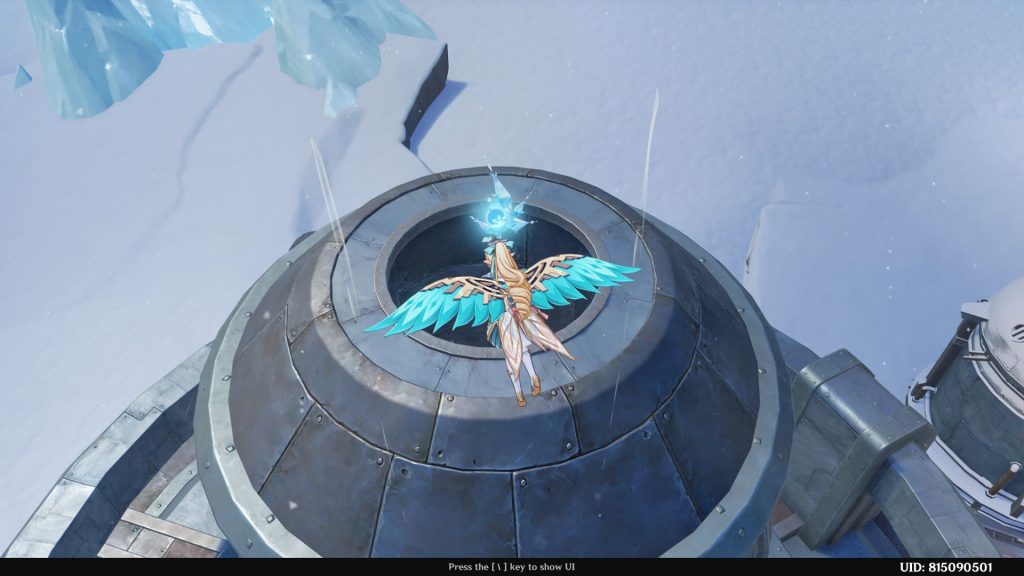
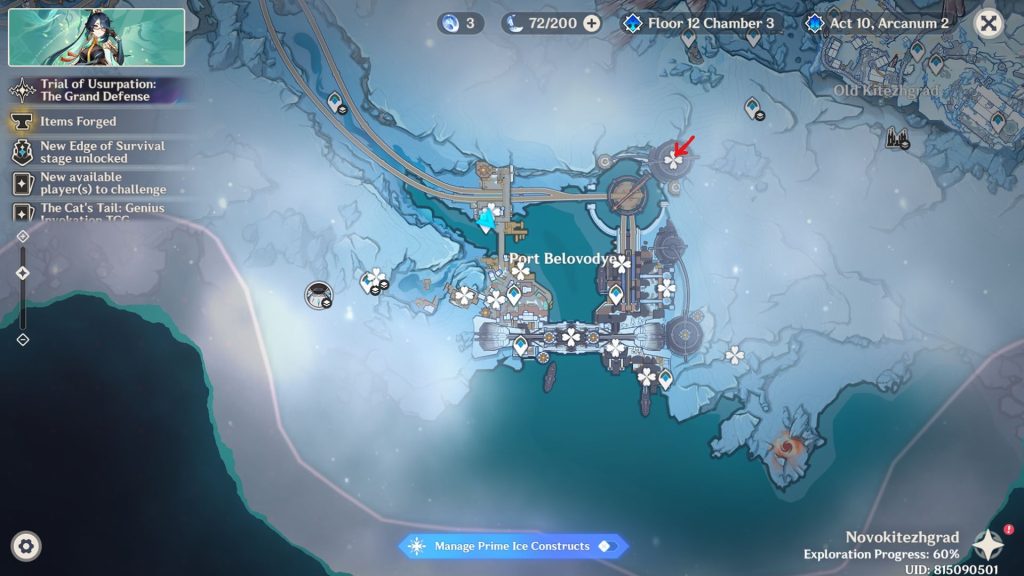
Wingspan Peak
We can now move on to Wingspan Peak, which includes the Teplo Oasis, Hallowed Plain, Star-Piercing Canyon, Old Kitezhgrad, Palace of Glacial Reflections, and Hollow of the Ancient Scaled One.
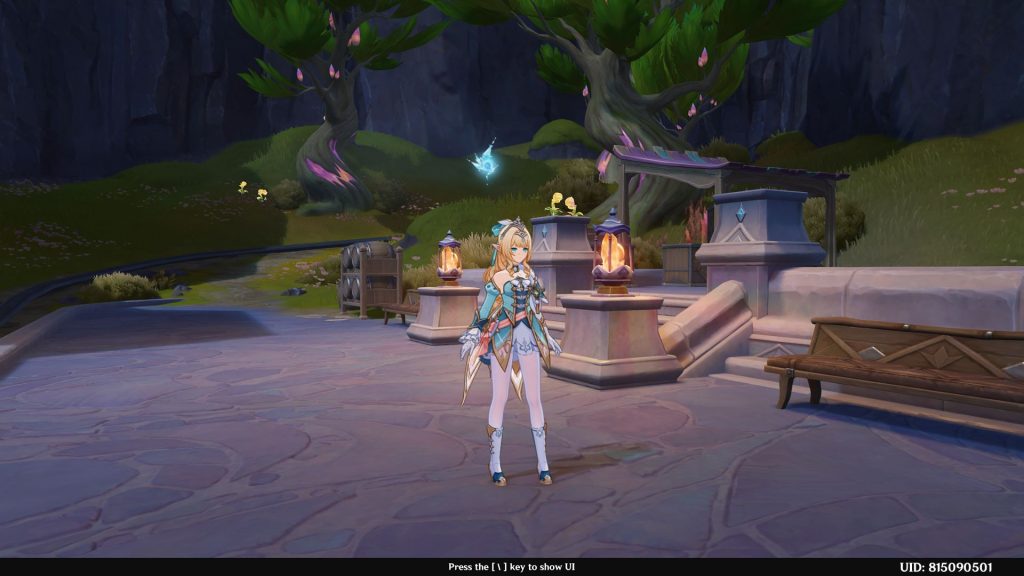
- Cryoculus 53
- Teleport to the waypoint at the entrance of Teplo Oasis. The Cryoculus will be right behind you.
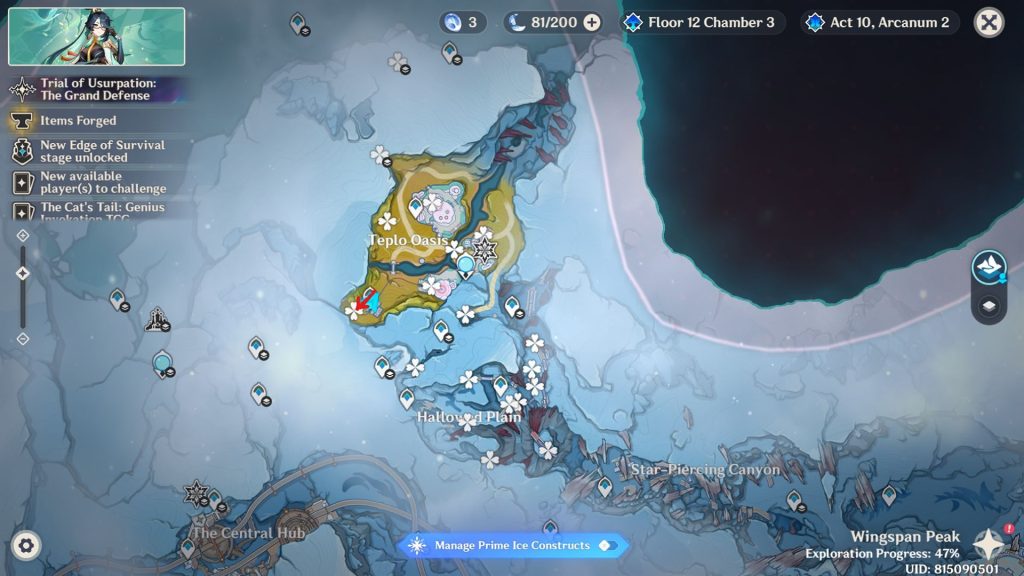
- Cryoculus 54
- Run towards the Statue of the Seven and you will see the next Cryoculus on top of the house.
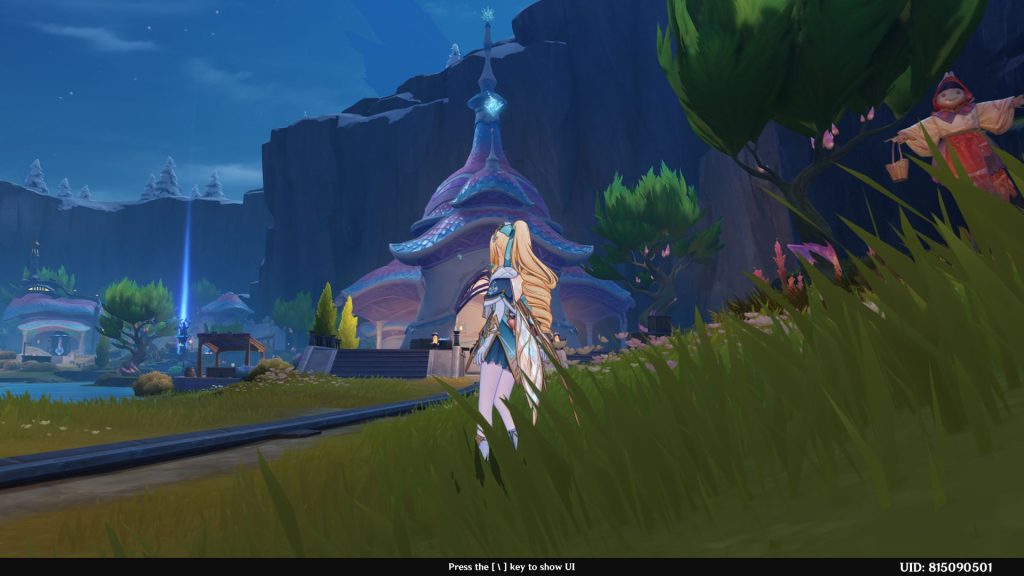
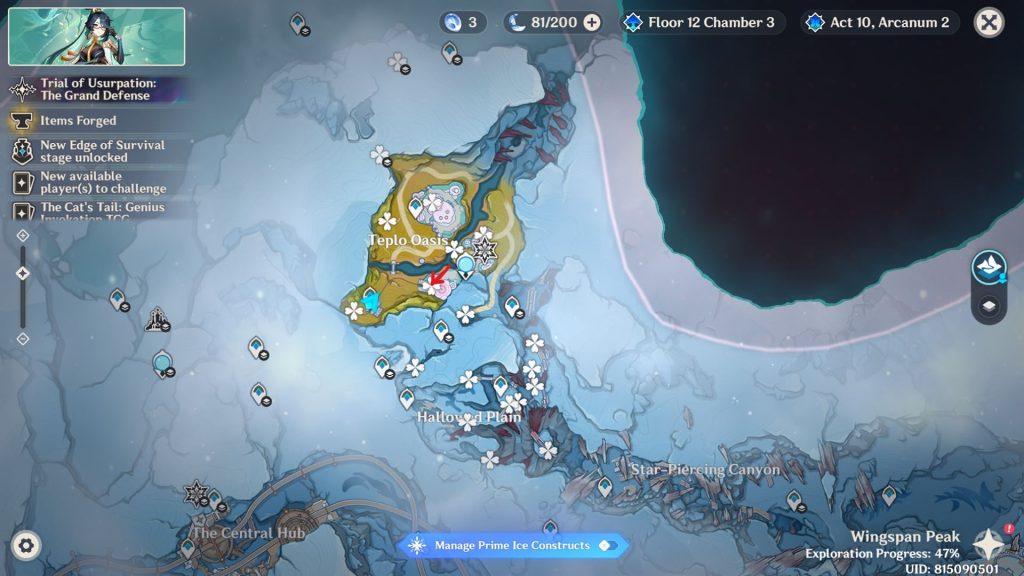
- Cryoculus 55
- Teleport to the waypoint at the center and look up towards the east. The Cryoculus is above the chimney.
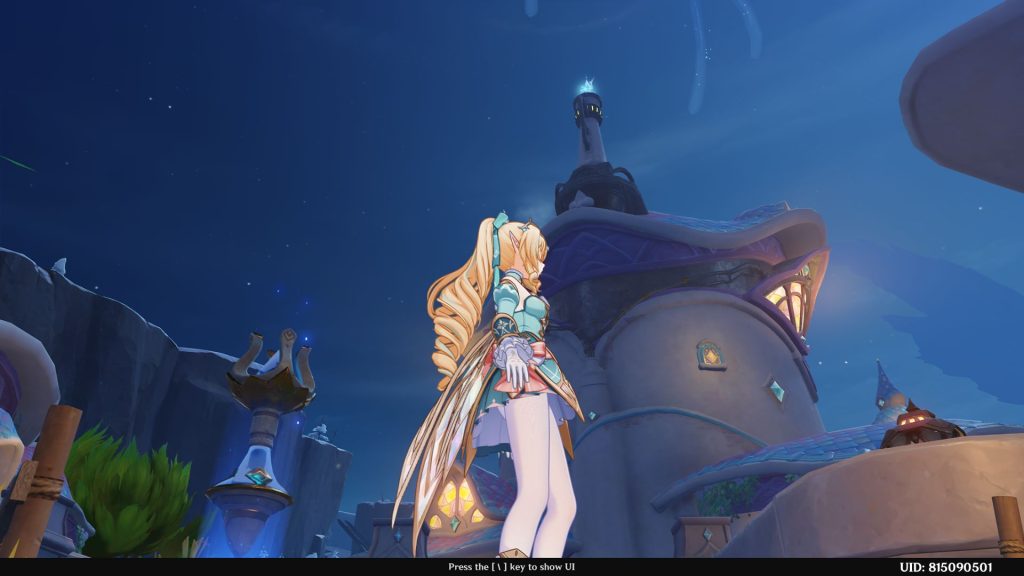
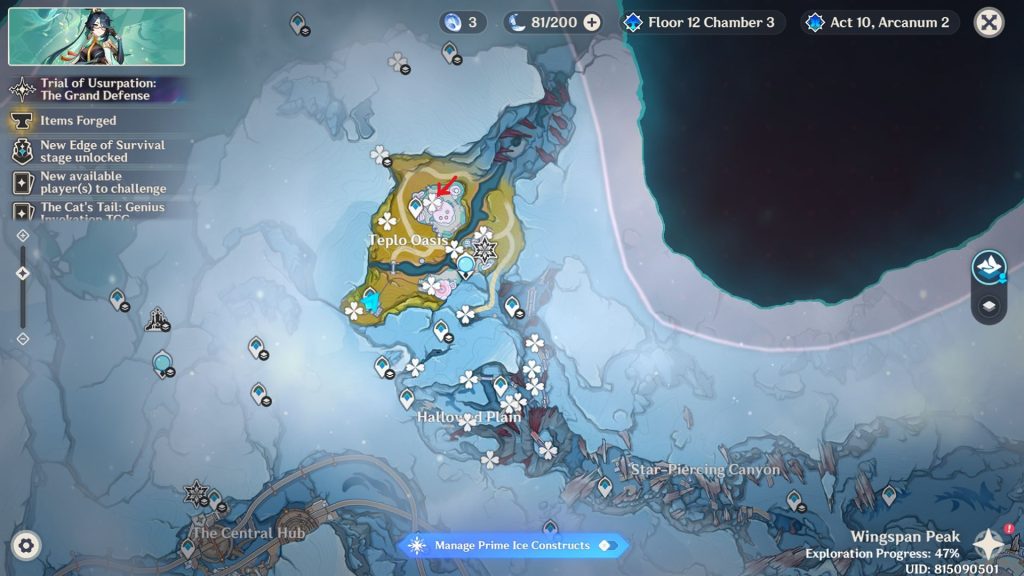
- Cryoculus 56
- Glide west, and the next Cryoculus is out in the open.
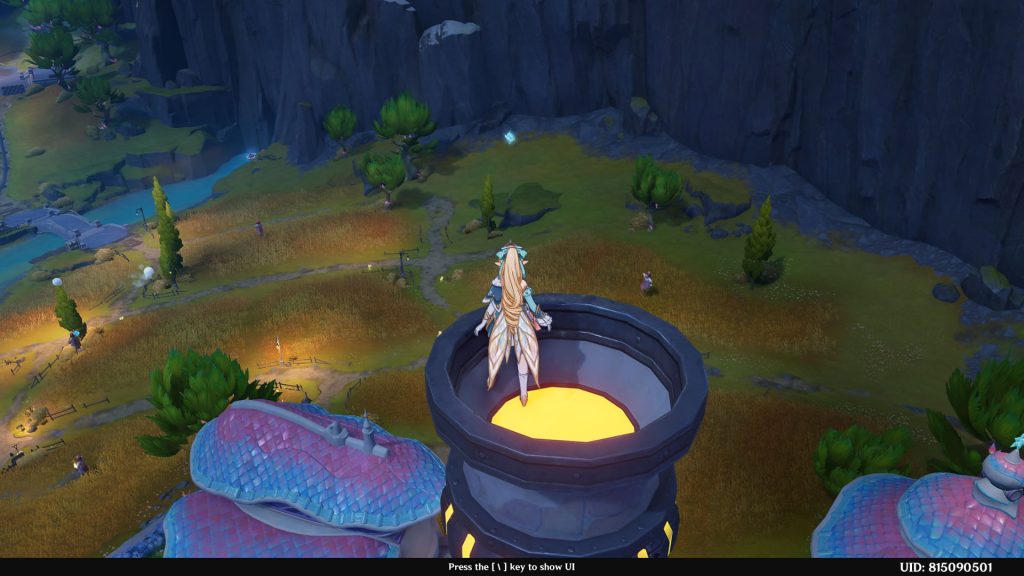
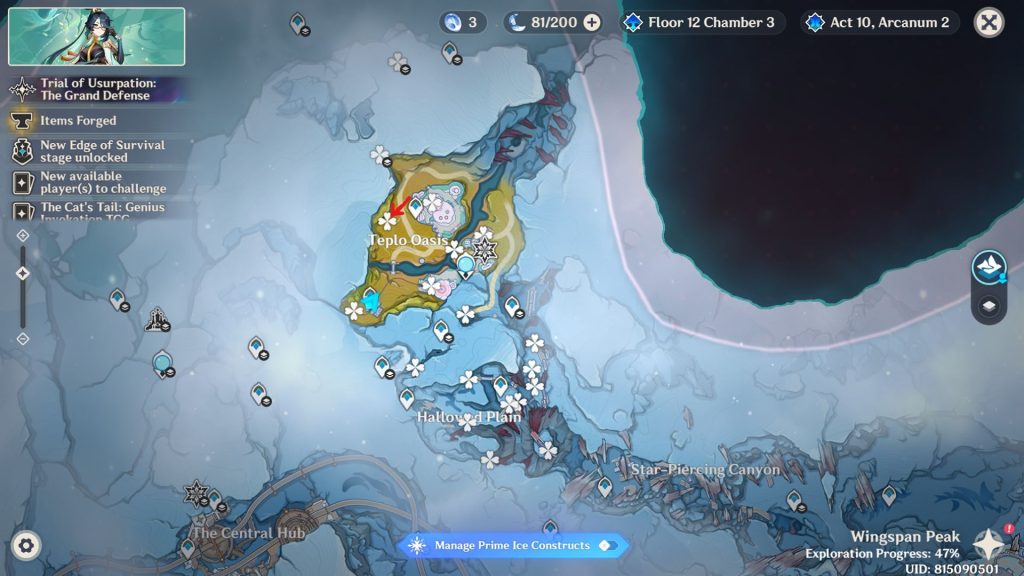
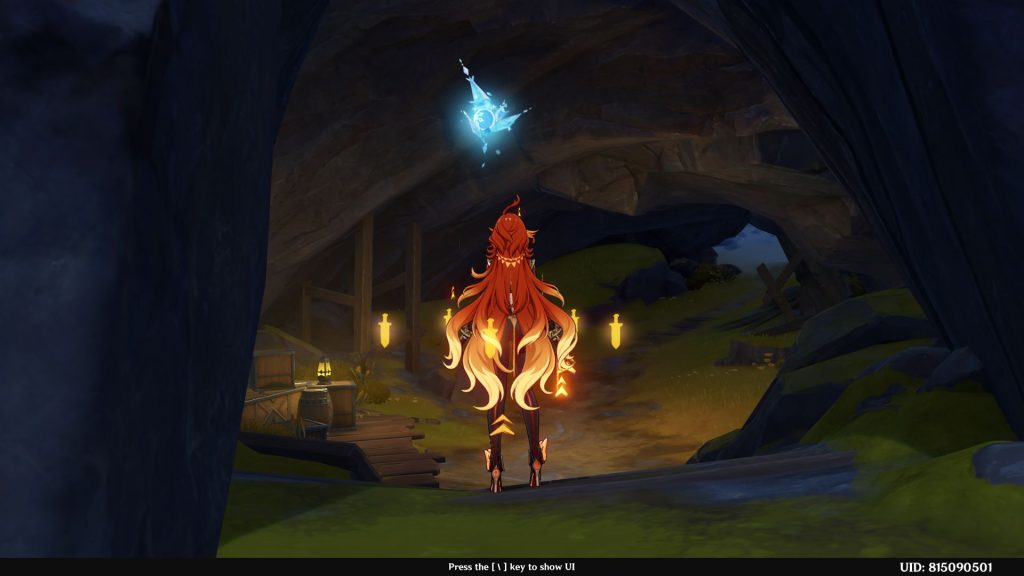
- Cryoculus 57
- Enter the cave at the north, the one you opened during Mitya’s second Meeting Point quest. The Cryoculus is at the entrance.
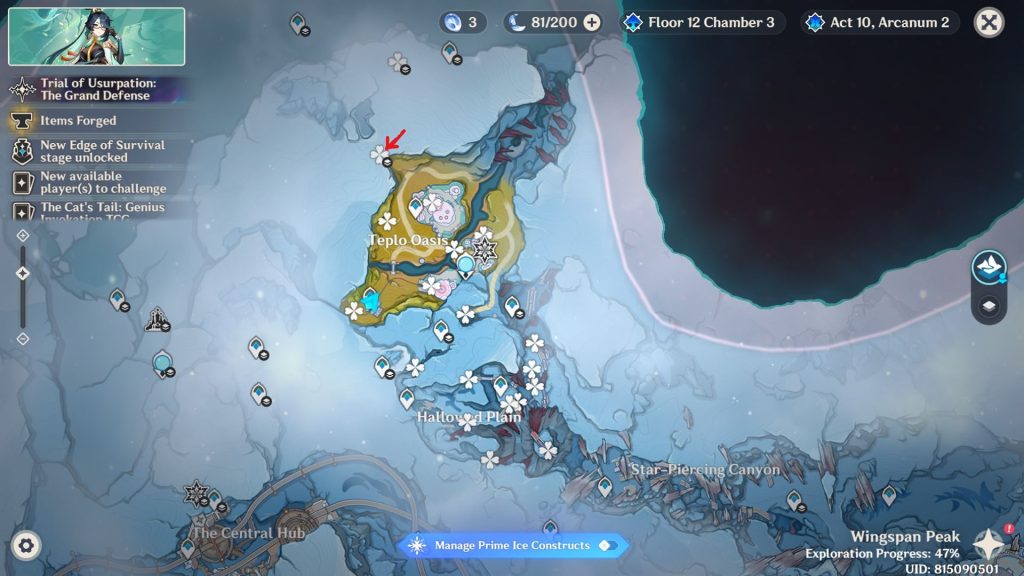
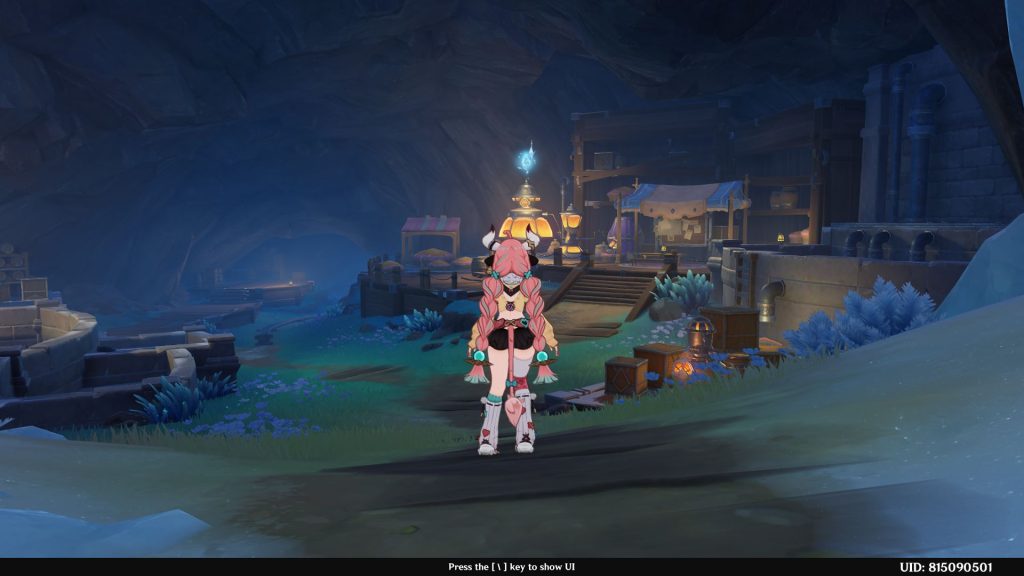
- Cryoculus 58
- Go deeper into the cave and you will see the Cryoculus at the camp.
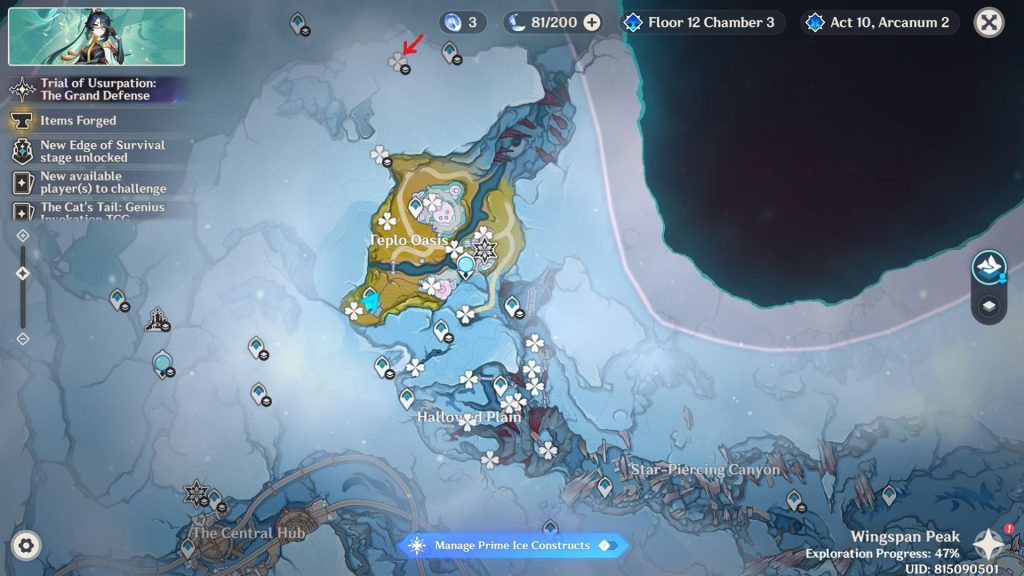
- Cryoculus 59
- Teleport to the Statue of the Seven and go a bit to the north. The Cryoculus is under the small waterbridge.
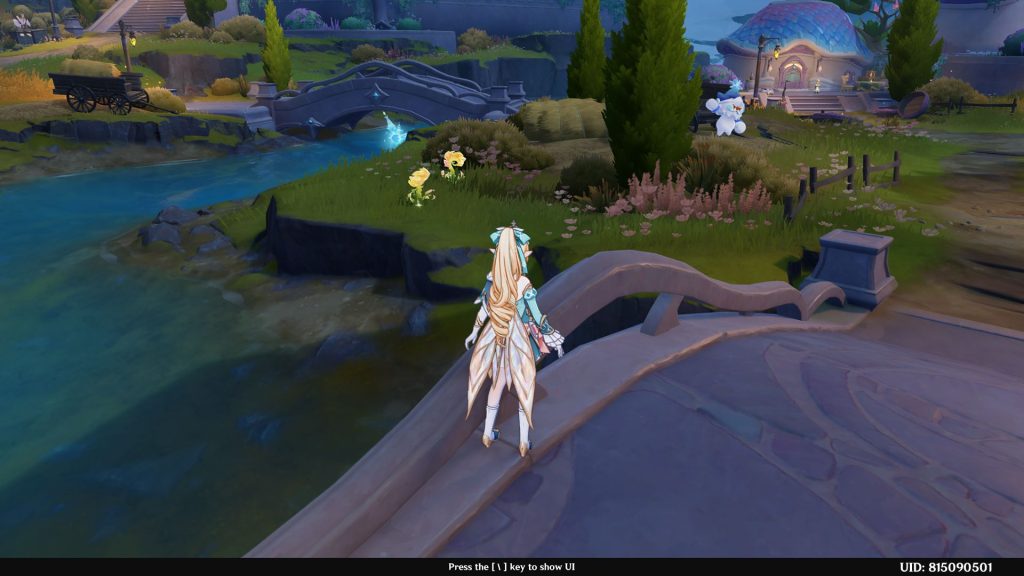
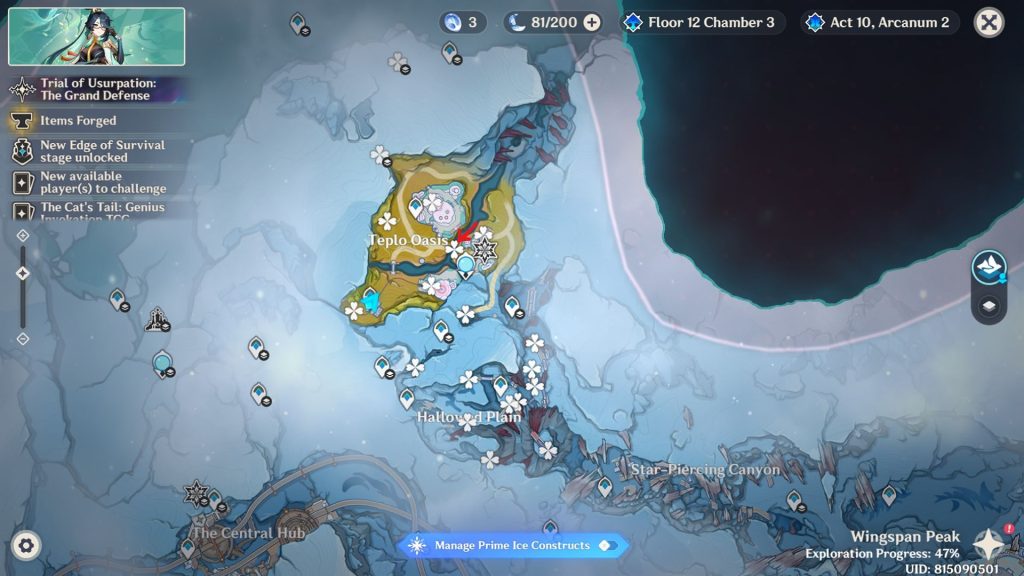
- Cryoculus 60
- Follow the path that goes outside of Teplo Oasis, and you will see the Cryoculus up in midair. Use Vortexes under it to get it.
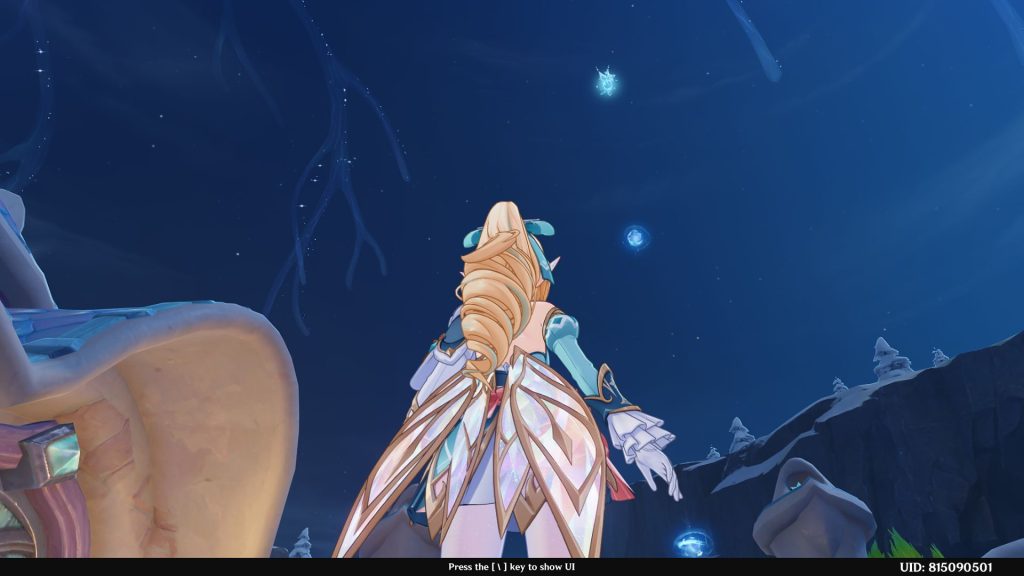
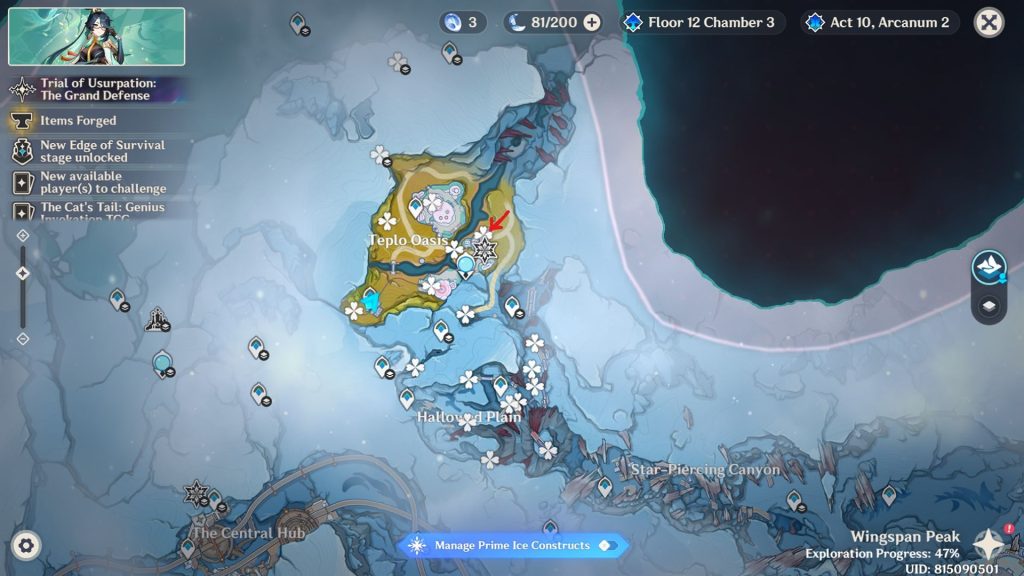
- Cryoculus 61
- Go into the Hallowed Plain, and you will find the next Cryoculus near the Shrine of Depths.
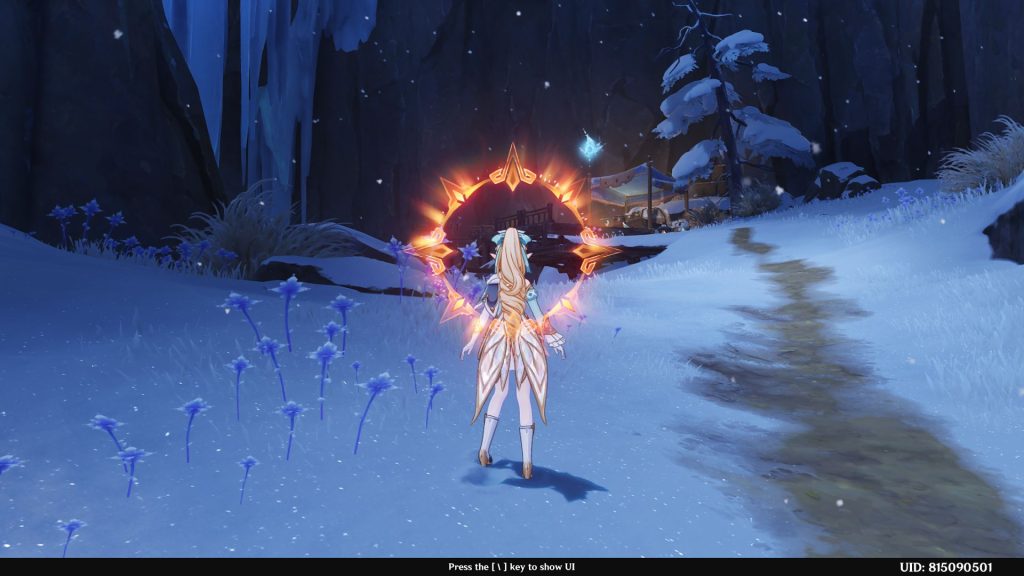
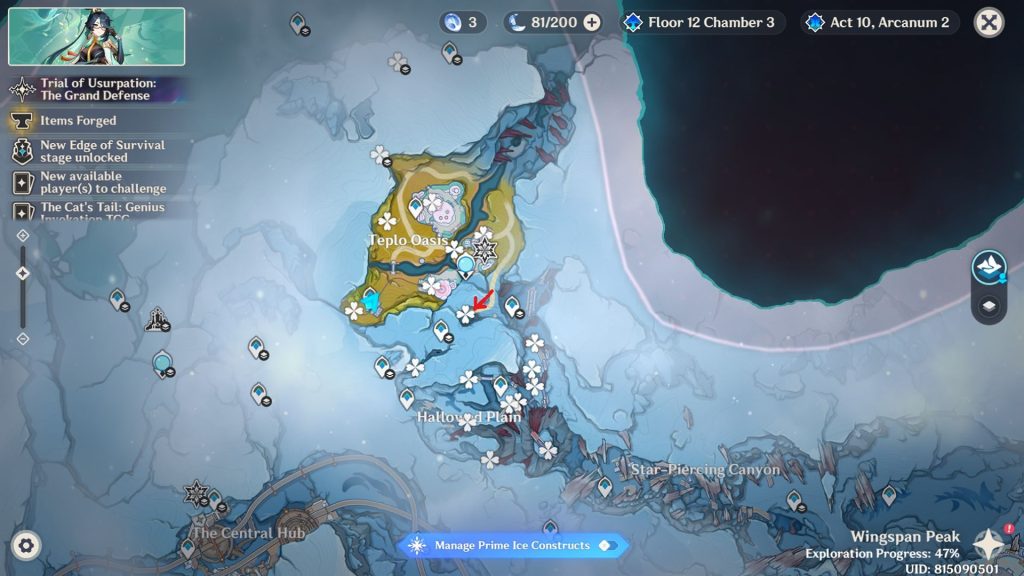
- Cryoculus 62
- Follow the icy path, and the next Cryoculus will be along the way.
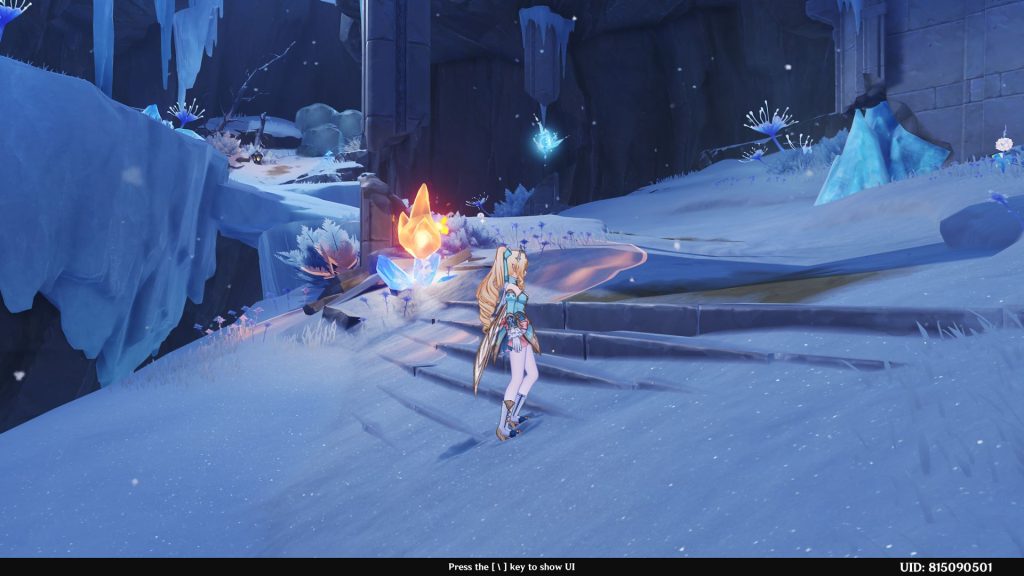
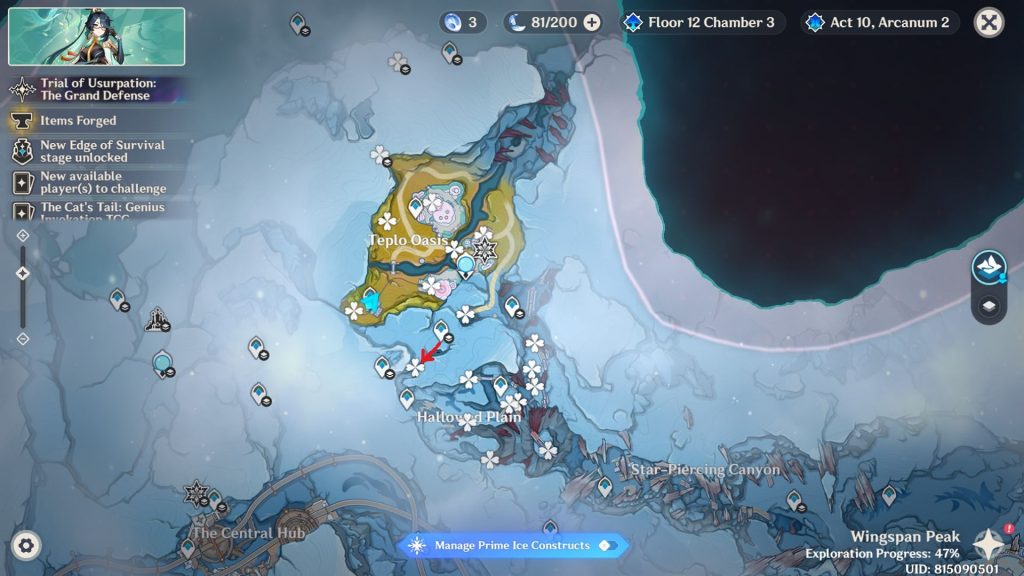
- Cryoculus 63
- Teleport to the nearby waypoint and head east, a bit to the south. The Cryoculus will be right up ahead.
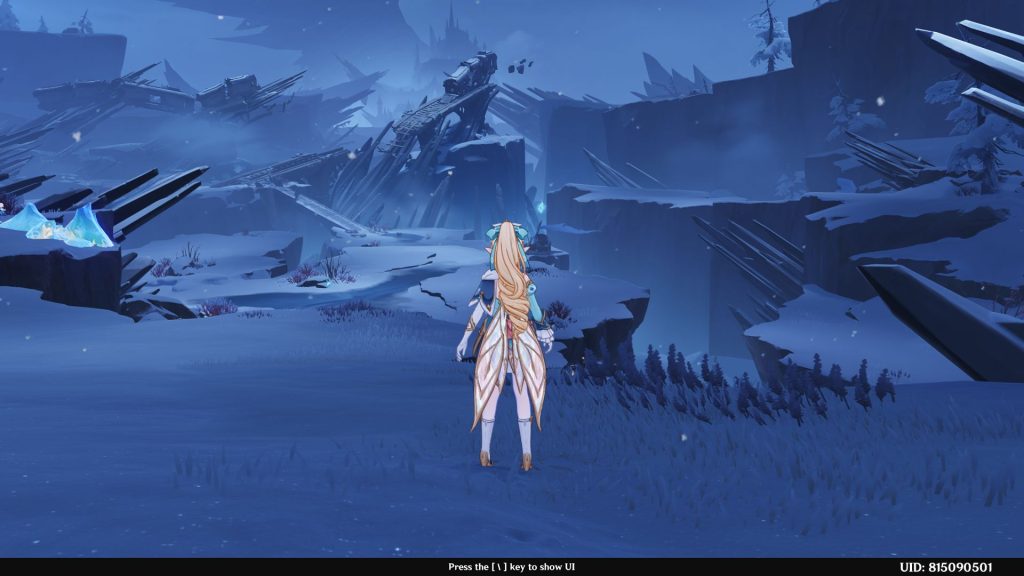
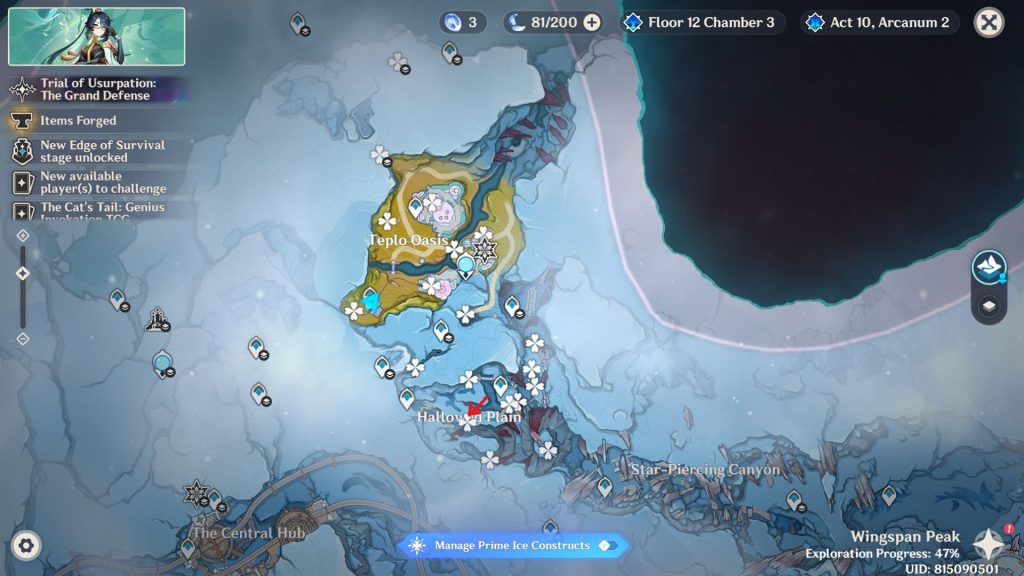
- Cryoculus 64
- Head south, a bit to the east. The Cryoculus is on top of the snow.
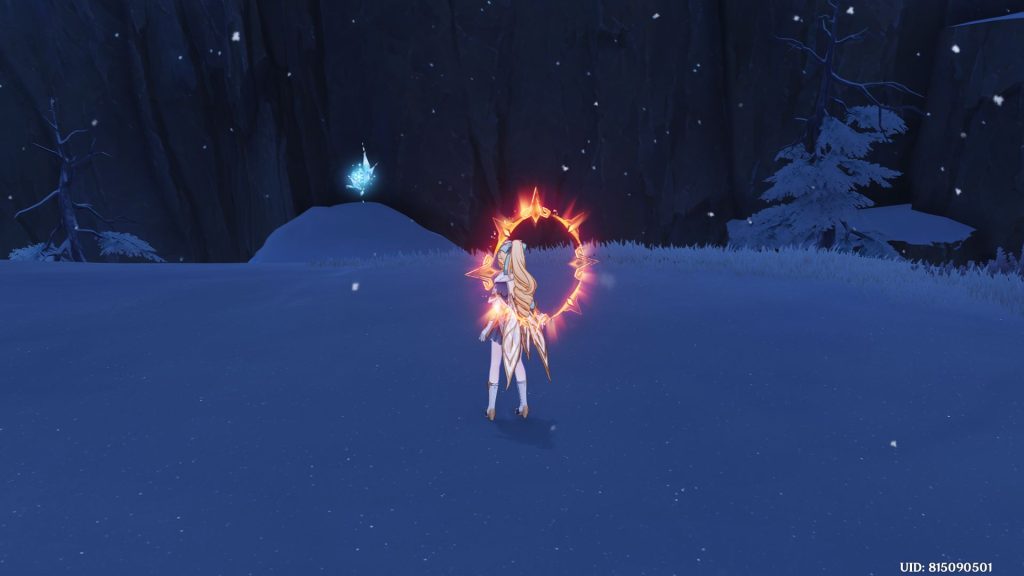
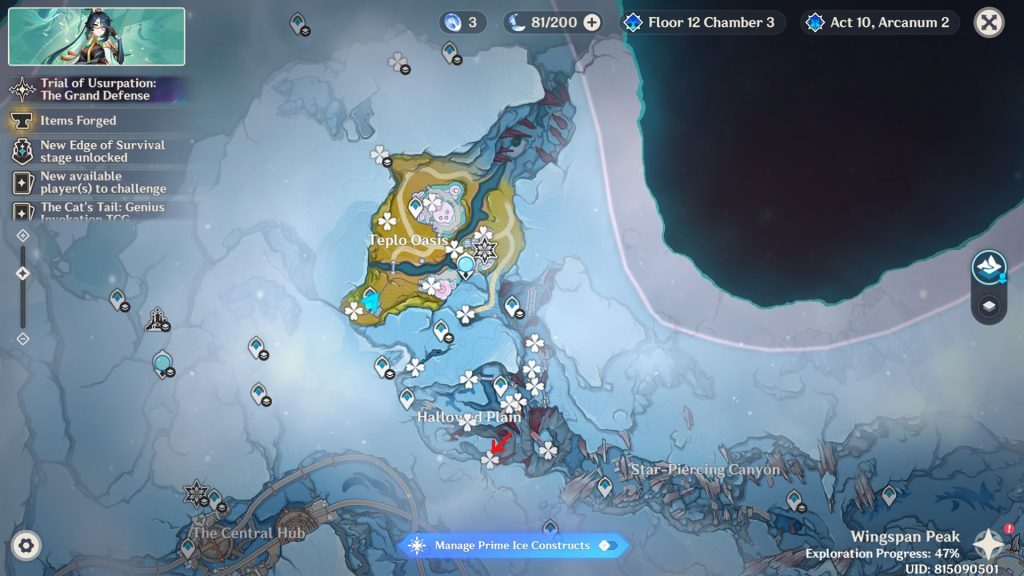
- Cryoculus 65
- Teleport to the center waypoint and jump down to the nearby trainwrecks to the west. The Cryoculus will be inside it.
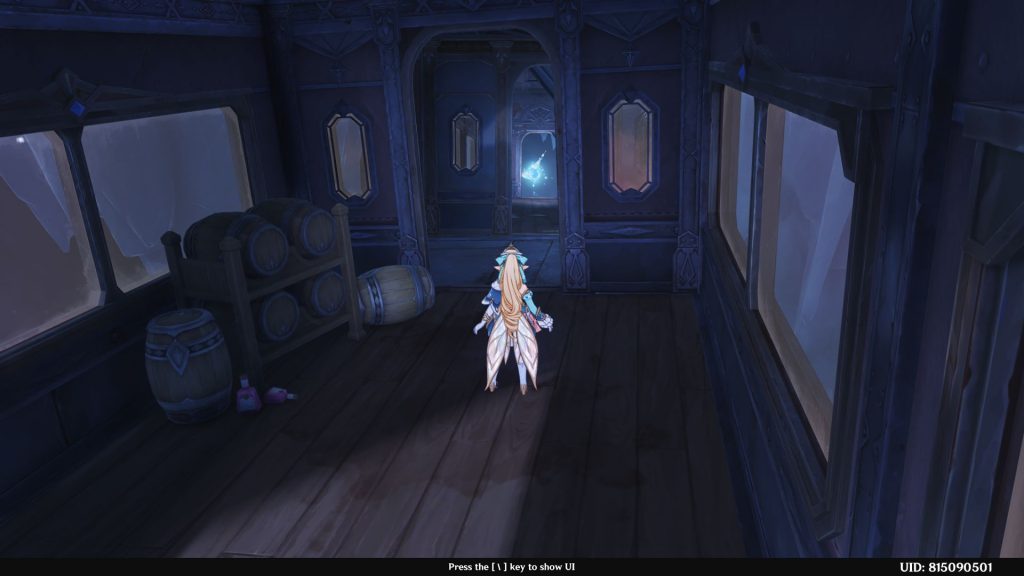
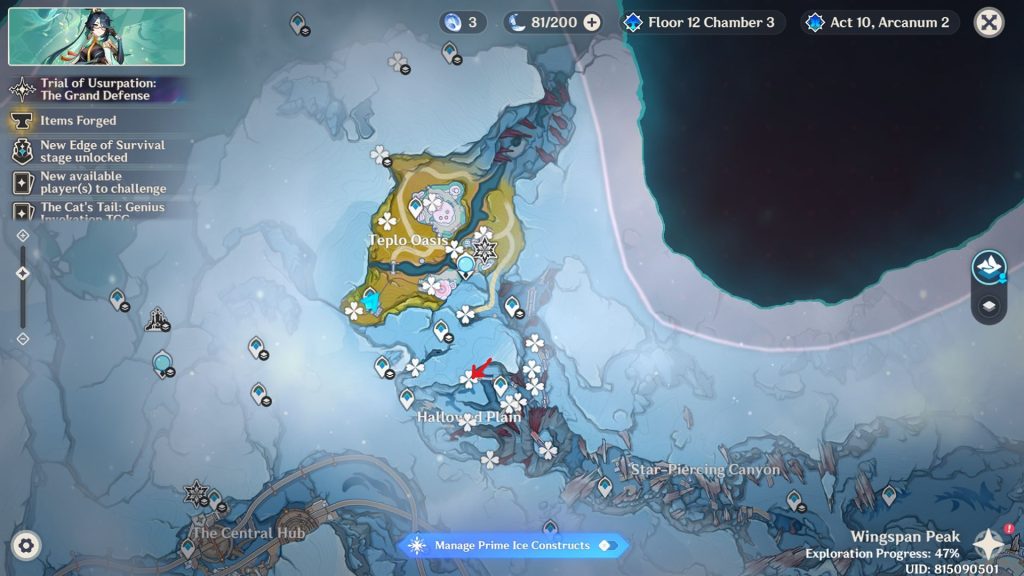
- Cryoculus 66
- Teleport back to the waypoint and jump to the trainwrecks on the east this time. The Cryoculus is inside there.
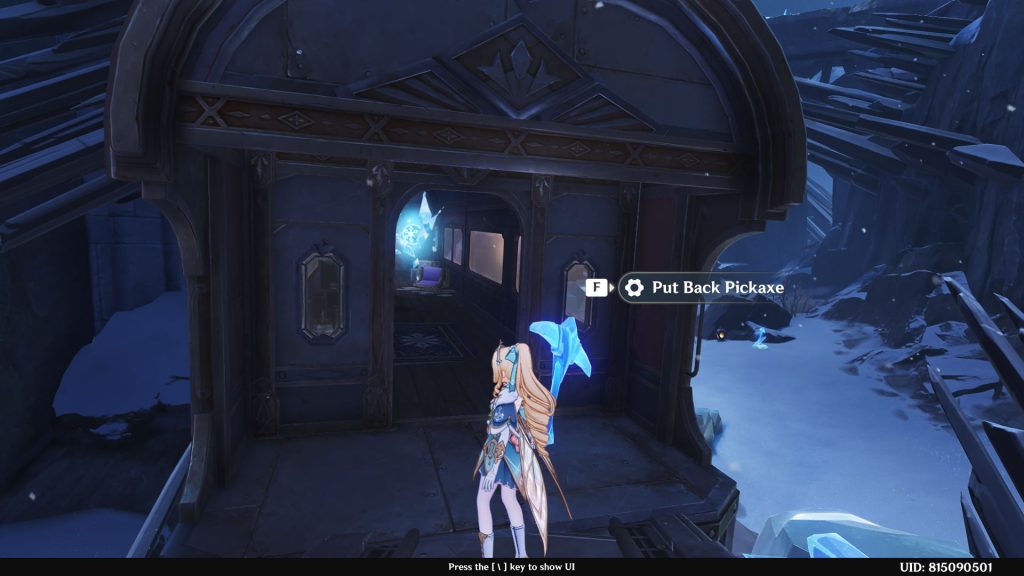
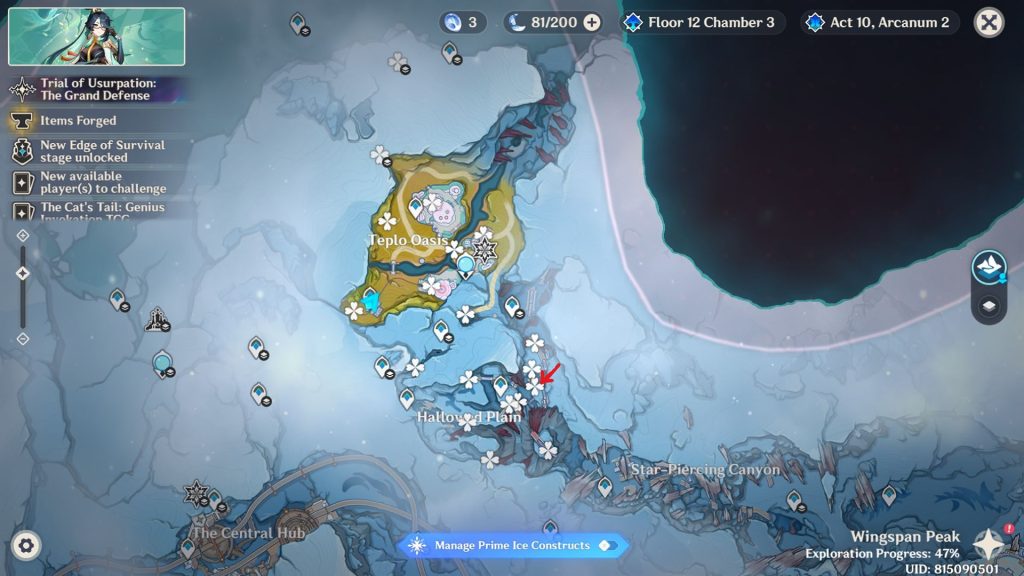
- Cryoculus 67
- Go behind and enter the train connecting to this one. Follow the path to see the next Cryoculus.
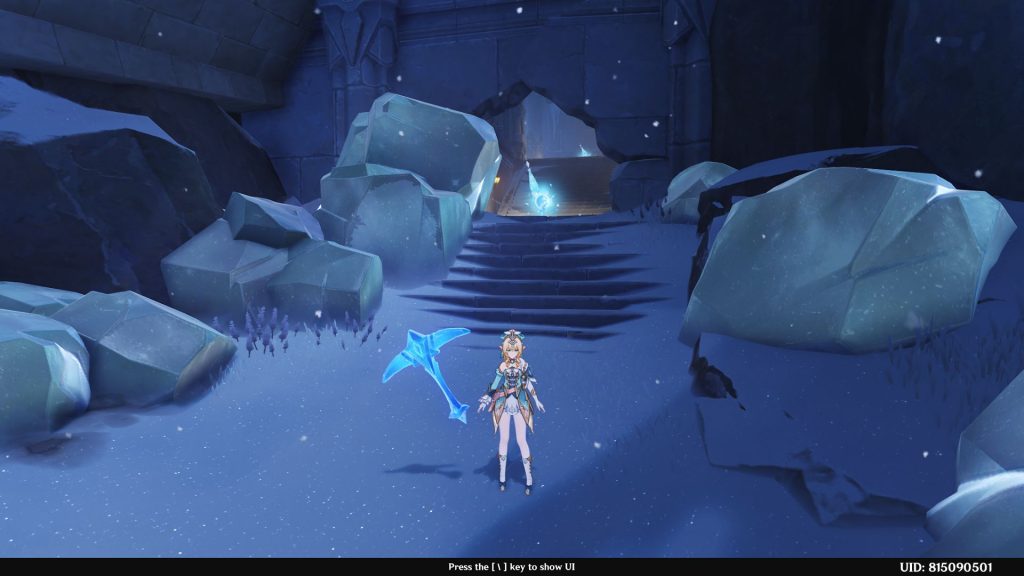
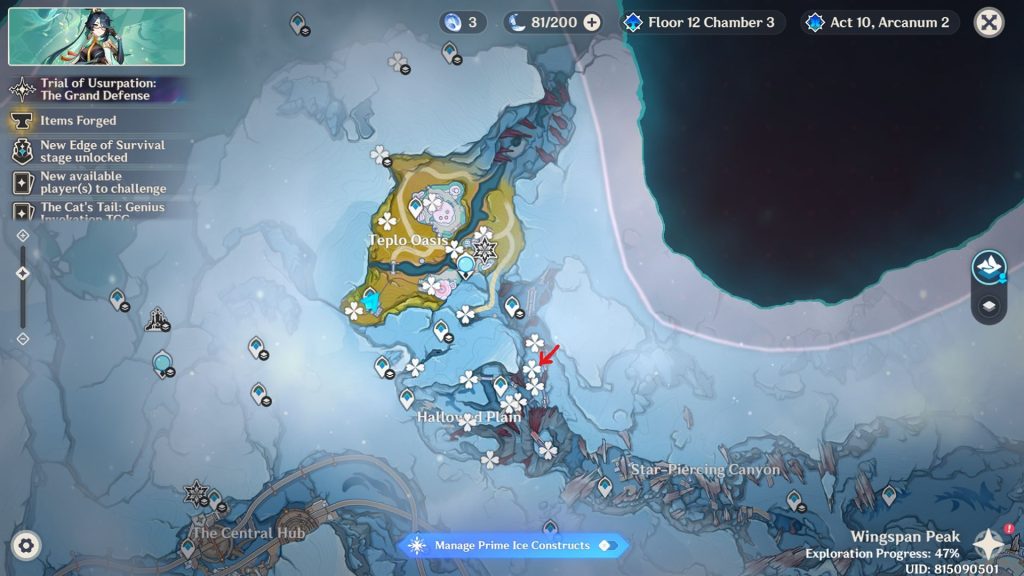
- Cryoculus 68
- This Cryoculus is visible right ahead when you collect the previous one.
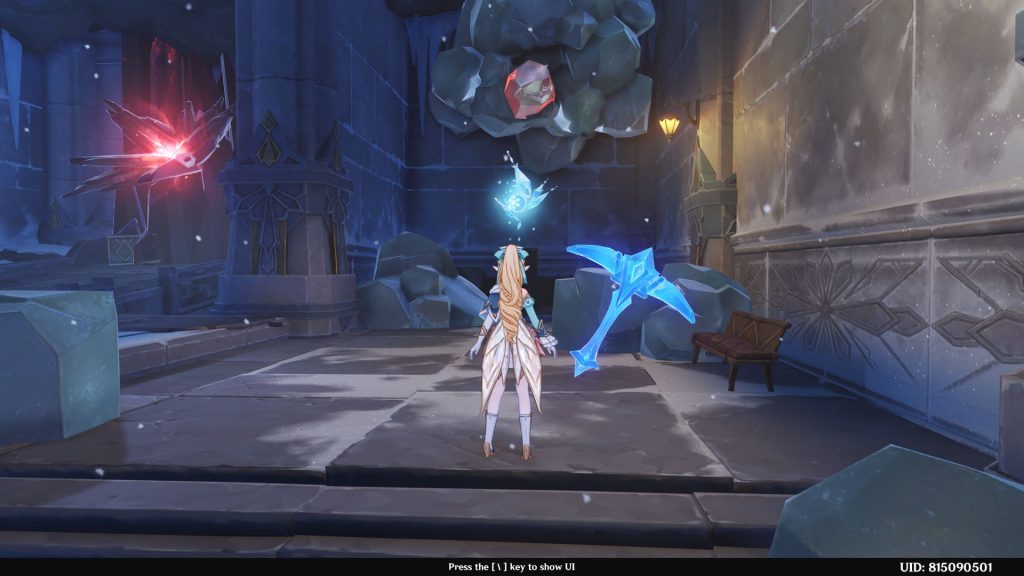
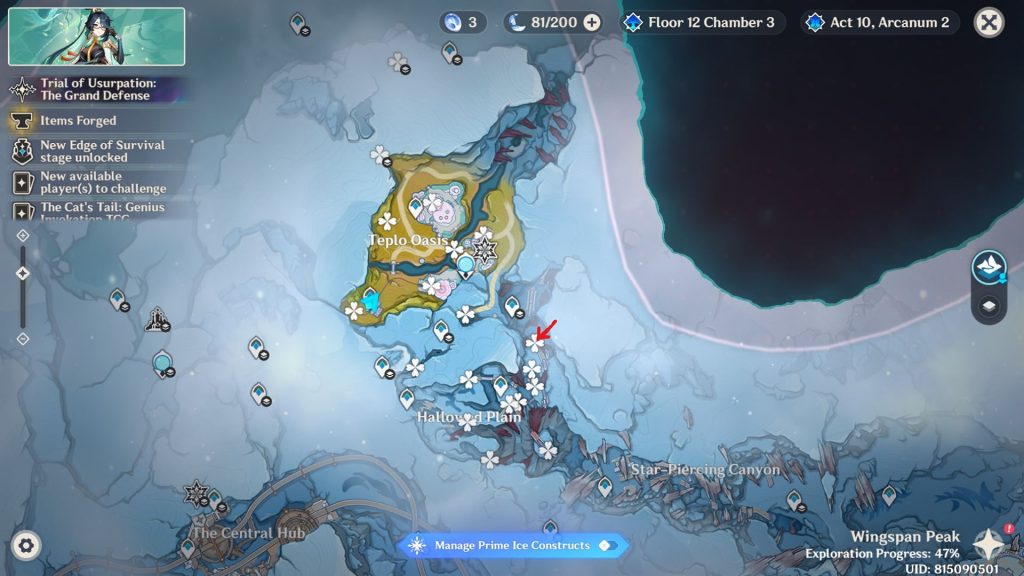
- Cryoculus 69
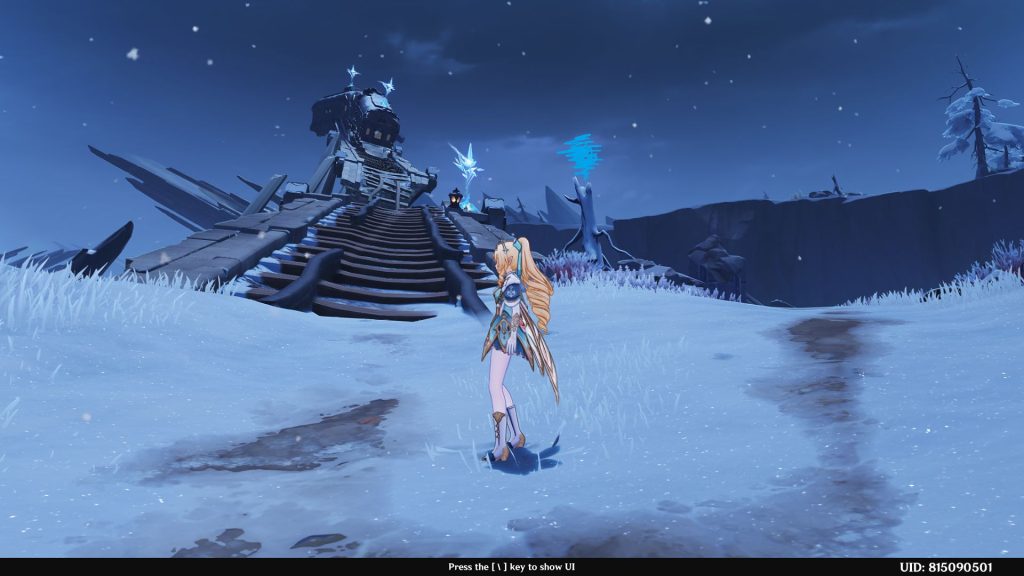
- Teleport to the waypoint again and look in front. The Cryoculus is on the hollow tree.
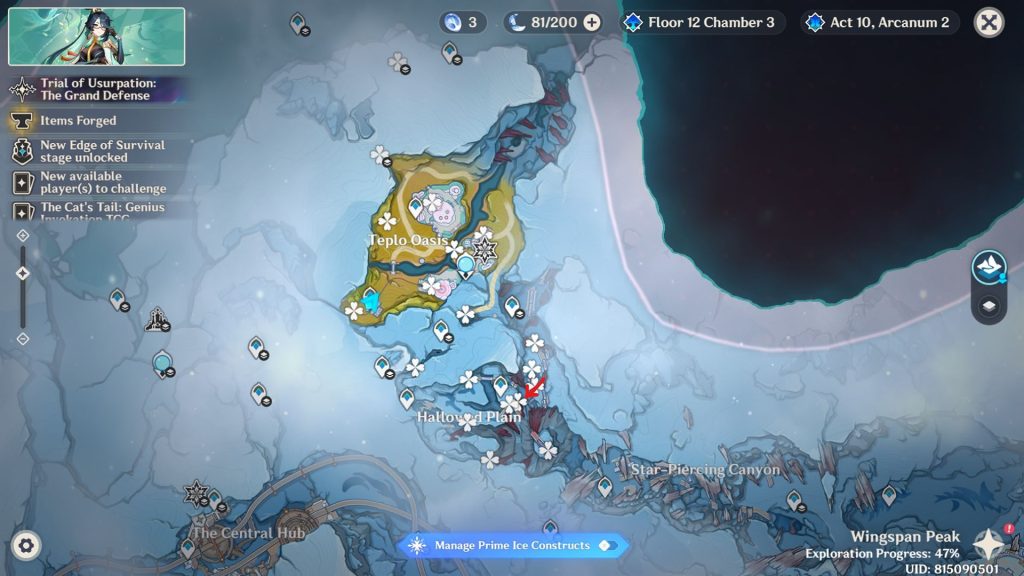
- Cryoculus 70
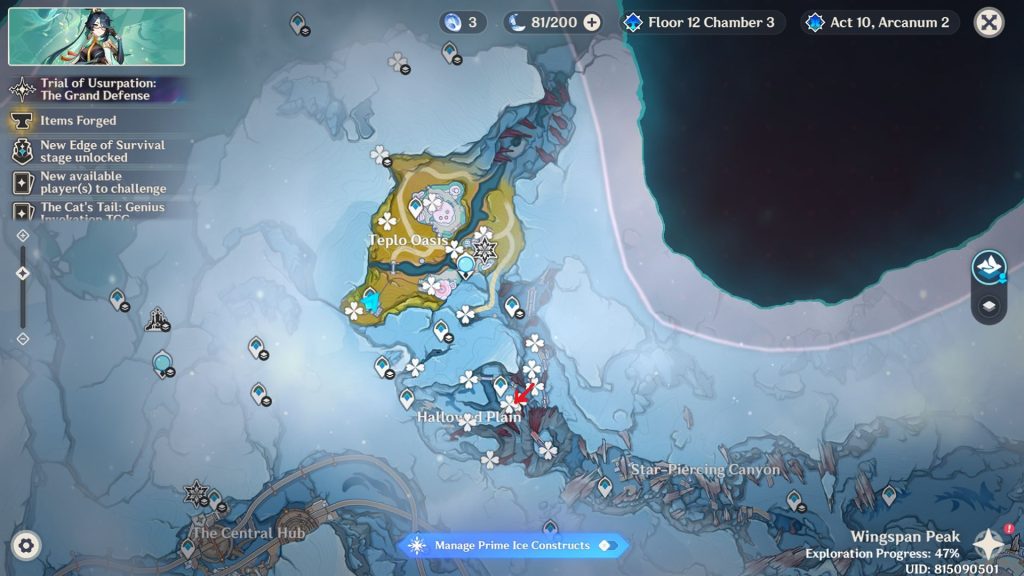
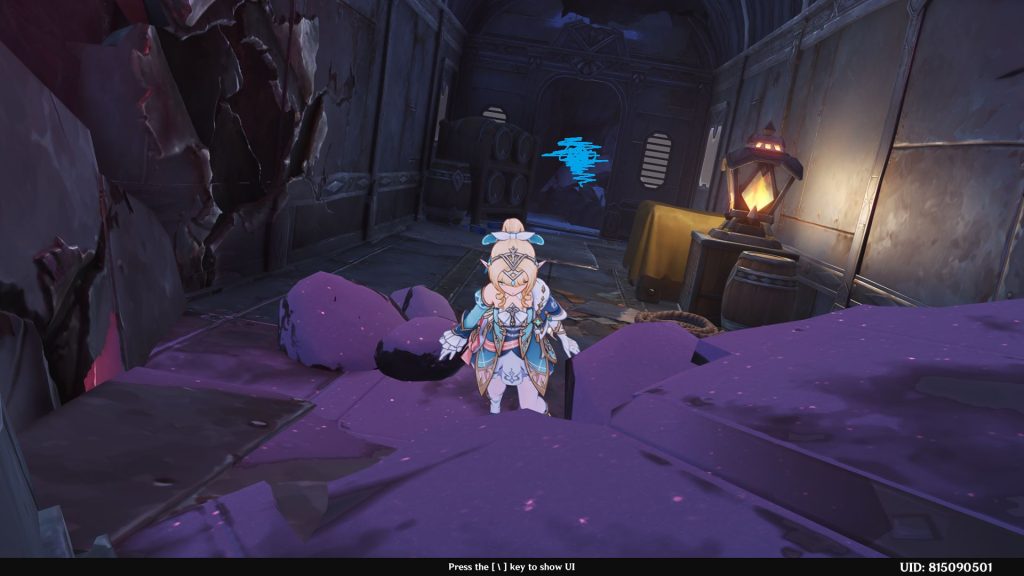
- Jump on the same train to the east as earlier. This time, keep going inside from when you collected the Cryoculus. The next one is deeper inside, which you may have collected during the quest already.
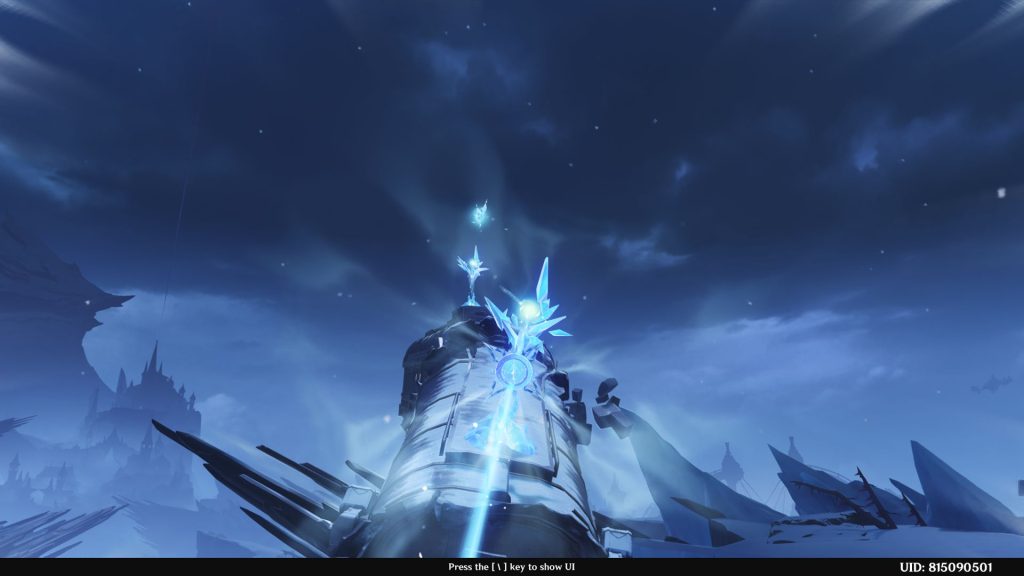
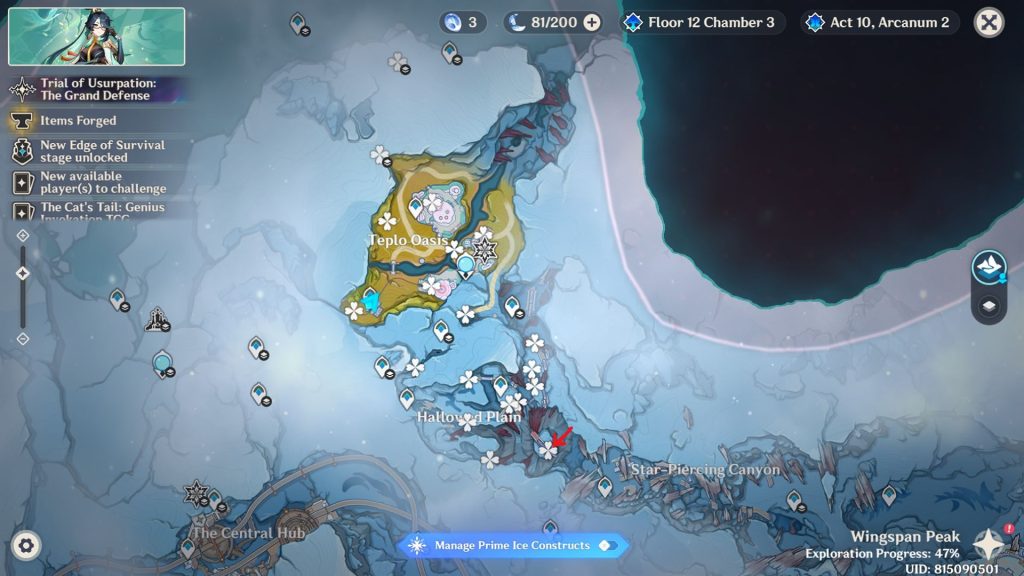
- Cryoculus 71
- Teleport to the same waypoint, and this time follow the trains going up into Star-Piercing Canyon. The Cryoculus is above the linking mechanism.
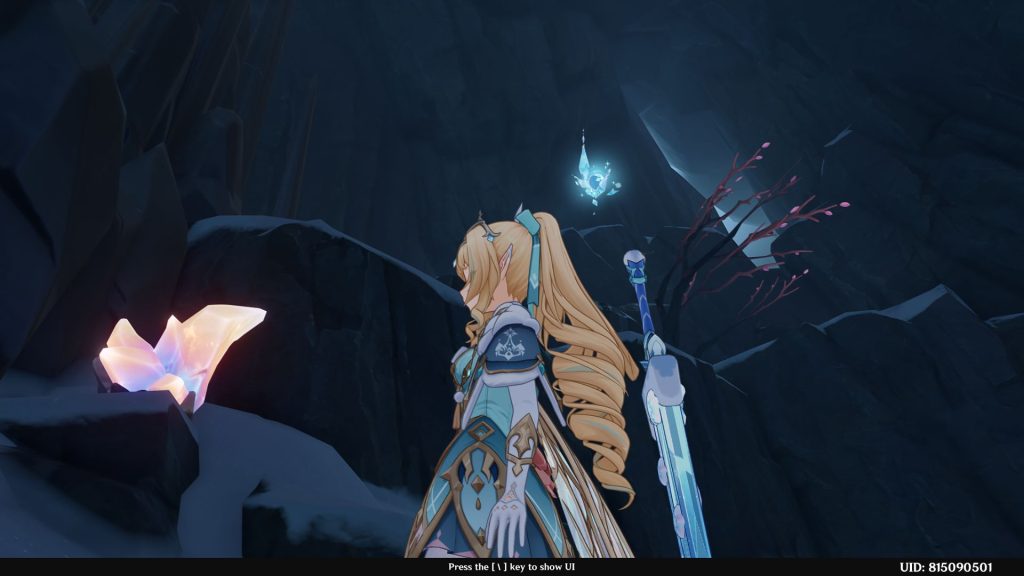
- Cryoculus 72
- Teleport to the underground waypoint in Star-Piercing Canyon and follow the path to the north. The Cryoculus will be right ahead.
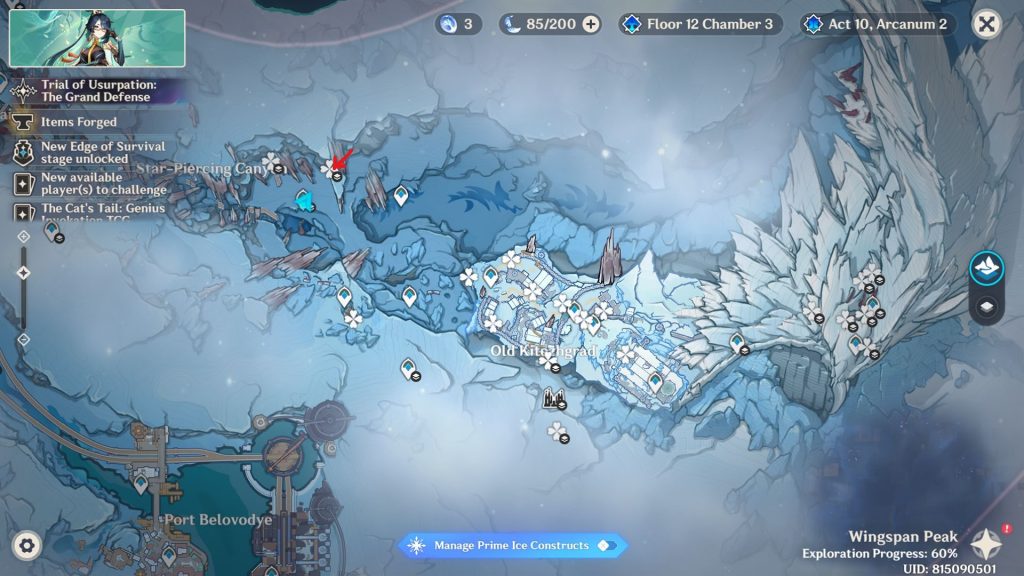
- Cryoculus 73
- Keep going inside the cave until you see linking mechanisms. Use them to get the Cryoculus. You likely already got this during the World Quest, as there’s no way to go around it.
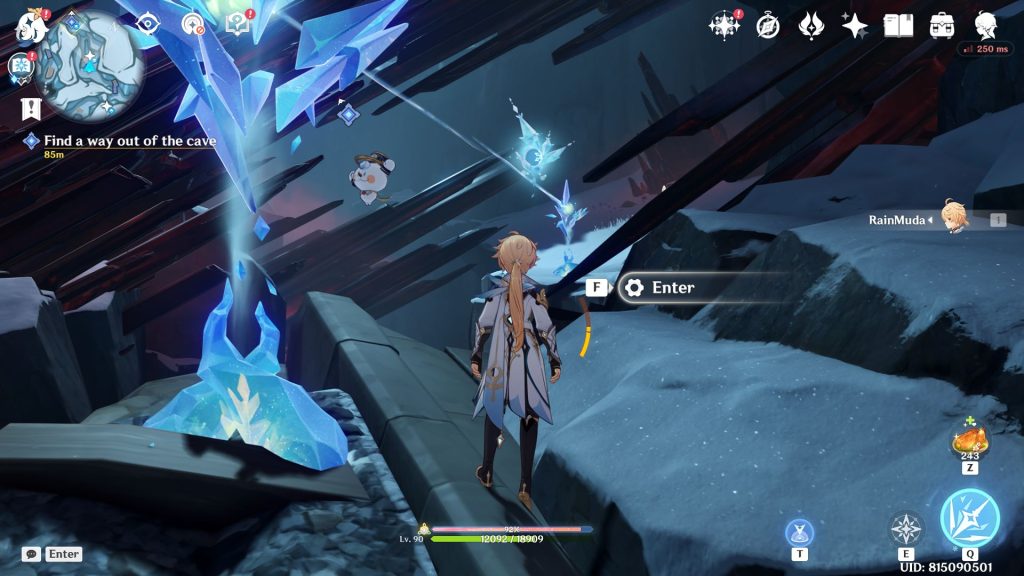
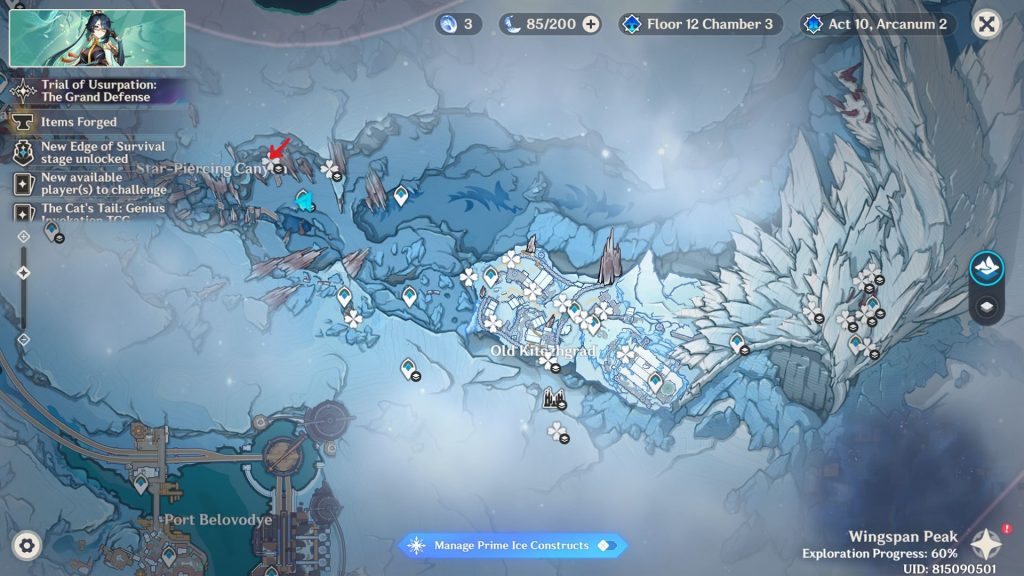
- Cryoculus 74
- Teleport to the waypoint below and head south. Use the linking mechanism to get the next Cryoculus. You may have also gotten this during the World Quest.
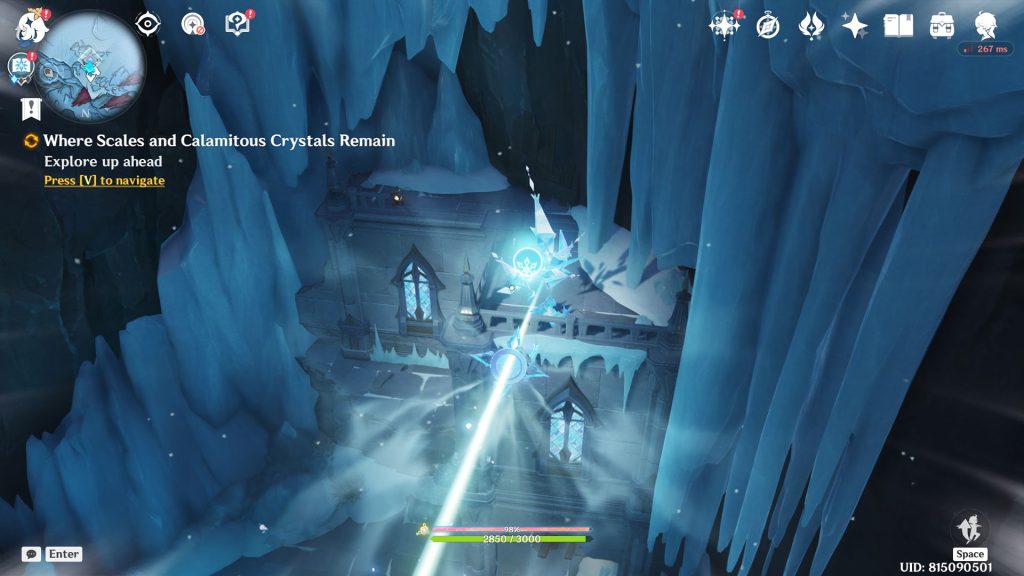
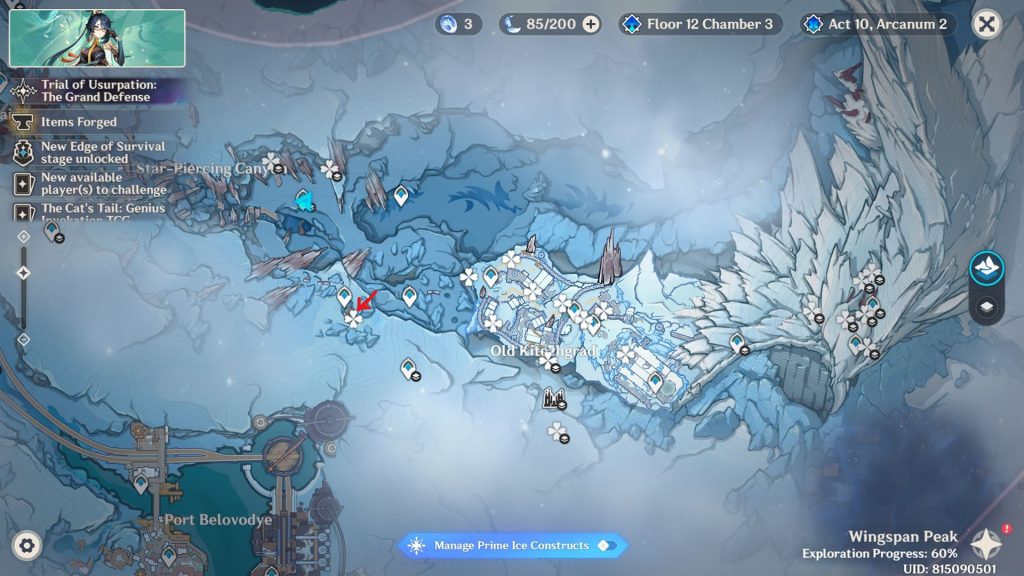
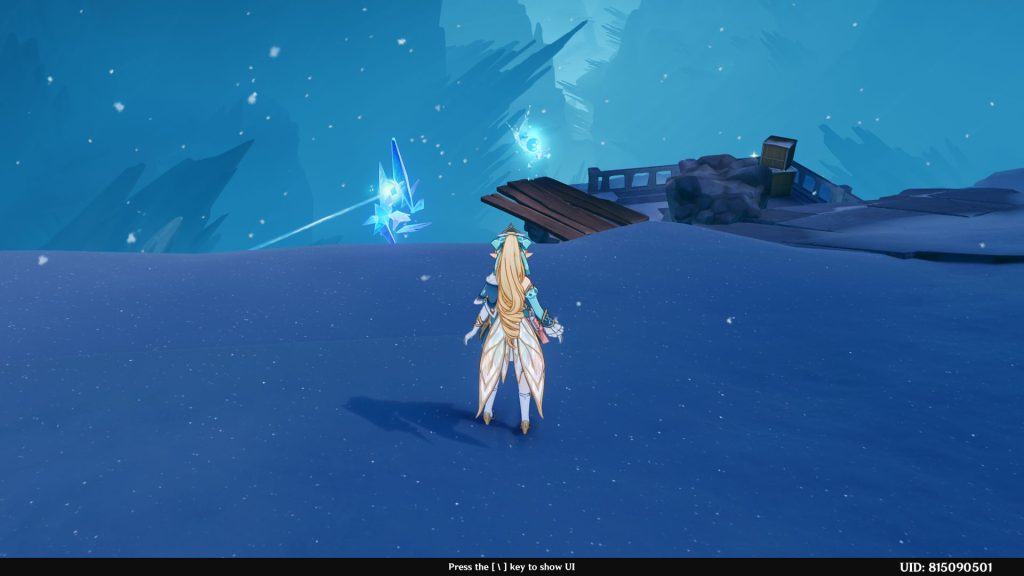
- Cryoculus 75
- Teleport to the waypoint at the entrance of Old Kitezhgrad. Look behind, and the Cryoculus will be on the wooden post.
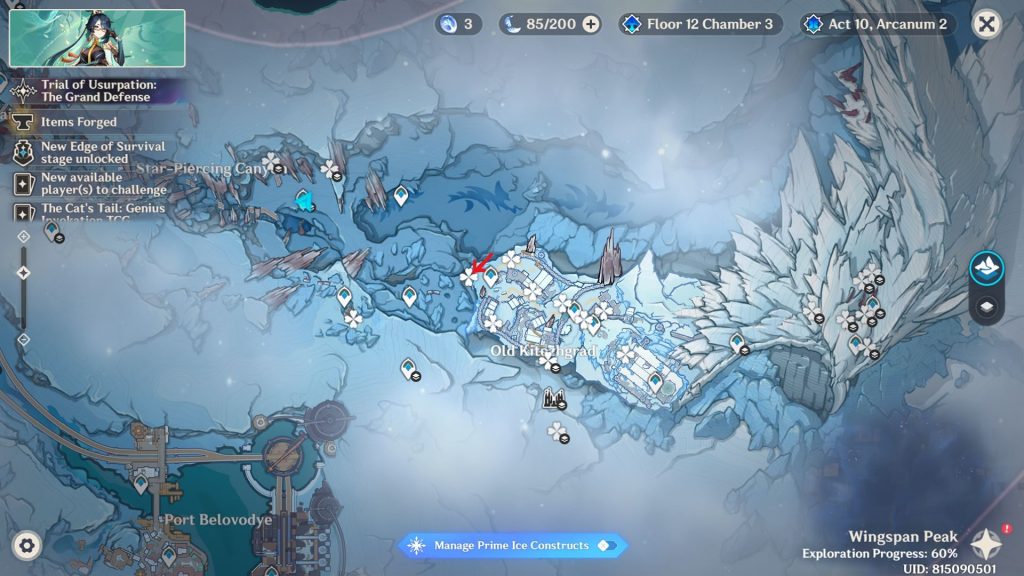
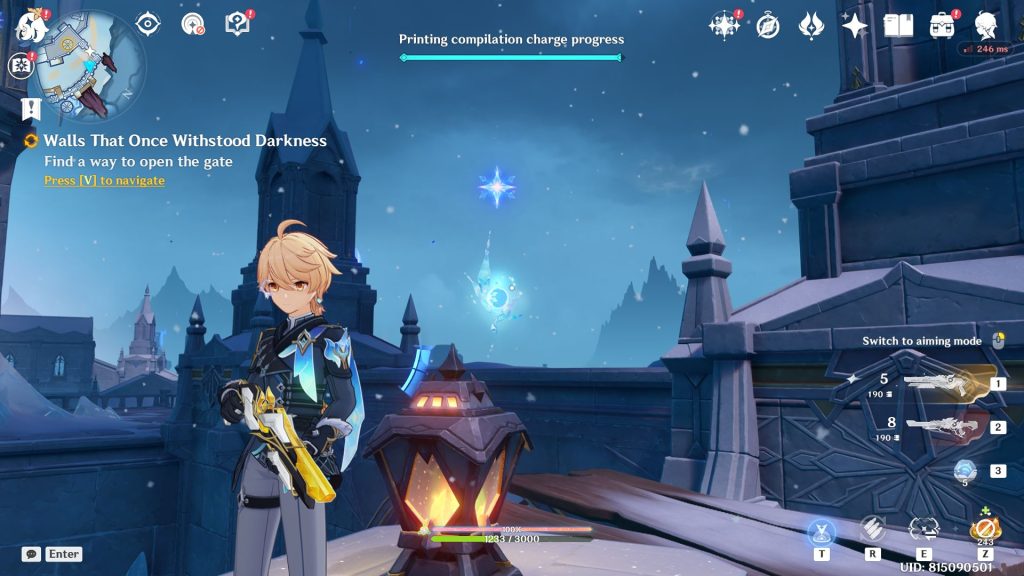
- Cryoculus 76
- Head east, and the Cryoculus will be on top of the wall between the pillars. You may have gotten it while grappling during the World Quest.
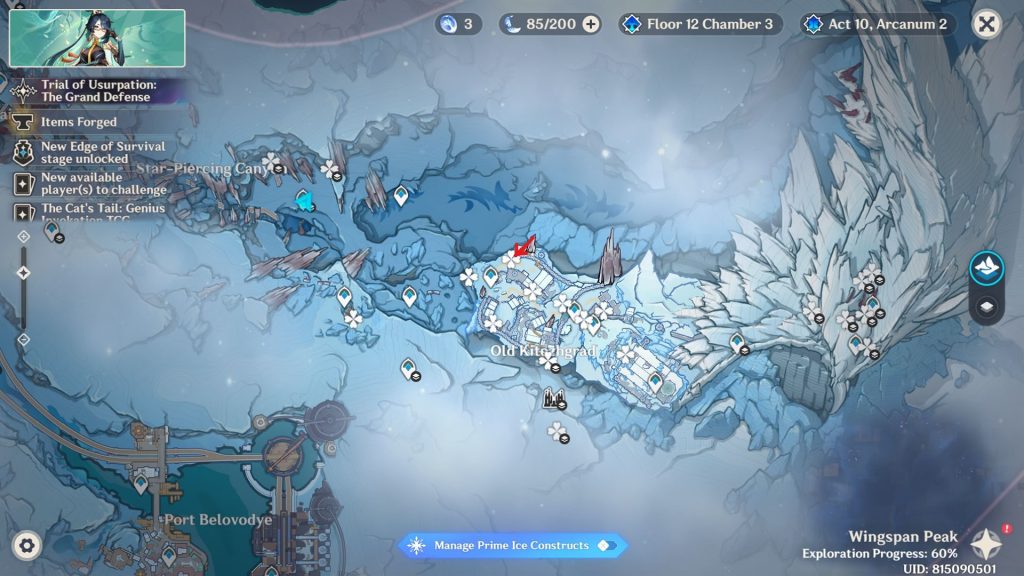
- Cryoculus 77
- Head south into the courtyard. There will be two Volkodlaks skating. The Cryoculus is inside the opening to the building.
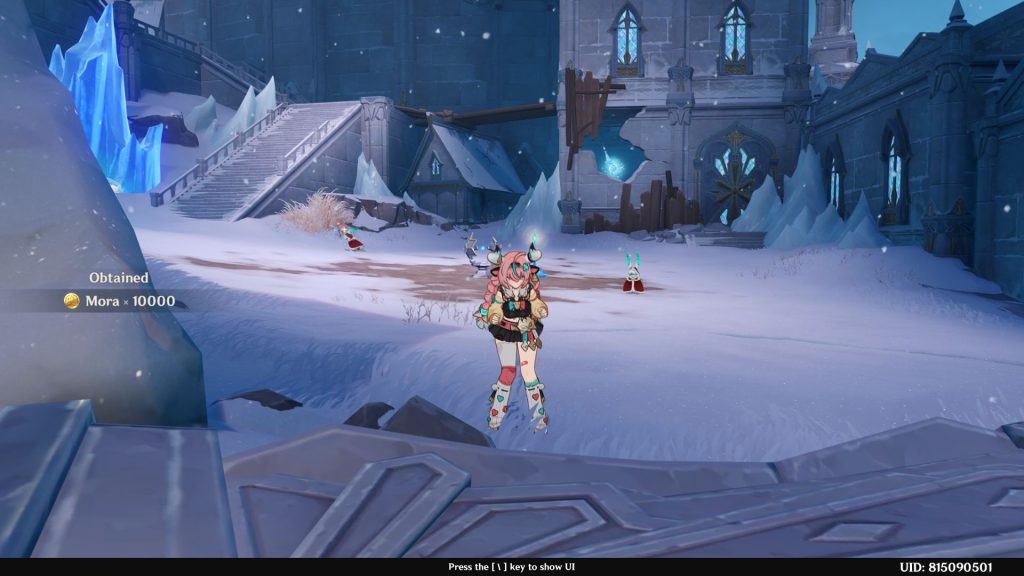
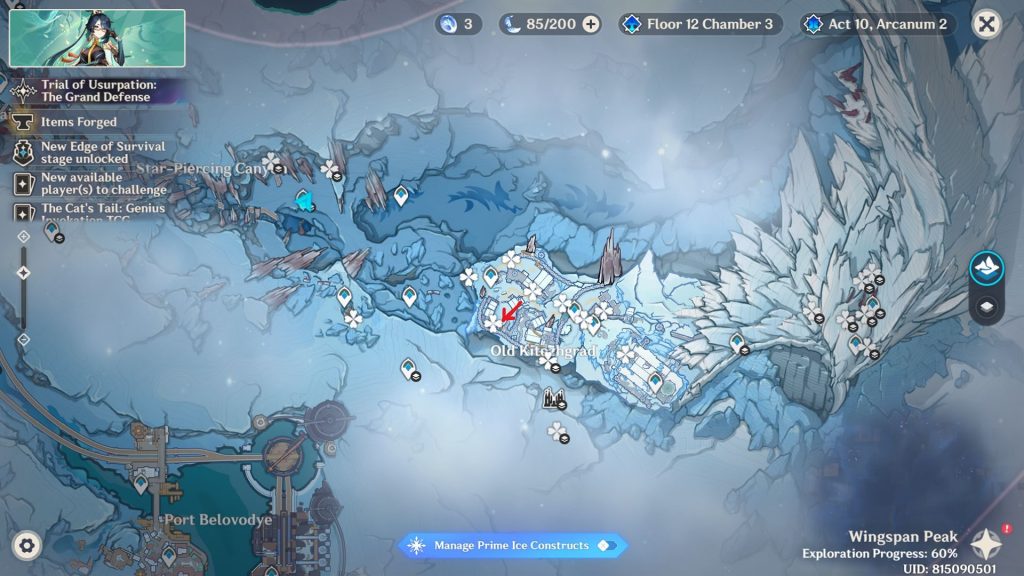
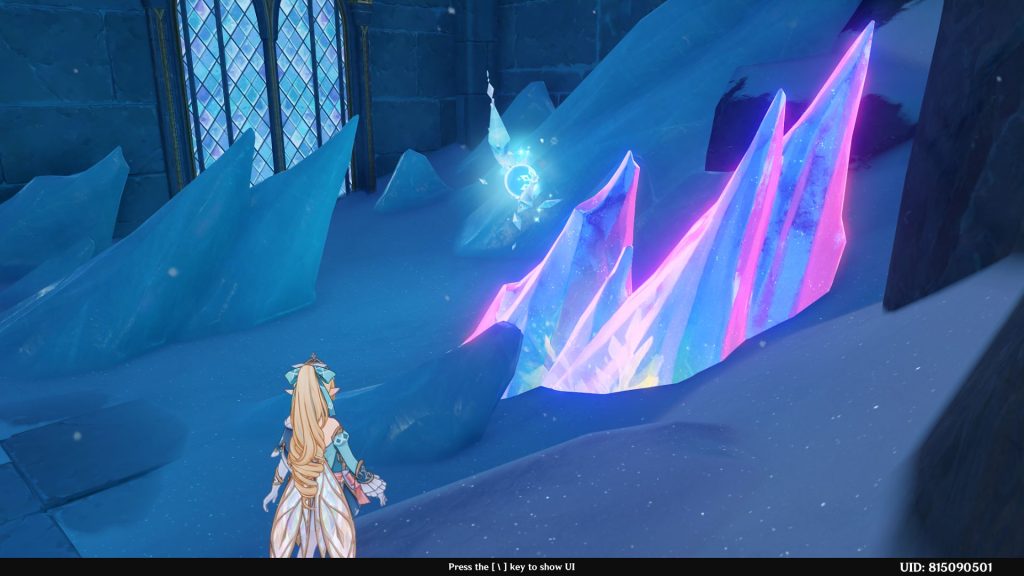
- Cryoculus 78
- Follow the path going inside the castle. The Cryoculus will be on the left side.
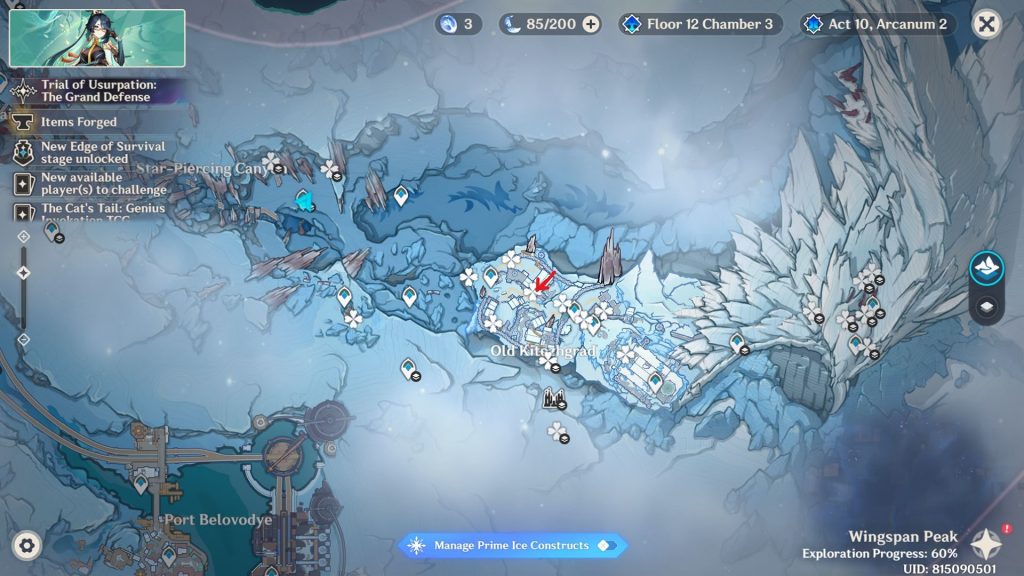
- Cryoculus 79
- Keep heading towards the castle. The Cryoculus will be right before the open gate.
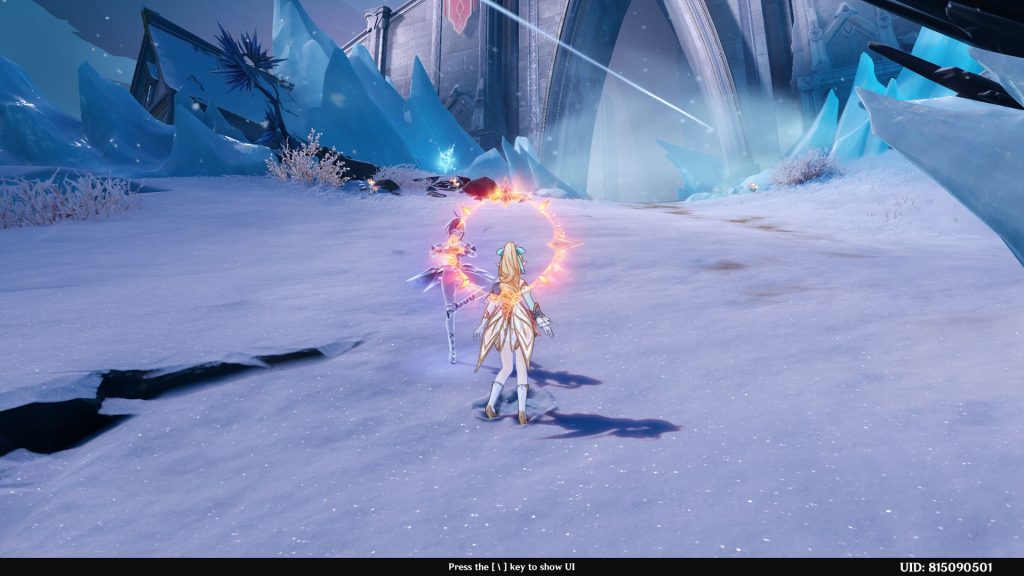
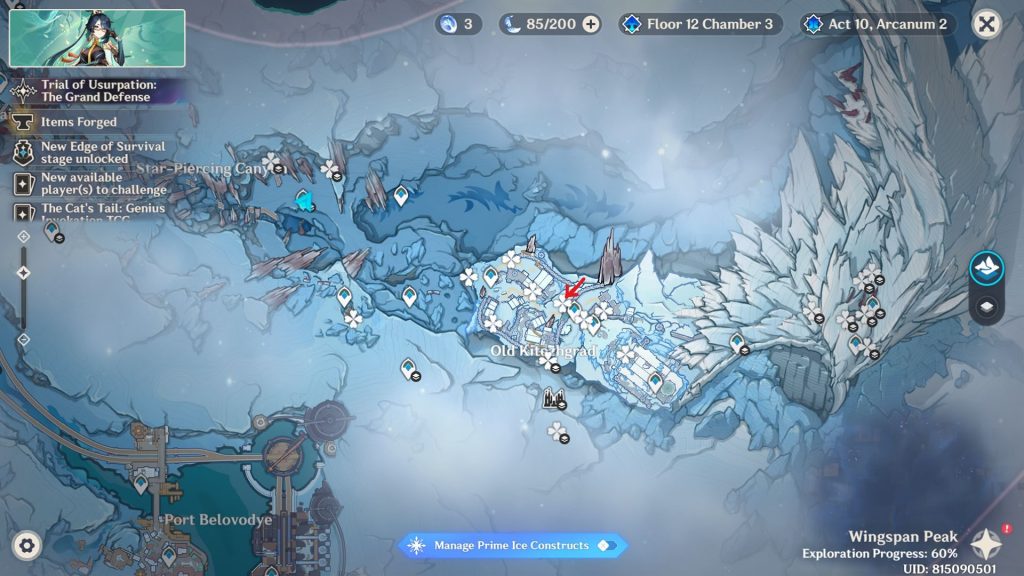
- Cryoculus 80
- Teleport to the next waypoint and look behind. The Cryoculus will be on the terrace.
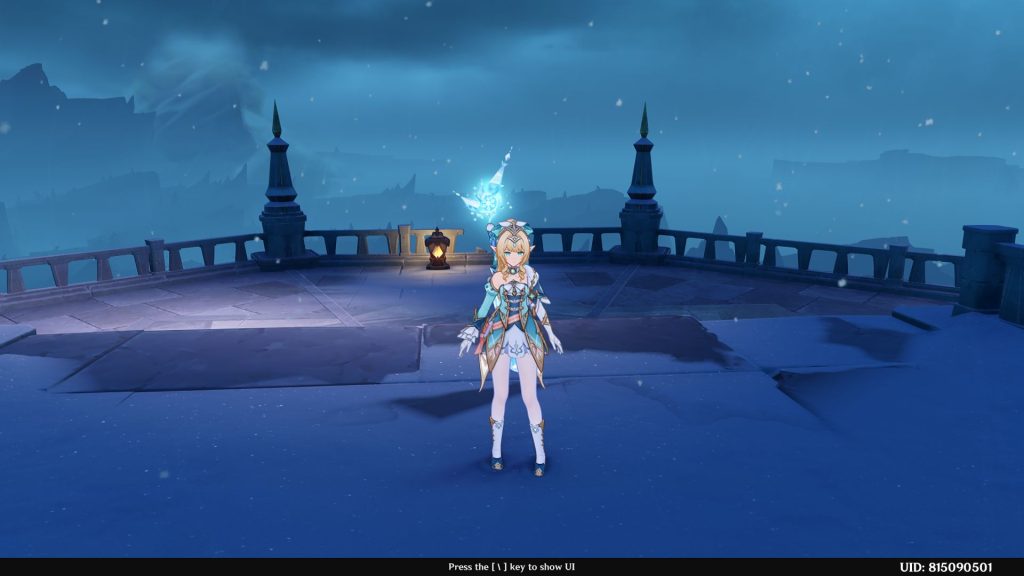
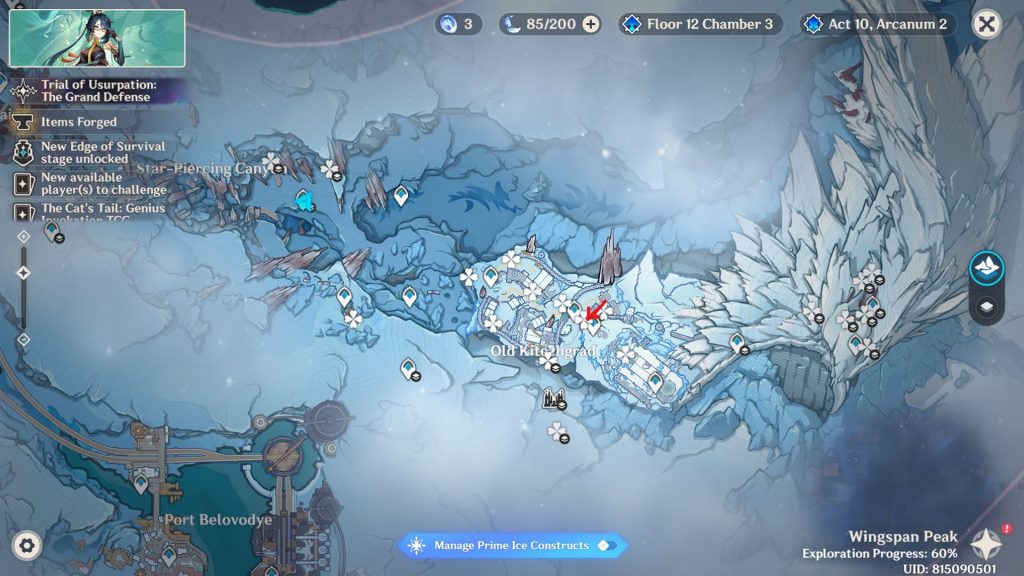
- Cryoculus 81
- Look to the east and glide down to the tower. The Cryoculus is inside it.
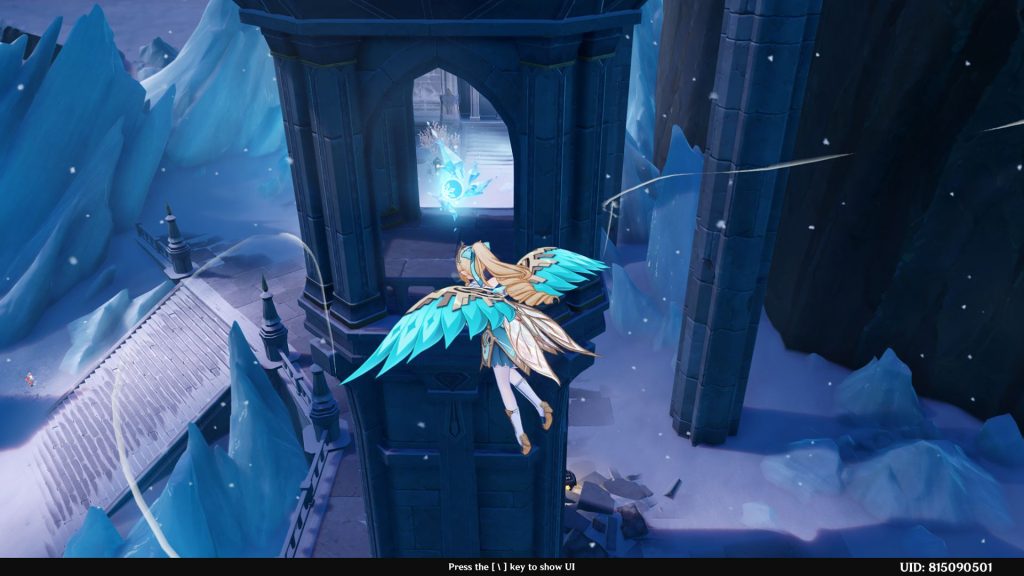
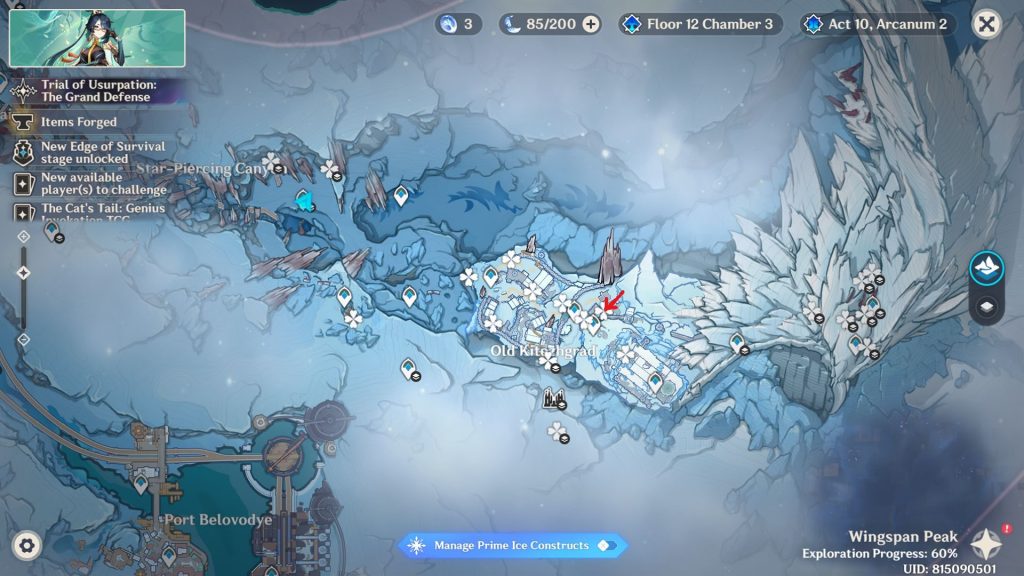
- Cryoculus 82
- Teleport to the waypoint inside the castle and head up the stairs. The Cryoculus will be right ahead.
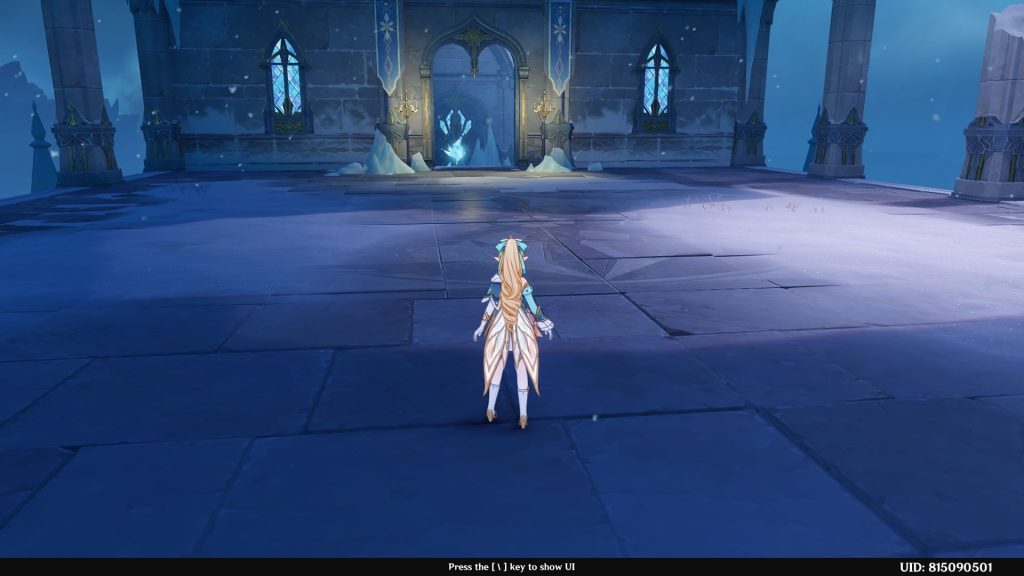
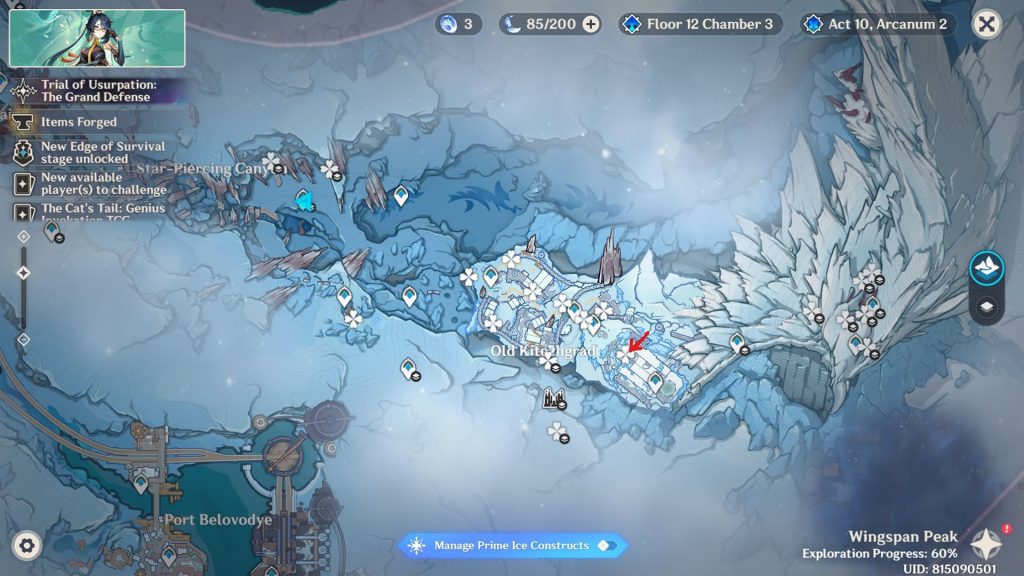
- Cryoculus 83
- Teleport to the Palace of Glacial Reflections. Go north and use the Vortex to jump up on the platform. The Cryoculus will be next to the mirror.
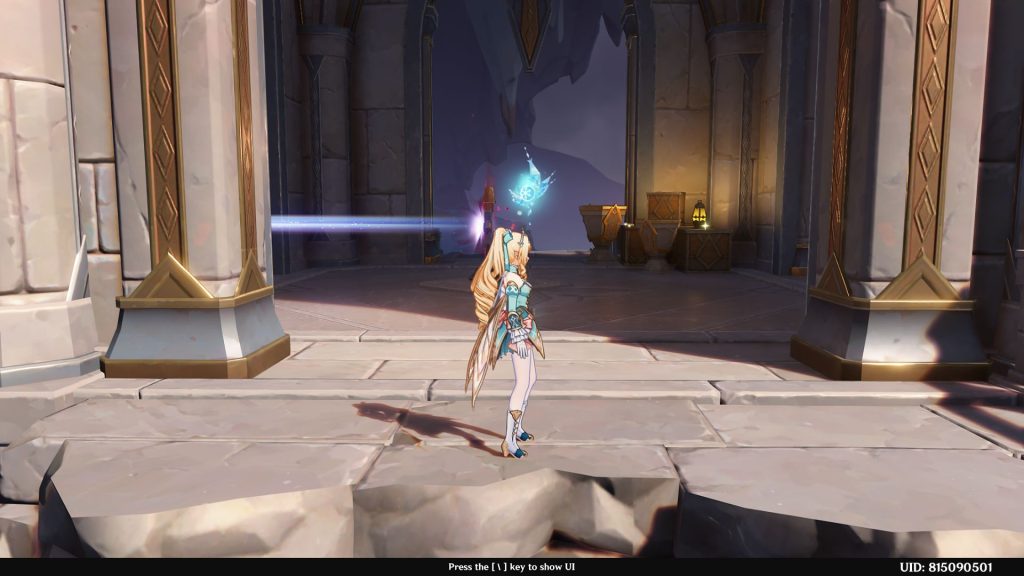
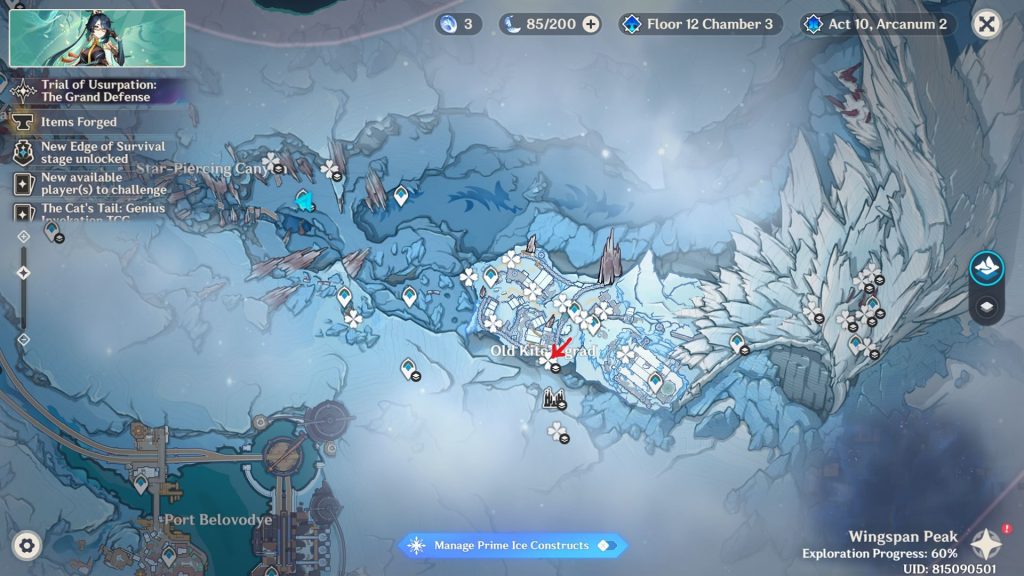
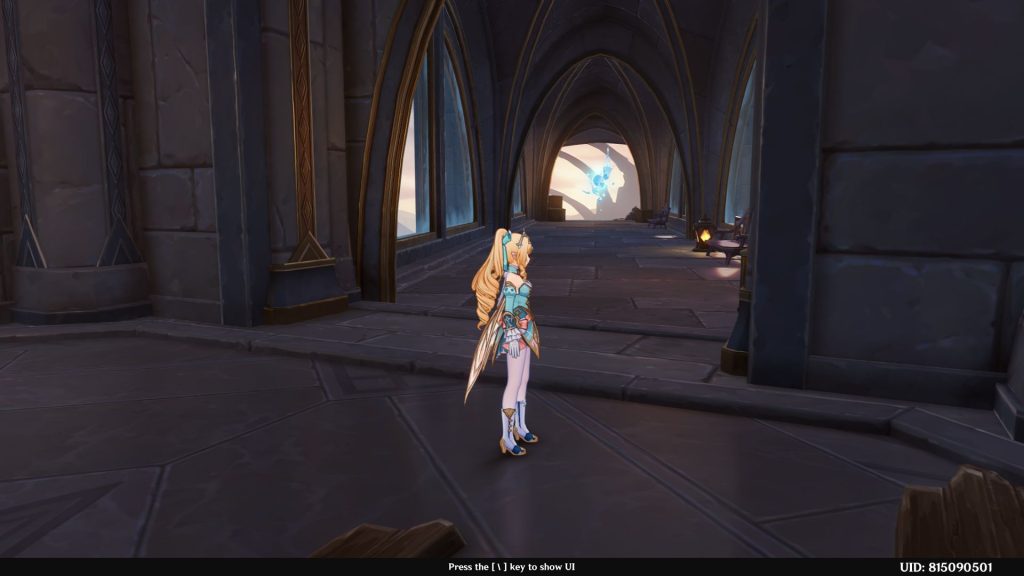
- Cryoculus 84
- Head south and use the Vortex to get to the platform on the other end. The Cryoculus will be there.
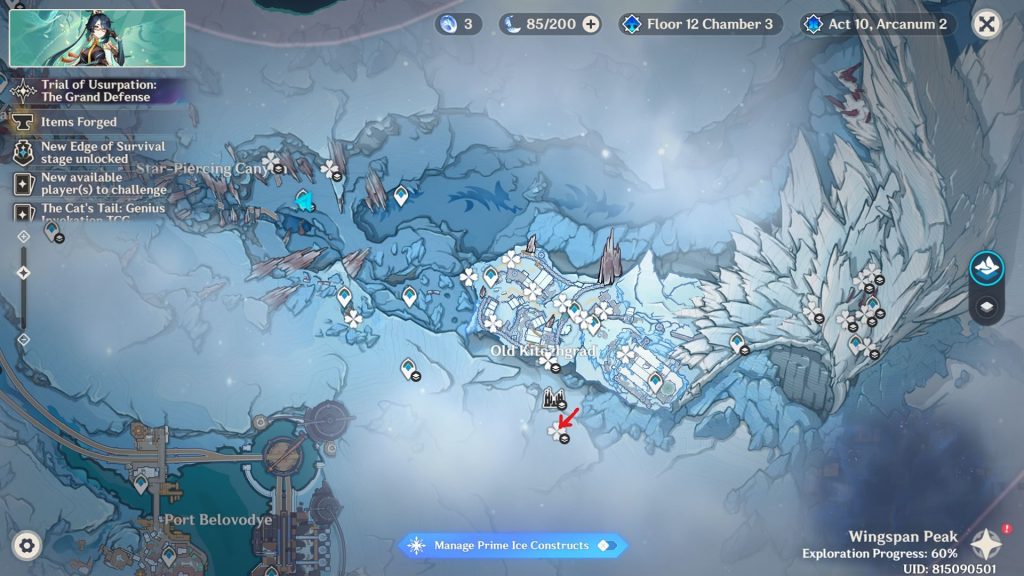
- Cryoculus 85
- This is where it gets a bit tricky because of the layout of this place. Head to the far left waypoint inside the Hollow of the Ancient Scaled One. Look north, and you will see the Cryoculus. You can glide to it.
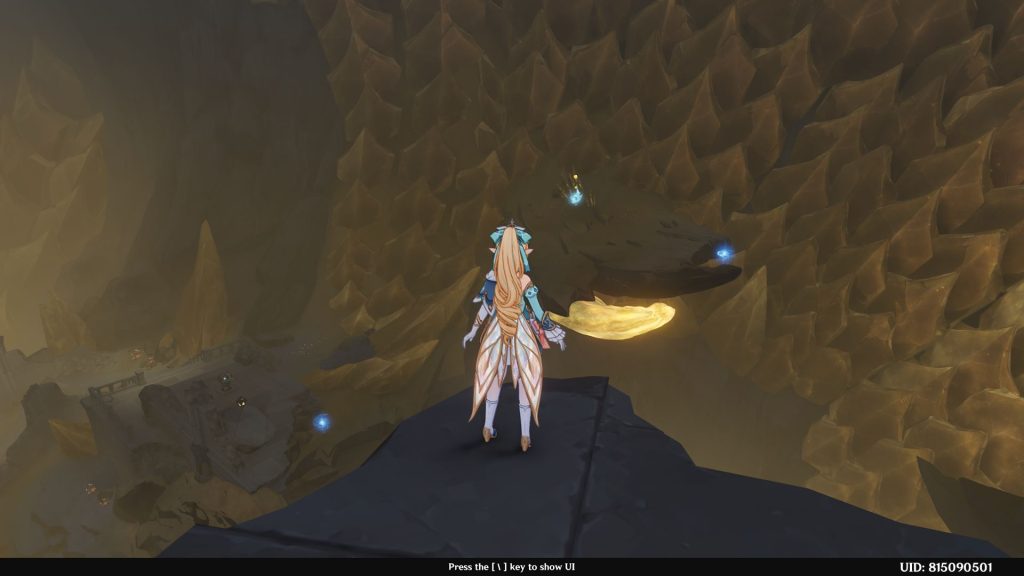
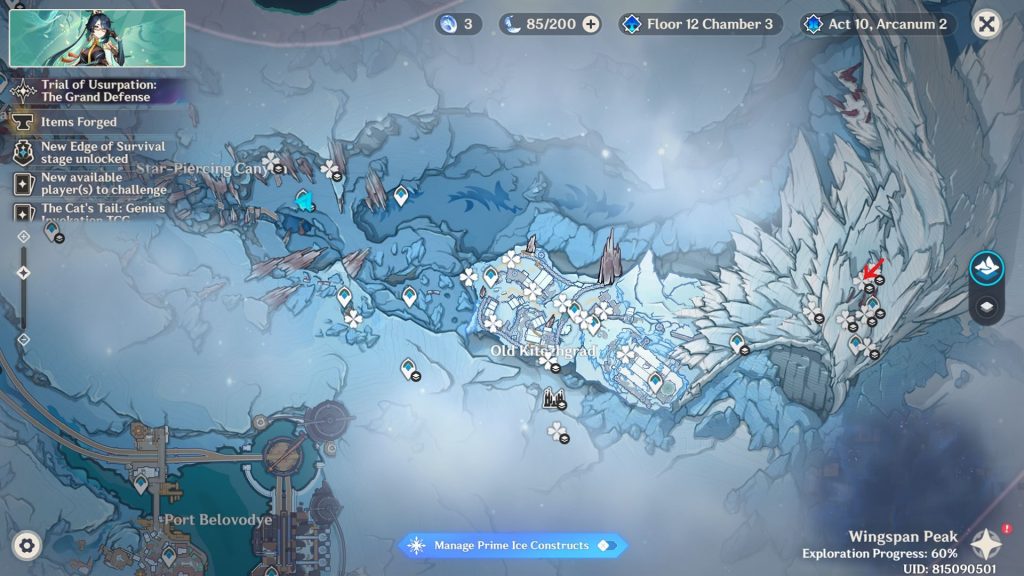
- Cryoculus 86
- Teleport back and head south this time by walking up the stairs. The Cryoculus is inside the structure.
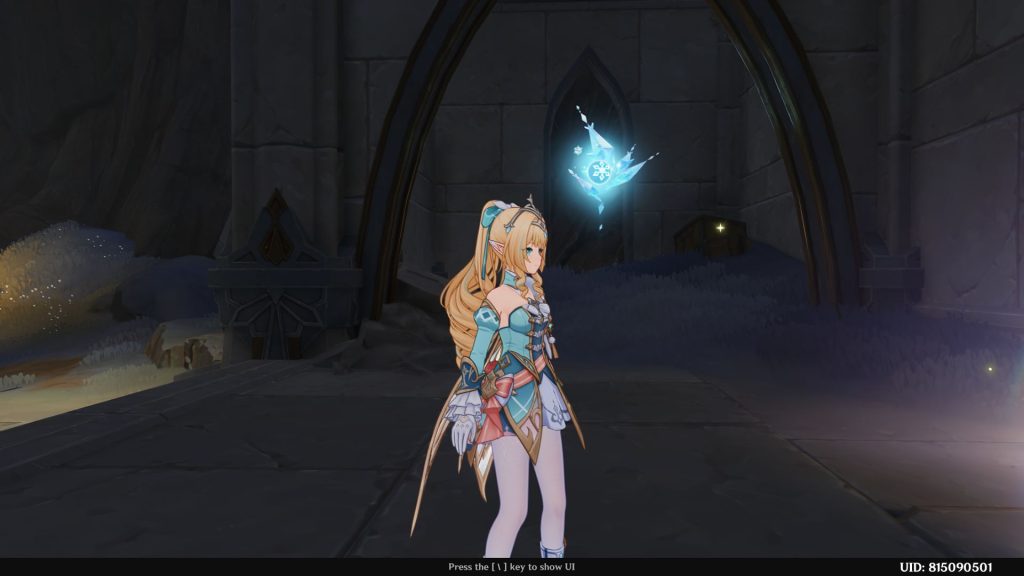
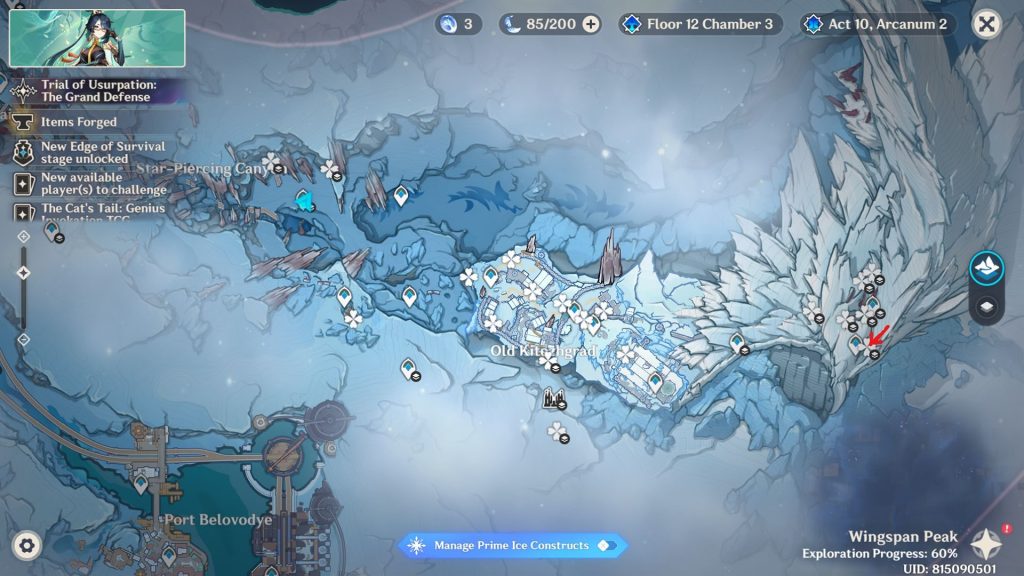
- Cryoculus 87
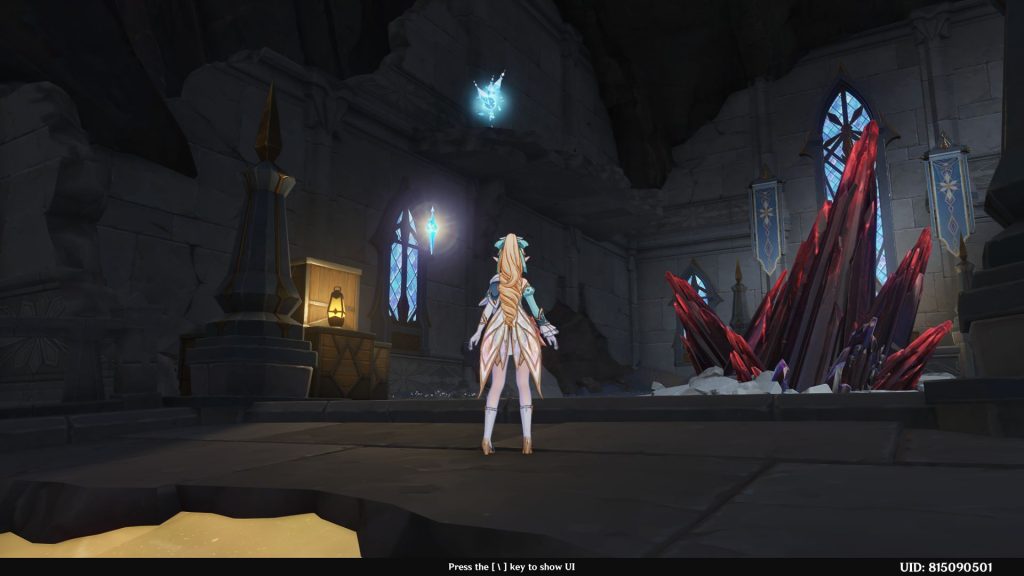
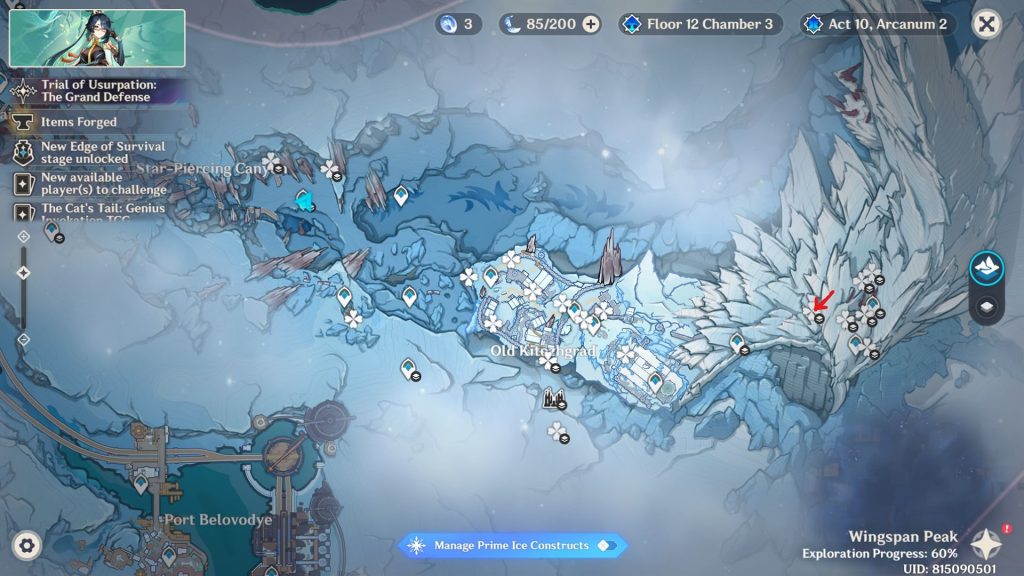
- Climb the previous structure. There should be a Remarkable Chest and a Seelie here, which you likely got during the World Quest. Create the crystal lamp construct and take the lamp crystal to illuminate the golden bridge. Use the Vortex there to gain height and glide to the crystal hanging nearby. There is a path below it that will illuminate. Follow it up to get to the room where you fought Sadunova. The Cryoculus is above to your left.
- Cryoculus 88
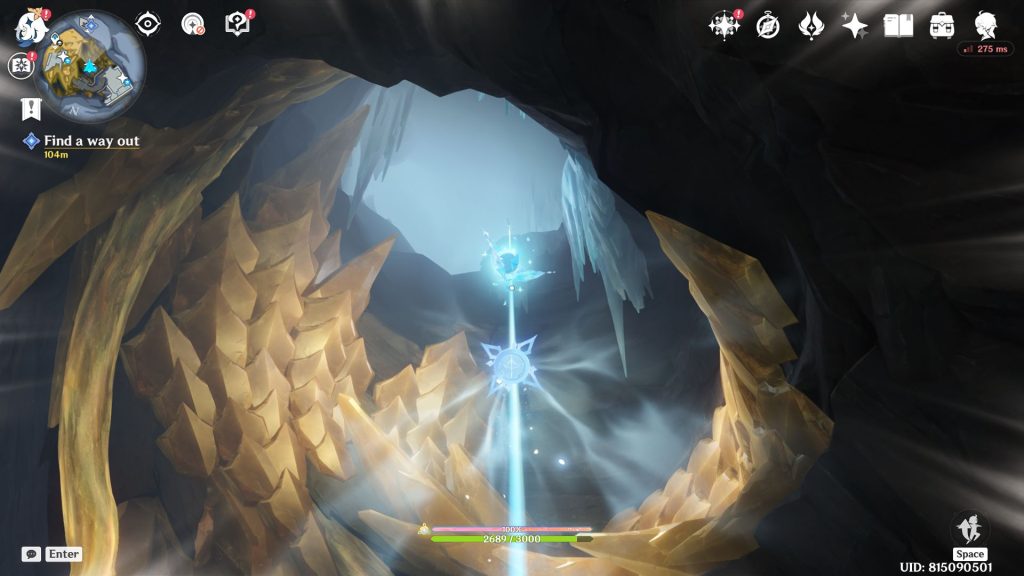
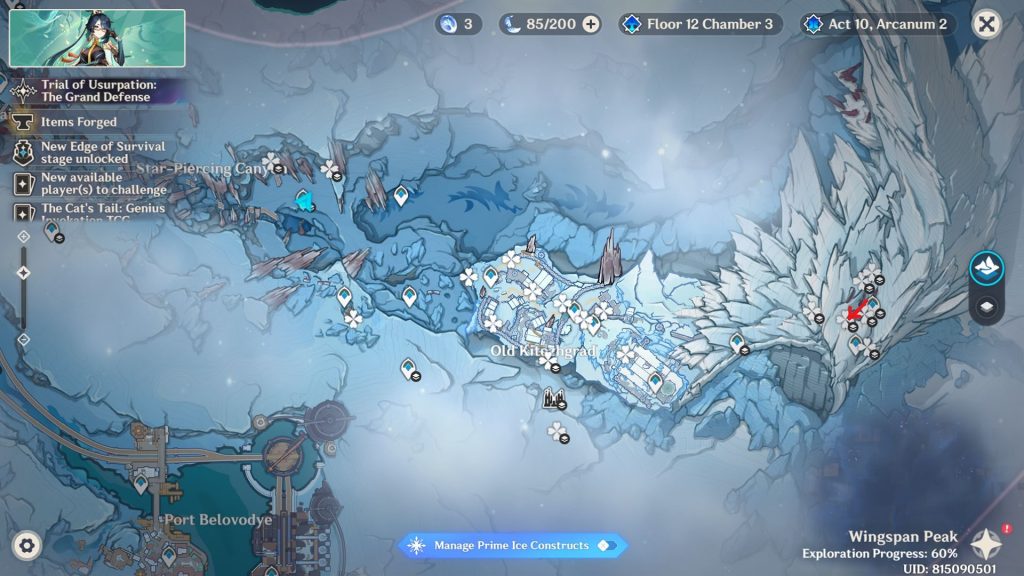
- From the previous room, you will see a linking mechanism close by. Create one to connect to it and get there. This one connects to another at the very top. The Cryoculus is en route, which you likely picked up during the World Quest. At this point, exit immediately and glide east for the next Cryoculus.
- Cryoculus 89
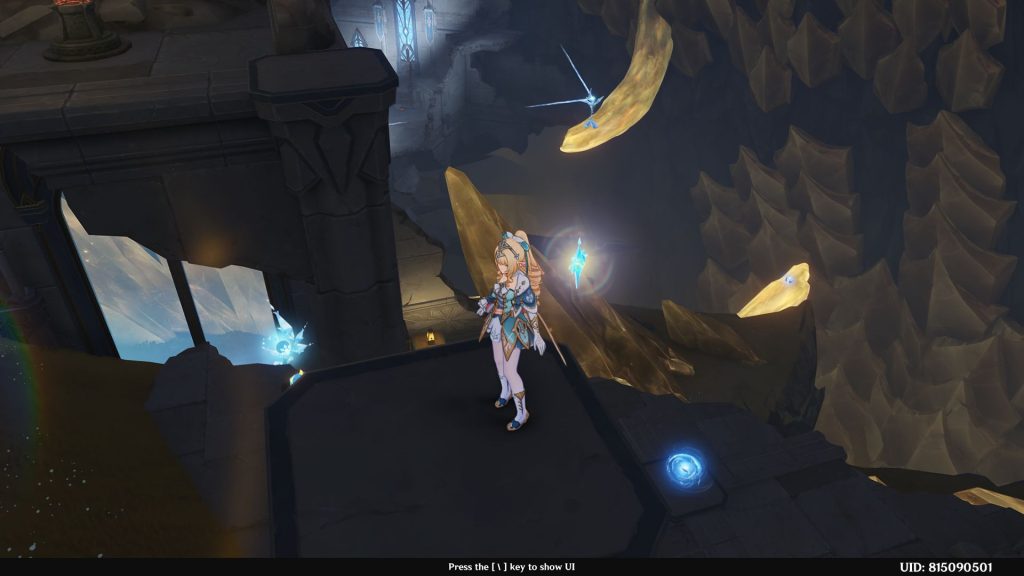
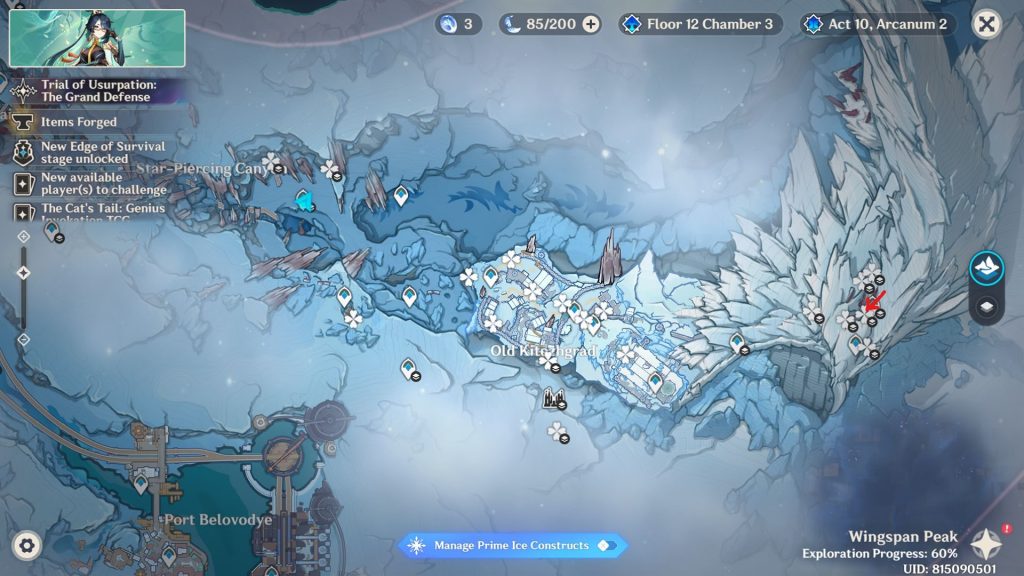
- As soon as you pick up the previous Cryoculus, exit and glide towards the structure to the east. If you miss the timing, you have to go all the way again.
- Cryoculus 90
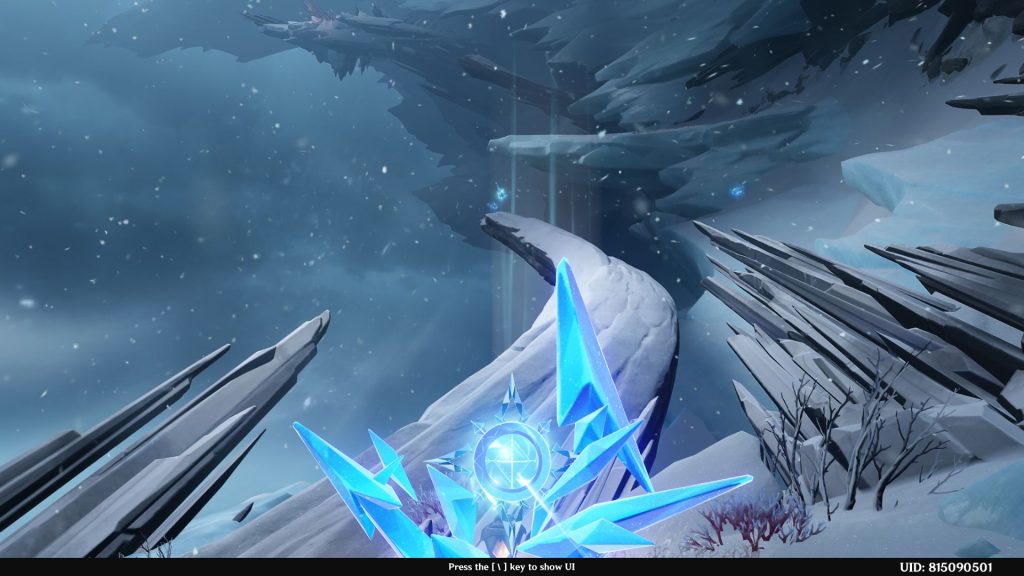
- Teleport to the waypoint at the top of the Wingspan Peak, the one in the overworld level, not inside. Head north and follow the linking mechanisms. The Cryoculus is right ahead on the edge of the cliff.
Where Are the Remaining Cryoculus for Max Statue Level?
There are only 40+1 Cryoculus remaining, and they will be added in a future Snezhnaya area. It doesn’t mean Snezhnaya will have only 1 more new region. We have had regions like Chenyu Vale and Dragonspine that had no Oculi, and instead had a separate offering system.
- More Insider Gaming: How to Defeat Elder Blighttree In Genshin Impact 7.2–Valiant Chronicles Guide
After leveling the Statue of the Seven in Snezhnaya to max in Genshin Impact version 7.2, players will be able to C6 their Cryo Traveler. That concludes the guide!
What do you think about the new areas in Genshin Impact version 7.2? Let us know through our Insider Gaming Discord server.
For more Insider Gaming content, check out ‘Genshin Impact: Imaginarium Theater 7.2 Guide (November 2026)’ and don’t forget to sign up for our newsletter.

Mudassir carries years of experience as a journalist and embodies that in his articles. His motto is "All great ideas come while writing." When he's not interviewing someone, he's on…
More from Mudassir Hussain





Comments