






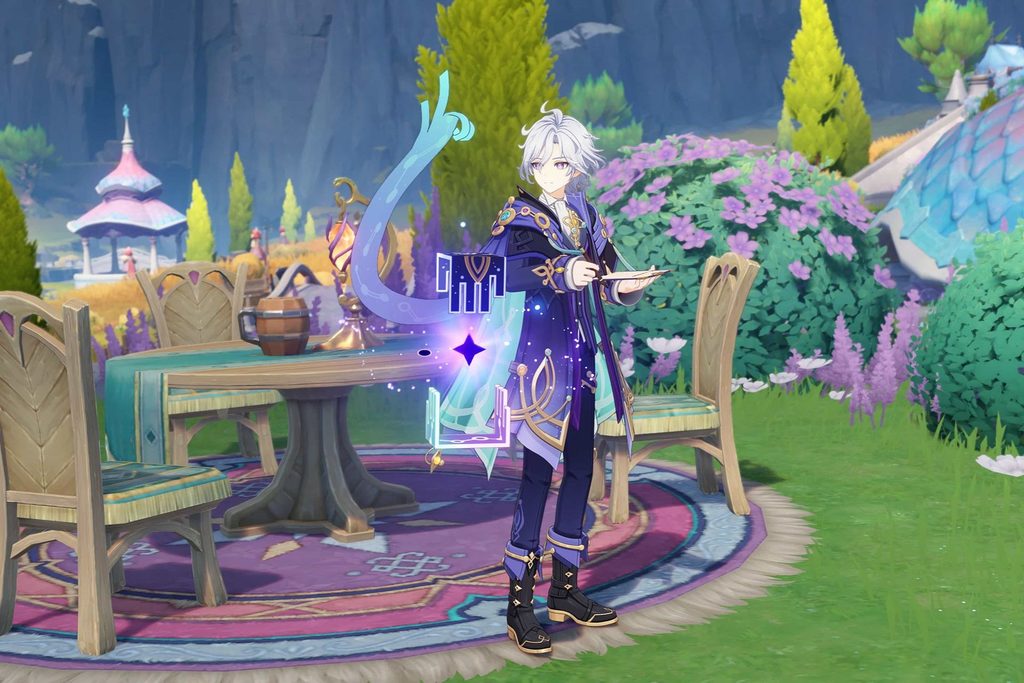
Mitya is the new 5-Star Electro character who uses a Catalyst and serves as a great support and even a strong DPS in Genshin Impact. He is already being compared to Yae Miko, who fills the same role, but due to his flexible team comps, Mitya is a bit more complex and well worth the investment.
So, let’s talk about how you should build Mitya in this Genshin Impact guide.
Basic Kit Overview
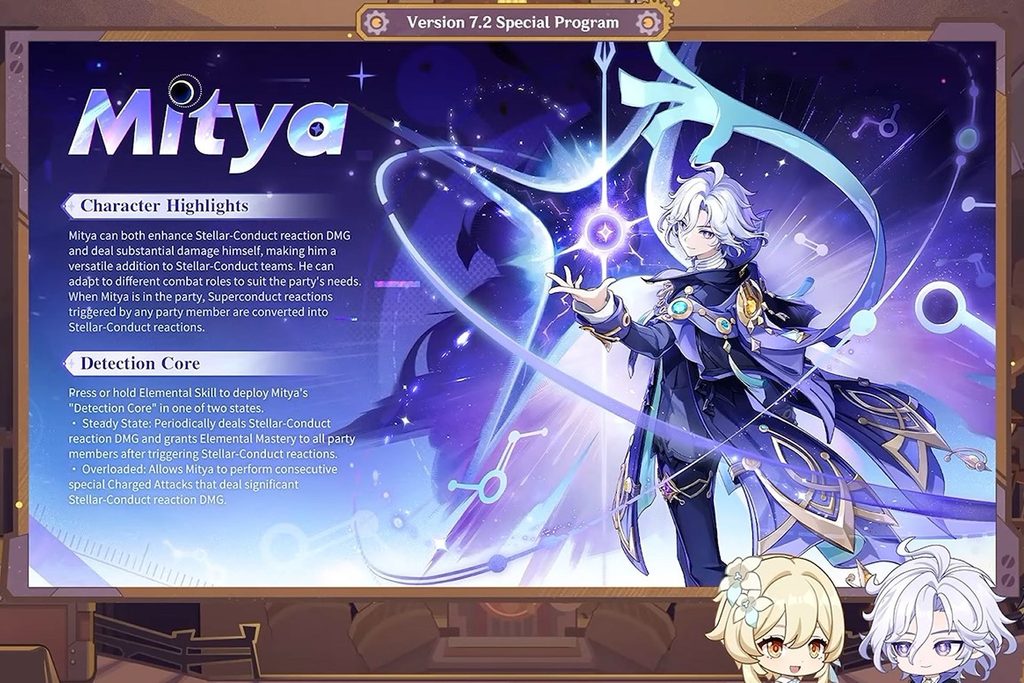
Mitya has two primary playstyles: Off-field Stellar-Conduct support with team-wide buffs, and on-field Stellar-Conduct DPS with strong Charged Attacks. Neither is superior, and his overall build should stay largely the same because he scales completely with Elemental Mastery—the only difference is his team building.
Like Nefer, Mitya has 100 base EM and has Crit DMG% as the ascension stat. So if you have a Nefer, like me, you can use her as the placeholder to get a good idea of your current build before going for Mitya.
With him on the team, your Stellar-Conduct reactions no longer create Starlight Prisms, and instead, generate Gradient Beacons. They replace the Starlight Prism’s Polestar Field with an even larger Polestar Field. That size wasn’t an issue, but it still feels more comfortable overall. Additionally, Mitya increases team Stellar-Conduct DMG by up to 14% within this field.
- More Insider Gaming: Phantom Blade Zero Trophy & Achievement Guide
In his off-field playstyle (Tap Skill), Mitya initially deals Electro DMG while generating Steady Gradient Beacons. Once he reaches the cap of 4, he deals Stellar-Conduct DMG. Each Beacon gives 30 EM to the party, totalling 120 EM at C0. His off-field damage is pretty decent, but noticeably lower than C1 Yae Miko, which is why people compare the two. However, the gap narrows depending on your Artifacts, and having Mitya lets you run one of the strongest Electro carry teams with him as the DPS.
Speaking of the on-field playstyle (Hold Skill), Mitya deals strong Charged Attacks by consuming Overloaded Gradient Beacons. Don’t confuse Overloaded with Overload, the Pyro+Electro reaction, because this is just the name of Beacons in this state. Since he can hold up to 4 at C0 and generates 1 every 1.5s, you have to time things well for optimal rotations. His Elemental Burst is also important, as it generates 3 Beacons, extending Mitya’s on-field time. Mitya has hybrid playstyles, which I explain further in the rotations below.
Lastly, because of the Ascension 4 Passive, each Gradient Beacon gives 5% Crit Rate to Mitya, up to a maximum of 20%. This greatly helps with building a good 1:2 Crit ratio.
Talent Priority
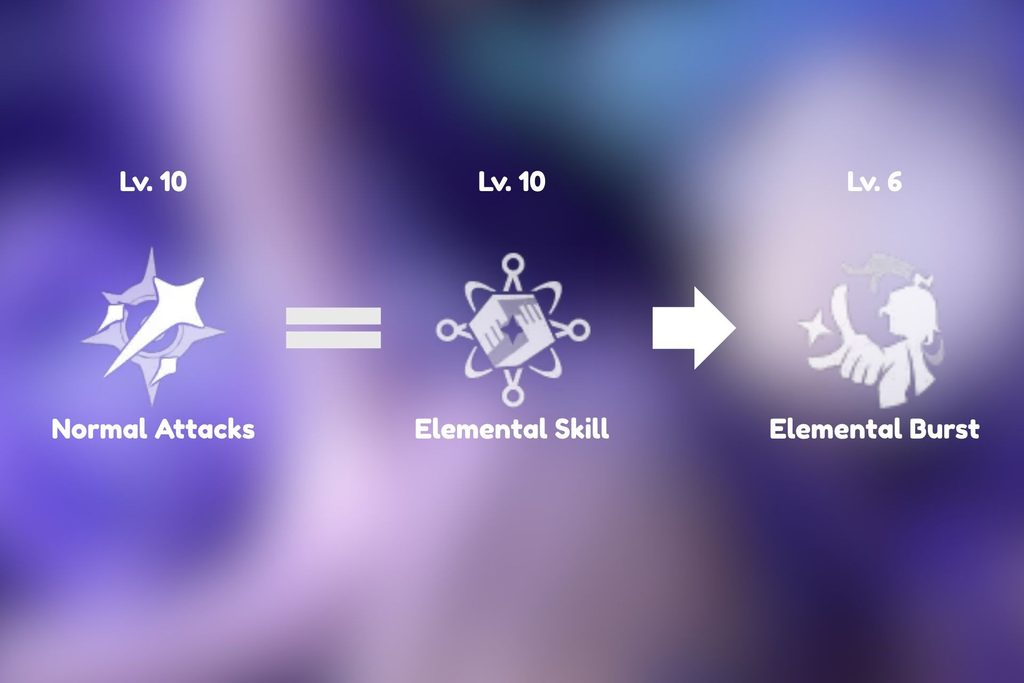
Mitya’s talent priority changes for both playstyles, but I highly recommend investing once to unlock his full potential. His hybrid playstyle utilizes the Skill and NA, so focusing on both is generally good.
| Off-field Support (Tap Skill) | Elemental Skill > Elemental Burst = Normal Attacks |
| On-field DPS (Hold Skill) | Normal Attacks > Elemental Skill > Elemental Burst |
| Insider Gaming Recommends | Lv 10. Elemental Skill, Lv 10. Normal Attacks, Lv 6. Elemental Burst |
Mitya’s Elemental Burst, although important, provides little value at higher levels. It deals Electro DMG, which is inferior to Stellar-Conduct, and its main function is generating Gradient Beacons. The investment-to-result ratio from Lv 1 to Lv 6 is fine, but beyond that, you are doing it because you love him.
Best Artifacts
Grinding for good Artifacts can be a huge pain, especially for newer sets. In Mitya’s case, there are a few options which I will discuss and tell you what you should realistically go for.
Disenchantment in Deep Shadow, Gilded Dreams, and 2pc/2pc EM artifacts are almost equal for on-field Mitya. Disenchantment is for Stellar-Conducts, but its 2pc effect gives ATK, which he doesn’t want. Gilded Dreams gives a lot of EM, but too much EM can give diminishing returns. 2pc/2pc gives decent EM and has a much better chance of getting you a high Crit value.
If you want Mitya to stay strictly off-field, Tenacity of the Millelith becomes a solid choice, and Heart of the Furnace also becomes viable if he is replacing Yae, giving Odette the option to switch to Disenchantment.
But what about Instructor or Wanderer’s Troupe? Instructor can be annoying because you have to trigger a reaction with Mitya, and while Wanderer’s Troupe buffs your Charged Attack DMG, it doesn’t count toward Stellar-Glimmer reactions, making it useless.
My personal recommendation is to run a 2pc/2pc set and wait for upcoming versions, since we’ll likely get an artifact set better suited to Mitya’s kit. Even if we don’t get one, it’s still arguably his best choice and works well in all his playstyles. Several Artifact sets offer a 2pc EM buff, and even if you are missing a piece, use the Strongbox while you grind for Tsaritsa, because that’s exactly what I will be doing.
Main Stats & Substats
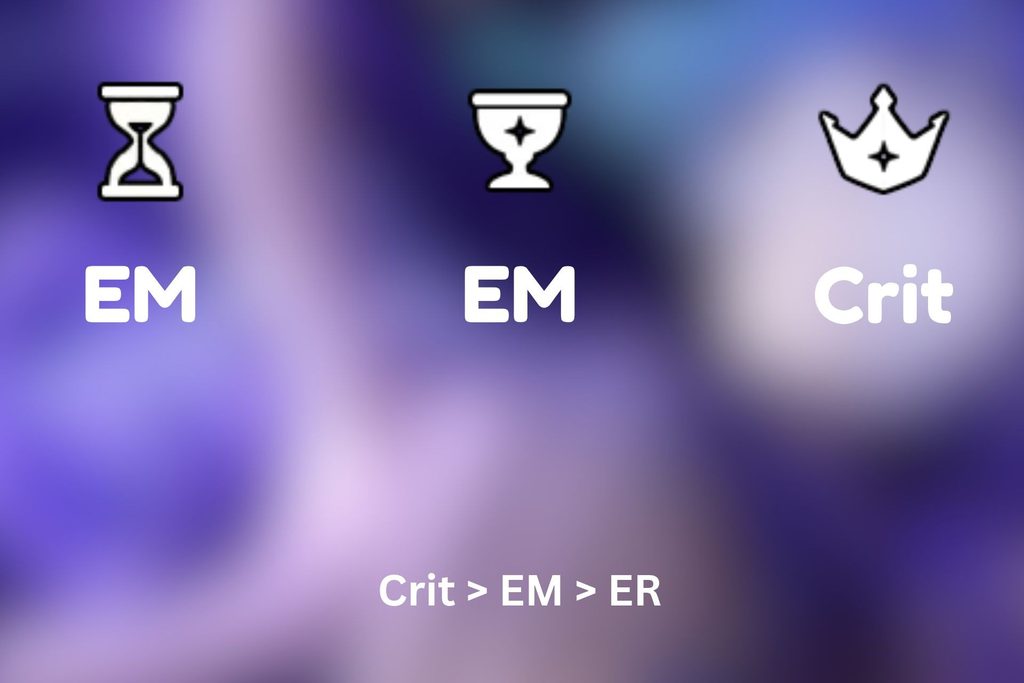
Regardless of the playstyle, Mitya’s main stat and substat requirements remain the same.
| Sands | Goblet | Circlet | |
| Main Stat | EM | EM | Crit > EM |
| Substats | Crit > EM > ER | Crit > EM > ER | Crit > EM > ER |
The choice between an EM and Crit Circlet depends on your substats, but a Crit piece should provide more value. I also think that if you have higher EM substats on other pieces, a Crit Circlet will automatically become better because after a certain point, you will see diminishing returns from too much EM.
As such, prioritize Crit substats more than anything else, and pray for EM and ER as the 3rd and 4th substats for the perfect build. Moreover, there is a certain Energy Recharge threshold you should aim for, so having a few rolls into ER might be better. Theorycrafters recommend 125-150% Energy Recharge for C0 Mitya, with the lower threshold being for double- and triple-Electro teams or for Favonius Codex.
If you have a C1 Mitya, I would recommend not worrying too much about ER and only having some for Stygian Onslaught.
Best Weapons
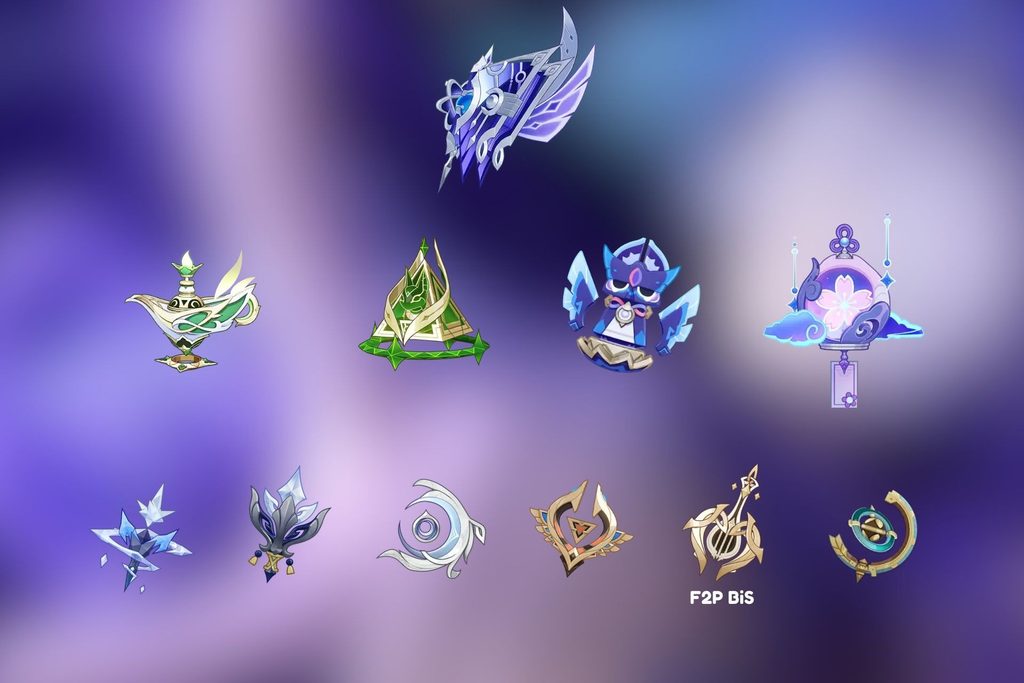
Let’s start with his on-field playstyle weapon options. Starsealed Edict is Mitya’s signature weapon, so it performs best by far. Other 5-Star weapon options include A Thousand Floating Dreams, Starcaller’s Watch, Reliquary of Truth, and Sunny Morning Sleep-In because of their Crit or EM stats. You should be able to use any other 5-Star stat stick for okay-ish results.
Mitya’s 4-Star options include Dawning Frost and Winter’s Heavy Heart, both of which are gacha weapons. The Battle Pass weapon Clash of Kings is also pretty decent, but if you have Etherlight Spindlelute from the event, I would recommend going for that instead. Spindlelute provides Energy Recharge for consistent Burst in his rotations and 200 EM at R5. The three gacha and BP weapons at R1 perform similarly to Spindlelute at R5, but the gap widens at higher refinements, which is difficult to get for gacha and BP weapons.
However, for an off-field Mitya, most stat sticks, including his signature weapon, offer less value, and I prefer a weapon that buffs your party. A Thousand Floating Dreams is still a good option as it gives the party EM. The 4-Star weapons I mentioned earlier are all decent, with Spindlelute being better for comfort. Wandering Evenstar also becomes very good among the 4-Stars as it gives your party ATK and your Mitya EM. TTDS is the bread and butter for off-field catalysts, but for Mitya, I recommend either Wandering Evenstar for similar effects or Spindlelute for an all-rounder Mitya.
Best Teams
Mitya can fit into many teams, depending on his playstyle. For an on-field Main DPS role, Mitya takes the front role while Odette and Yae Miko become his dedicated supports. At higher constellations, Valeriy becomes his best 4th slot due to his buffs and sustainable shield.
If you’re unlucky with Valeriy or his constellations, you can run a sustainless team with Sucrose or Cryo MC, which gives higher DPS but makes your Mitya more vulnerable to enemy attacks. Other options include Xilonen for Resistance Shred and healing, Qiqi for Cryo application with a TOTM build and healing, Alyosha at C6 for buffs, and Diona as an inferior version of Qiqi without TOTM. One caveat with Diona is that you might lose the EM buff in her Burst field because Mitya teleports back when he is too close to an enemy.
If you don’t have Odette, you will struggle with Cryo application and lose out on a lot of damage. You can only replace her with another character like Qiqi, Diona, or Cryo MC, but even then the application might not be enough. If you don’t have Yae Miko, then I suggest opting for any of the other supports we mentioned so far, though Sucrose would be the best replacement. On-field Mitya really depends on characters like Odette and Yae Miko, and while that may change once we get Tsaritsa and Danica, I can’t recommend going all in on that without official kit confirmations.
On-field Main DPS Mitya
For an on-field Main DPS role, Mitya takes the front role while Odette and Yae Miko become his dedicated supports. At higher constellations, Valeriy becomes his best 4th slot due to his buffs and sustainable shield.
If you’re unlucky with Valeriy or his constellations, you can run a sustainless team with Sucrose or Cryo MC, which gives higher DPS but makes your Mitya more vulnerable to enemy attacks. Other options include Xilonen for Resistance Shred and healing, Qiqi for Cryo application with a TOTM build and healing, Alyosha at C6 for buffs, and Diona as an inferior version of Qiqi without TOTM. One caveat with Diona is that you might lose the EM buff in her Burst field because Mitya teleports back when he is too close to an enemy.
If you don’t have Odette, you will struggle with Cryo application and lose out on a lot of damage. You can only replace her with another character like Qiqi, Diona, or Cryo MC, but even then the application might not be enough. If you don’t have Yae Miko, then I suggest opting for any of the other supports we mentioned so far, though Sucrose would be the best replacement. On-field Mitya really depends on characters like Odette and Yae Miko, and while that may change once we get Tsaritsa and Danica, I can’t recommend going all in on that without official kit confirmations.
Off-field Support Mitya
As off-field support, Mitya will either replace Yae Miko on all her current teams or fill the 4th slot alongside her on many current Stellar-Conduct teams. The current Stellar-Conduct support core consists of Yae Miko and Odette, and Mitya will make this a trio. I have C1 Wriothesley, Cyno, and Sandrone, and he is going to be the premium option for all of them.
Since you can change your Skill stance by tapping or holding the button again within 6s of the initial cast, you can also use him as a quickswap, combining both playstyles. He can do this with all the characters I mentioned, and it should be compatible, or possibly even better, with future Snezhnaya casts.
Rotations
It is difficult to come up with practical rotations without extensive testing, but there are three main rotations that you can do.
For the off-field playstyle, use him like a normal support: tap his Elemental Skill, use the Burst if it’s charged, then swap out.
For the on-field Main DPS playstyle, start the rotation by tapping his Elemental Skill, then set up your supports. Do this quickly, then switch back to Mitya to hold his Skill to change stance and use his Charged Attacks to frontload damage. If you have your Burst ready, use it to generate more Beacons and extend the rotation. From your second rotation, just continue refreshing your supports and using Mitya’s Charged Attacks.
I’m a bit skeptical of the on-field rotation because the timing has to be on point. If you have high ping or can’t manage it on mobile, you might find the quickswap playstyle more reliable. It is complicated, but once you time his Gradient Beacon generation well, it becomes easy to understand. I actually recommend learning this and using it for all on-field teams.
For the hybrid playstyle, the credit goes to TGS, who came up with the rotation. You start the rotation by holding Mitya’s Elemental Skill, and then switch to Yae Miko to use her Skill, then you switch to Odette for her Elemental Skill double tap and switch to Valeriy for his Skill, Charged Attack, and Burst, in that order. After setting up the supports, use Mitya’s Charged Attack, Burst, and Charged Attack in that order, then move on to the second rotation. On your second rotation, use Yae Miko and Odette’s Skills and Mitya’s Charged Attack, then tap his Skill. After that, use Valeriy’s Skill, Charged Attack, and Burst in that order, then switch to Mitya, change his stance by holding Skill, and use all remaining Charged Attacks.
It is pretty complicated, but it all revolves around his Beacon generation and balancing his on- and off-field timing to maximize the potential. You can also refer to the rotation formula below if you find a paragraph difficult to understand.
- 1st Rotation – Mitya (Hold E), Yae (EEE), Odette (EE), Valeriy (E CA Q), Mitya (CA Q CA).
- 2nd Rotation – Yae (EEE), Odette (EE), Mitya (CA Tap E), Valeriy (E CA Q), Mitya (Hold E CA Q CA)
You can dash-cancel Mitya’s Charged Attacks to reduce the animation and shave a few seconds.
Pull Value
In every way, Mitya performs almost as well as Yae Miko, and the gap between their off-field damage narrows with a bit of investment. What makes him especially good is the on-field playstyle. We rarely get characters that perform this well in both roles. This means that no matter what future characters like Tsaritsa or Danica do, Mitya is bound to get better, or at least more flexible.
Mitya is definitely a must-pull if you don’t have Yae Miko, and even if you do, I’d argue he’ll still provide a lot of value to your account. I’d only recommend skipping him if you are low on Primogems and want to save for another potential character. I’m only going for C0 Mitya, so I won’t be able to get C6 Valeriy, but I plan to learn his hybrid playstyle and pair him with Sucrose for the Stygian Onslaught.
This should help you excel with Mitya. Let us know how you get on through our Insider Gaming Discord server.
For more Insider Gaming content, check out ‘GTA 6 Map Size Officially Revealed—How Big Is It?’ and don’t forget to sign up for our newsletter.

Andy is Insider Gaming's Senior Evergreen Editor and has been in the games journalism sphere in one way or another for over 7 years. His video game taste is as…
More from Andrew Highton





Comments