Planning on beginning your streaming career, but not sure how to get started with OBS? The streaming app can be stressful to start out on, but luckily we have provided a guide on how to get started with OBS.
Here is everything you need to know about OBS and more.
How to Stream With OBS
Getting started with OBS can be frustrating at times, especially for those without any experience working with a live-streaming application. That is why we suggest downloading Streamlabs OBS, which has a plethora of included features that help make the streaming setup process easier.
Once downloaded, though, you will need to decide how much pressure you want the application to put on your computer and the internet. Streaming at high quality can sometimes be tough, especially if you have a low-end PC and a poor internet connection.
It is best to start small, with a 720p and 30 fps video output. You can set your output to this by going to Settings. Once there, you should also lower your bitrate. Start at around 2000, and then slowly go up to see what your internet can handle.
Lastly, it is important to see how much pressure your stream is putting on your CPU. In Video Settings, you can adjust the CPU usage. Start with Ultra Fast, just to see how that affects your PC. If you think you can use more, then change to fast. The faster your CPU usage, the more grainy your stream will look. If you can manage to have a slower CPU usage, then your stream will look clearer.
Related: Should I use Streamlabs or OBS for Streaming?
How to Add Gameplay, Webcam, Notifications and More (OBS Streaming Guide)
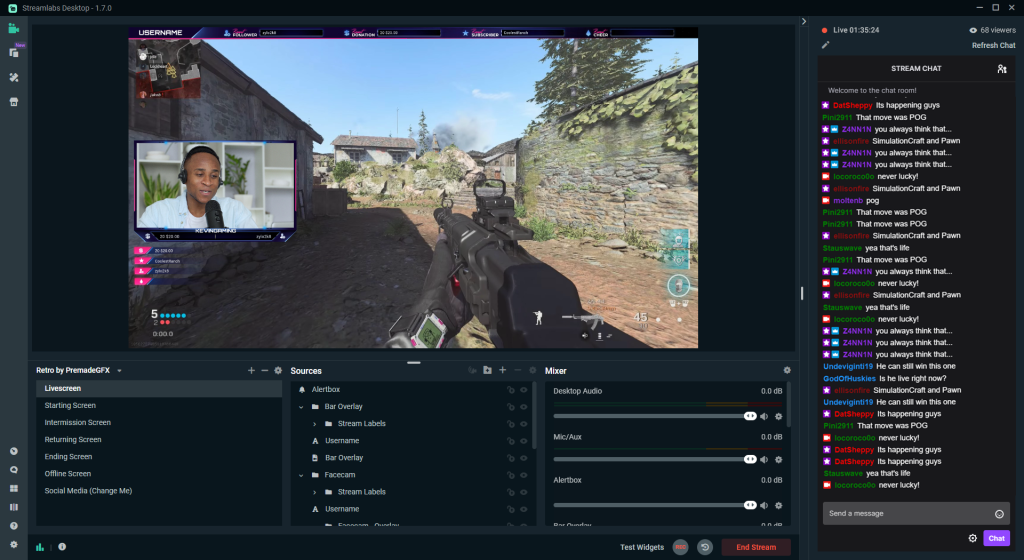
Now, once your actual stream settings are set up, you are probably wondering just how you can actually add your gameplay, webcam and more. It’s actually pretty simple. In Streamlabs OBS, head to Sources in the bottom middle and click the + button. This will take you to all the sources you will want to add.
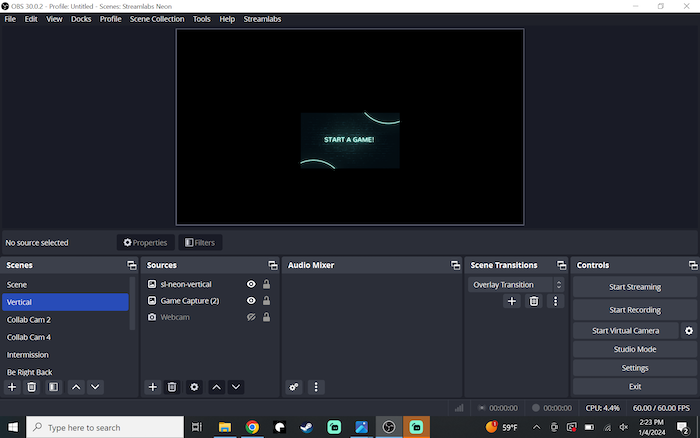
From here, you can add your video device, gameplay and notifications. Better yet, Streamlabs allows you to use its website to customize your very own notifications the way you would want them, and it is totally free.
Once you have your stream ready, it is time to go live.
How to Go Live on OBS
It is now time to hit that live button. Luckily, with OBS and Streamlabs OBS, the software will have you log in to whatever account you wish to stream on. This works for YouTube, Twitch and others.
Once you have logged in to the account you are wanting to stream on, all you have to do is click on the Start Streaming button in the bottom right-hand corner.
BUT WAIT! A screen popped up on Streamlabs with some more information. What do you do now? Well, this information needs to be entered by the streamer, as it is the title of the stream and the tags that will help viewers discover you.
Once you have entered all the information, you will hit the second Go Live button.
And there, now you have it. You are ready to go live on Twitch, YouTube or any other streaming platform.
Stay tuned to Insider Gaming for more tech news.


