If you’re looking to enhance your OBS (Open Broadcaster Software) experience, installing plugins can significantly expand its functionality. No matter what you need or want to do, there’s likely an OBS plugin available for you. This guide will walk you through how to install OBS plugins, how to use OBS plugins, and explain where plugins are located in OBS if you ever have to manually install or remove them.
What Are OBS Plugins?
OBS Plugins are extensions that increase the features and abilities of the software. Some plugins allow you to monitor your stream chat right within OBS while others allow you to create soundboards easier. There are hundreds of options available to you via the official OBS website. There are other places to download OBS plugins, but, if you’re new to using them, it’s best to start on the official website.
Some of the plugins we recommend that are helpful are:
- Advanced Scene Switcher
- Aitum Vertical (if you plan on streaming to TikTok)
- Animated Lower Thirds
- Scene Notes
Where Are OBS Plugins Located?
If you’ve never installed OBS plugins before, you may not know where they are located. Depending on your operating system, OBS plugins will in specific folders.
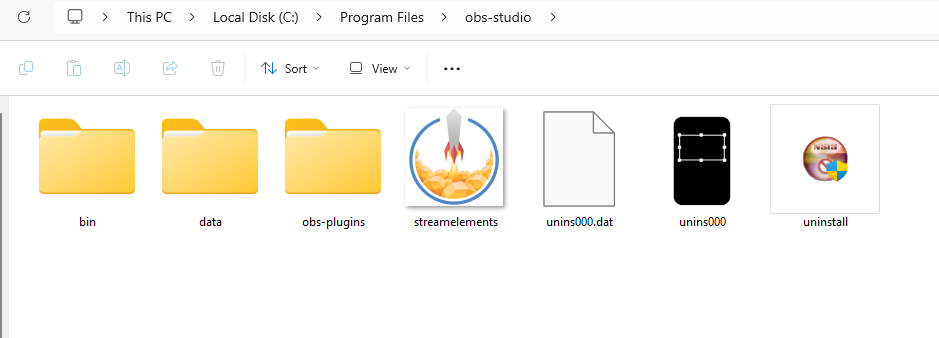
- On Windows: C:\Program Files\obs-studio
- On Mac: ~/Library/Application Support/obs-studio/plugins
- On Linux: ~/.config/obs-studio/plugins

How To Install OBS Plugins
Unlike the early days of OBS, many plugins available to you today can be installed automatically. You’ll download them from the forums, repo, or website, and they’ll come with a handy installer. The installer then simply locates where your OBS install is, and adds the plugin to the appropriate folder.
While that’s the case for many, there are still instances where you may have to install your OBS plugins manually. For that, it’s pretty straight forward no matter the operating system you’re using.
OBS Plugins on Windows
To install your plugins on Windows, you need to download the appropriate folder labeled “windows”. Once you have your plugin downloaded, follow these steps:
- Extract the zip file to a location you’ll remember
- Go to your OBS install location (By default, it’ll be at C:\Program Files\obs-studio)
- Copy the information from data and obs-plugins folder that are in your newly downloaded plugin folder
- Paste the data information from the new plugin into the data folder in the OBS install location. Repeat with the obs-plugins folder.
- Restart OBS and your plugin will be available
- If it’s a Dock plugin, check the “Docks” option in OBS to select the new plugin.
OBS Plugins on Mac
Installing an OBS plugin on Mac is similar to windows, you just need to make sure you download the appropriate files from the plugin developer for your operating system. From there, copy them over to the install location on MacOS. The default is ~/Library/Application Support/obs-studio/plugins
Within that folder, you’ll see separate bundles for each plugin.
OBS Plugins on Linux
On Linux, download the appropriate files and place them in your install folder that is, by default, located at ~/.config/obs-studio/plugins
How To Uninstall OBS Plugins
So, you’ve used a plugin for a while, but now you realize you no longer need it. What do you do? Sometimes, the plugins can be uninstalled by going to your add/remove programs, but that’s not always the case.
If you need to manually uninstall your OBS plugins, go back to the folders you installed them at on your Windows, Mac, or Linux machine. Simply delete the files from the data and obs-plugins folders for your specific plugin, and then restart OBS. You’ll find that they are no longer available, and are uninstalled.
For more tech and streaming coverage, stick with Insider Gaming.


