If you’re jumping into Satisfactory 1.0, especially with multiplayer in mind, you’ll likely want to explore dedicated servers. A server of your own allows greater control over the game’s flow, the settings you prefer, and the players you want to build a factory alongside. However, setting up a dedicated server in Satisfactory may prove challenging to the uninitiated. Here’s how to get the job done!
How to Set Up a Dedicated Server in Satisfactory
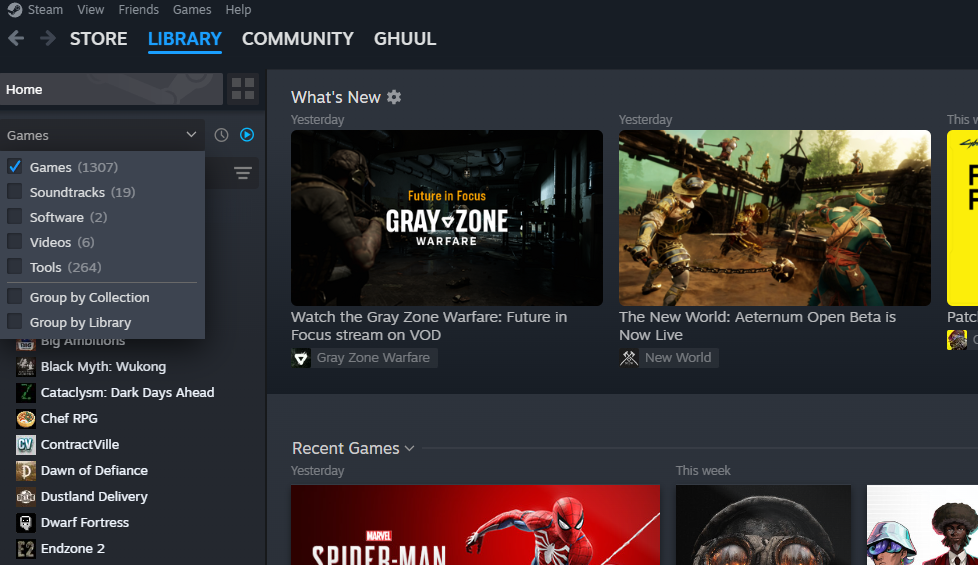
Hosting a dedicated server for Satisfactory is easier than ever, as you can download the server client directly through Steam’s Tools functionality within your Game Library.

- Open your Steam Library and select Tools from the dropdown on the left-hand side.
- When the Tools box is checked, search for Satisfactory. The results will bring up both the game and the dedicated server client.
- Install the dedicated server.
Once you download and install the client, launch the dedicated server software. It will automatically scan your game install folder to ensure you have the proper updates and files in place, prompting you to reinstall any missing or corrupted files so that the game can run properly.
You may need to grant access to server ports, such as:
- Query Port (UDP Port 15777)
- Beacon Port (UDP Port 15000)
- Game Port (UDP Port 7777)
You can launch and join the server by loading the client from the tools section of your Steam Library. The first player to join the server—typically you, the host—will alter the game’s settings, including providing the server with a name and password.
For additional information on tweaking settings or troubleshooting a dedicated server, we recommend the game’s comprehensive Wiki!
Satisfactory Dedicated Server System Requirements
- Processor: Intel i5-3570 / Ryzen 5 3600 (x86/64)
- OS: Windows / Linux
- Memory: 12 GB Minimum / 16 GB Recommended
- Storage: 25 GB
- Internet: Broadband Internet Connection
Related: The Best Starting Location in Satisfactory Isn’t Grass Fields
Satisfactory Console Commands
As server host, you will have access to various console commands to help you run and manage the multiplayer server, including:
- quit/stop/exit — Shuts down the server.
- server.SaveGame savename — Create a save of the current multiplayer game by replacing “savename” with your desired file name.
- FG.AutoSaveInterval xxx — Set how frequently the server autosaves progress by replacing xxx with the number of seconds. By default, it is set to 300 seconds.
- FG.NetworkQuality xxx — Set the network quality configuration, which is set to 3 or Ultra by default.
- FG.DsisableSeasonalEvents x — Choose to enable (1) or disable (0) the various in-game events, such as FICSmas.
Satisfactory Server Hosting
Alternatively, if you don’t wish to go through the technical steps necessary to host a dedicated server, you can pay for one from a game server hosting company. A few top choices include:
- G-Portal
- Shockbyte
- Nitrado
While setting up a dedicated server, you may need the save location for Satisfactory! If you’d like to discuss Satisfactory more, join us on the PC side of the official Insider Gaming community forums!


